Using the Premium Flat File Destination Component
The Premium Flat File Destination Component is an SSIS data flow pipeline component that can be used to write data to a Flat File. There are three configuration pages:
- General
- Columns
- Error Handling
The General page is used to specify general settings for the Premium Flat File Destination Component. The Columns page is used to manage columns from the upstream component. The Error Handling page allows you to specify how errors should be handled when they occur.
General Pageco
The General page allows you to specify general settings for the component.
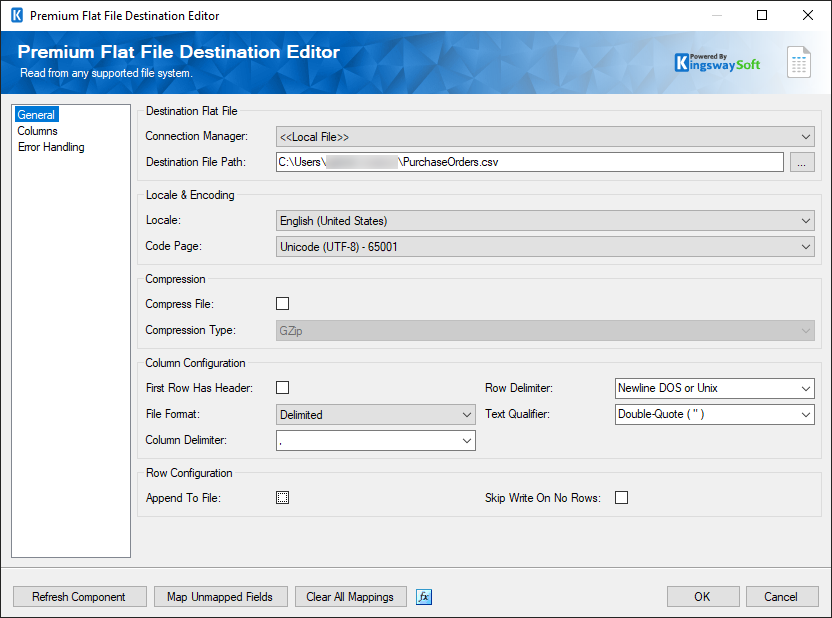
- Connection Manager
-
The Premium Flat File Destination Component requires a connection. The Connection Manager drop-down will show a list of available connection managers:
This component will support the following connection managers:
- Local File
- Amazon S3 Connection Manager(since v6.0)
- Azure Blob Connection Manager(since v6.0)
- Azure Data Lake Storage Connection Manager(since v10.0)
- Azure Files Connection Manager(since v20.1)
- Box Connection Manager
- Dropbox Connection Manager
- Google Cloud Storage Connection Manager(since v9.0)
- Google Drive Connection Manager(since v21.2)
- Hadoop Connection Manager(since v10.0)
- OneDrive Connection Manager
- SharePoint Connection Manager (offered with the SSIS Integration Toolkit)
- WebDAV Connection Manager(since v20.1)
The Connection Manager option will show all the compatible connection managers that have been created in the current SSIS package or project.
- Destination File Path
-
The Destination File Path specifies the location of the file that you are trying to write to.
- Locale
-
Specify the Locale of the file.
- Code Page
-
Specify the Code Page of the file.
- Use BOM Encoding (added in v23.2)
-
This option will specify if the file should be generated with BOM Encoding. When selecting a file to write to, the component will autodetect if the file that is being written to is using BOM encoding
- Compress File
-
This option allows you to specify if you want to compress the file you are trying to write.
- Compression Type
-
This option allows you to specify the type of compression in which the file will be compressed. Available options are:
- Gzip.
- Deflate.
- First Row Has Header
-
Select this option if you would like the first row to contain column names.
- Row Delimiter
-
Specify a delimiter character to indicate the end of a row.
- File Format (since v6.2)
-
Use this option to indicate whether the file uses the Delimited or FixedWidth format.
- Column Delimiter
-
Specify a delimiter character to indicate the end of a column. Available when Delimited File Format is selected.
- Text Qualifier
-
Use the Text Qualifier option to specify the symbol that represents when the field begins and ends. This option is used in cases where the column may contain a character that represents the Column Delimiter. Available when Delimited File Format is selected.
- Text Alignment (since v6.2)
-
Specify the alignment of the fixed-width text file. Available when FixedWidth File Format is selected.
- Padding Characters (since v6.2)
-
Specify the padding character to fill the allotted space when input data is smaller than the specified column width. Available when FixedWidth File Format is selected.
- Value Overflow Handling (since v6.2)
-
The Value Overflow Handling option allows you to specify what action will be taken when input data is larger than the specified column width for a fixed-width file. Available when FixedWidth File Format is selected. There are three options available.
-
- Error: An exception will be reported when input data is larger than the specified column width.
- Truncate: The input value will be truncated to fit in the specified column width.
- Ignore: Input value will be written to the target file even if the input data is larger than the specified column width.
- Append To File (since v21.1)
-
This option allows you to append to the file you are trying to write.
- Skip Write On No Rows (since v21.1)
-
This option allows you to not write to the file if there are no input rows from upstream.
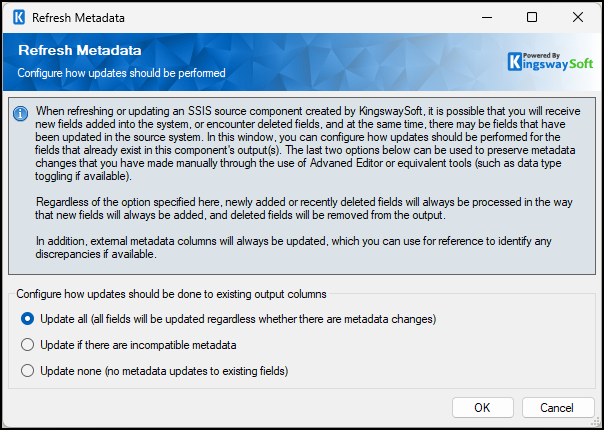
- Refresh Columns Button
-
Clicking the Refresh Component button will provide the options below on how updates should be done to existing output columns.
-
- Update all: All fields will be updated regardless of whether there are metadata changes.
- Update if there is incompatible metadata.
- Update none: Existing fields do not receive metadata updates, only new fields.
- Map Unmapped Fields
-
By clicking this button, the component will try to map any unmapped attributes by matching their names with the input columns from upstream components.
- Clear All Mappings Button
-
By clicking this button, the component will reset (clear) all your mappings in the destination component.
- Expression fx Icon
-
Click the blue fx icon to launch SSIS Expression Editor to enable dynamic updates of the property at run time.
- Generate Documentation Icon
-
Click the Generate Documentation icon to generate a Word document that describes the component's metadata, including relevant mapping, and so on.
Columns Page
The Columns page of the Premium Flat File Destination Component allows you to map the columns from upstream components to the Premium Flat File Fields.
On the Columns page, you would see a grid that contains four columns as shown below.

- Input Column: You can select an input column from an upstream component for the corresponding Premium Flat File Field.
- Premium Flat File Field: The field that you are writing data to.
- Data Type: This column indicates the type of value for the current field.
- Unmap: This column can be used to unmap the field from the upstream input column, or otherwise it can be used to map the field to an upstream input column by matching its name if the field is not currently mapped.
- Selected Columns: This option shows how many fields are selected. Clicking on the grid next to it selects all columns.
- Column Properties: Properties window for the field listed. These values are configurable.
-
- CodePage: Specify the Code Page of the field.
- DataType: The data type can be adjusted to an available type.
- FormatString: How a column's data should be interpreted when writing.
- HeaderQualifier(since v26.2): Character used to enclose column header names allowing headers to contain delimiters or special characters. Dropdown option is Auto by default, but you may explicitly select Yes or No.
- Length: If the data type specified is a string, the length specified here would be the maximum size. If the data type is not a string, the length will be ignored.
- Name: Specify the Column name.
- Precision: Specify the number of digits in a number.
- Scale: Specify the number of digits to the right of the decimal point in a number.
- TextQualifier: You can set individual fields to determine if they have a text qualifier. The default is set to Auto. You may also choose yes or no.
- Has Text Qualifier: This option allows you to specify if fields have a text qualifier, and it can be set for all Columns.
- Apply To All Columns: This option allows you to apply the selected setting to all Columns.
- Reset From Upstream Columns: By clicking this button, the component will reset all columns.
- Import External Column: Option to import the Columns and their properties from a file.
- Export External Column: Option to save the Columns and their properties to a JSON file later for reuse.
- +sign: Add field to Flat File Destination component.
- - sign: Remove field from Flat File Destination component.
- Remove All (since v22.1): Remove all fields from the Flat File Destination component.
- Arrows: Move the fields to a desired location in the file.
Error Handling Page
The Error Handling page allows you to specify how errors should be handled when they happen.
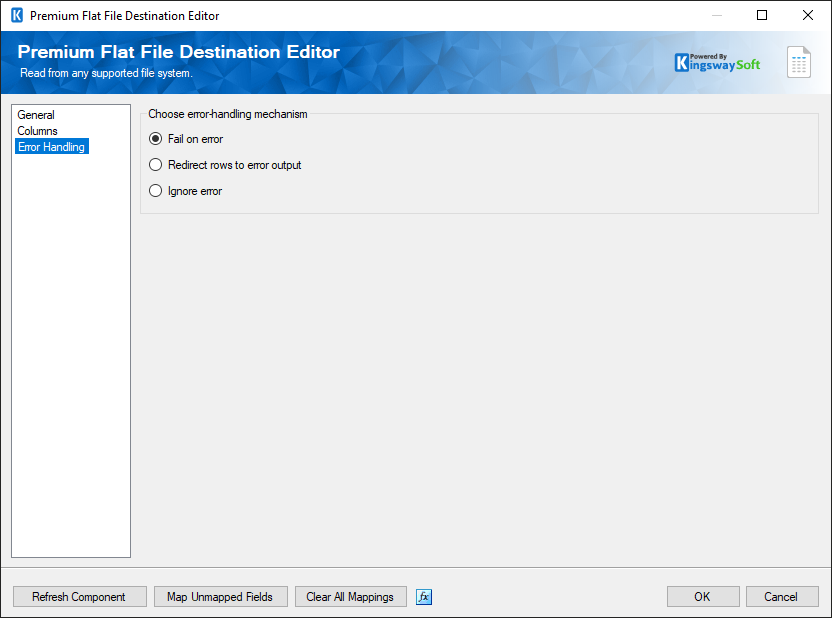
There are three options available:
- Fail on error
- Redirect rows to error output
- Ignore error
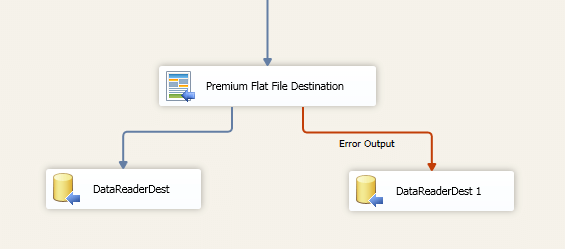
When the Redirect rows to error output option is selected, rows that failed to write to the Flat File will be redirected to the 'Error Output' output of the Destination Component. As indicated in the screenshot below, the blue output connection represents rows that were successfully written, and the red 'Error Output' connection represents erroneous rows. The 'ErrorMessage' output column found in the 'Error Output' may contain the error message that was reported by the server or the component itself.
Using the Local File Connection Manager found in the Premium File Pack Components
Within the Control Flow and Data Flow Components found in this toolkit, you will notice a 'Local File' connection manager in the Connection Manager area. Note that the Local File does not have to be configured in order for you to use this. You would simply select the 'Local File' option, and you would be able to access the folder and files within the local machine.