Whether you are managing files in Google Drive or retrieving reporting data from Google Analytics, or working with any such Google Services, the foundation of your integration begins with secure authentication. While Google's OAuth 2.0 implementation is robust, it requires specific configuration steps to ensure your SSIS packages can run unattended in a production environment. When speaking about this foundation, KingswaySoft offers various Google Service based components as a part of our SSIS Integration Toolkit. And we generally offer two main authentication modes: Service Account and Authentication Code. While Service Accounts are designed for server-to-server communication, the Authentication Code flow is often the more accessible and practical choice for SSIS developers. It offers several distinct advantages:
- User Context: It executes operations as a specific user, ensuring the data you retrieve matches exactly what that user sees in the browser.
- Versatility: Unlike Service Accounts, which are strictly for Workspace domains, this flow works seamlessly with both corporate accounts and personal @gmail.com addresses.
- Ease of Setup: It allows you to authenticate without needing Admin intervention or complex Domain-Wide Delegation.
This guide serves as a general blueprint for the Authentication Code flow. By setting this up correctly once, you can reuse the same project and credentials across virtually any KingswaySoft Google services component.
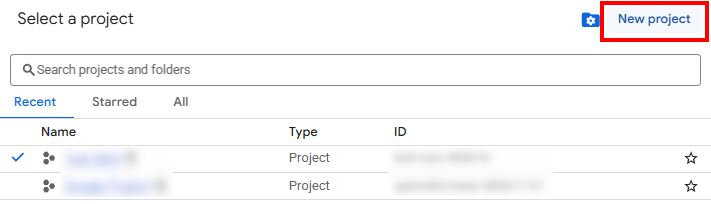
Step 1: Create a New Project
The first step begins in the Google Cloud Console. You will need to create a dedicated project for your integration's credentials and API usage.
Log in to the Google Cloud Console, and open the project picker (or press CTRL + O). Click the New Project button to begin.

Give your project a meaningful name (e.g., KingswaySoft-SSIS-Integration) and select the appropriate parent organization or folder.
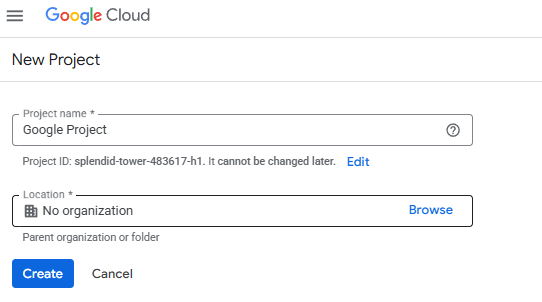
Note on Organization: If you do not have a parent organization assigned, or if you select "No Organization", it will impact your choices in the next step.
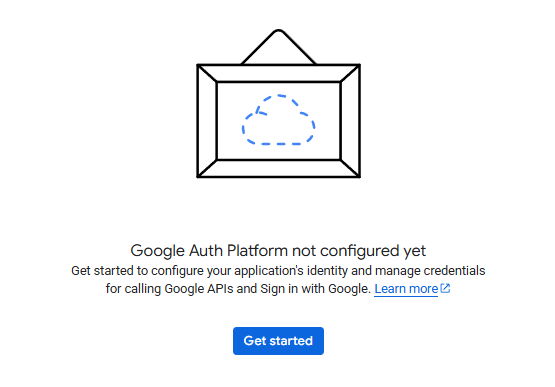
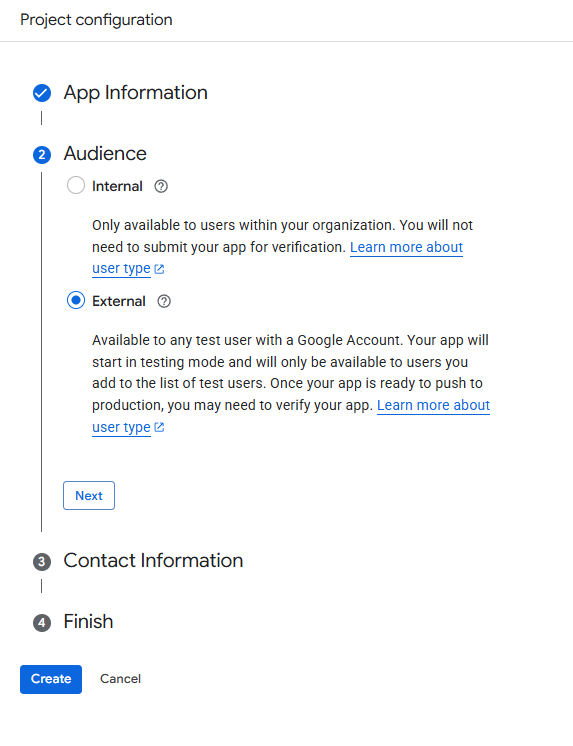
Step 2: Initialize the Google Auth Platform
Once your project is created, you must configure the "OAuth consent screen". This is the interface that users will see when authorizing the application to access data.
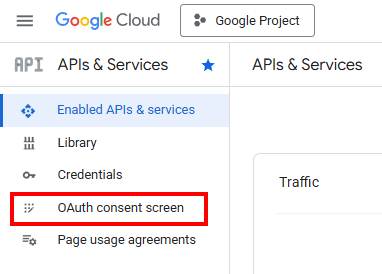
Navigate to APIs & Services > OAuth consent screen and select Get Started.
Fill in the required fields, specifically the App name and User support email.

Audience Choice: Internal vs. External
This is a key technical decision point that determines who can authorize the connection:
- Internal: The preferred choice for Google Workspace users. This restricts access to users within your specific domain. Note that this option is only available if your Google Cloud project is associated with a Workspace Organization resource.
- External: Select this if you are using a personal @gmail.com account, or if the "Internal" option is unavailable because your project was created with "No Organization" assigned.
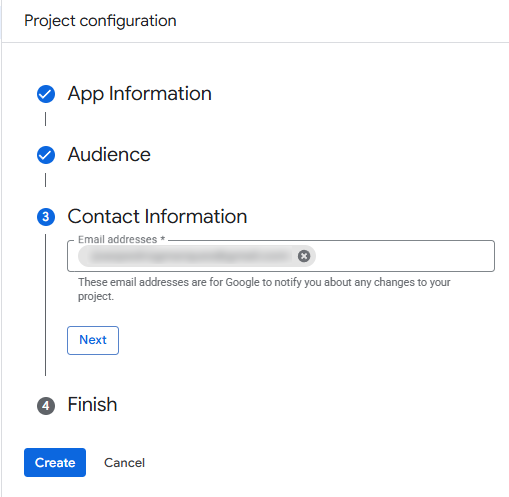
Next, enter your contact info. Google will use this email address to notify you about any changes to your project.
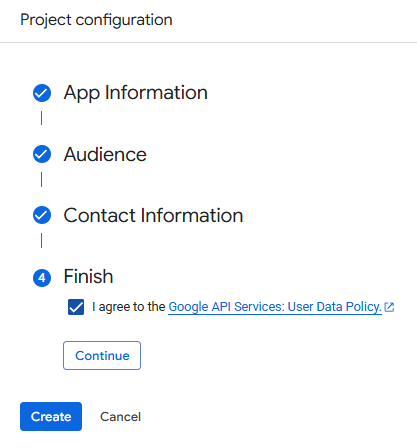
Finally, you will be asked to agree to the "Google API Services: User Data Policy" in order to continue.
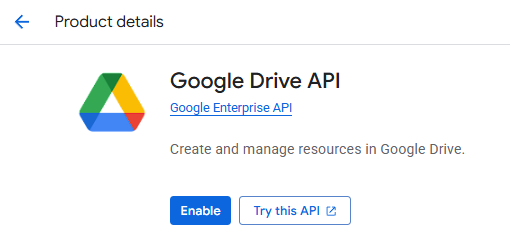
Step 3: Enable the Target APIs
Before you can establish a connection, you must explicitly tell Google which services this project is allowed to access.
Go to the API Library, search for the specific API you intend to use, and click Enable. Note that our example is for Google Drive API, and you may enable it for other APIs based on your requirements.
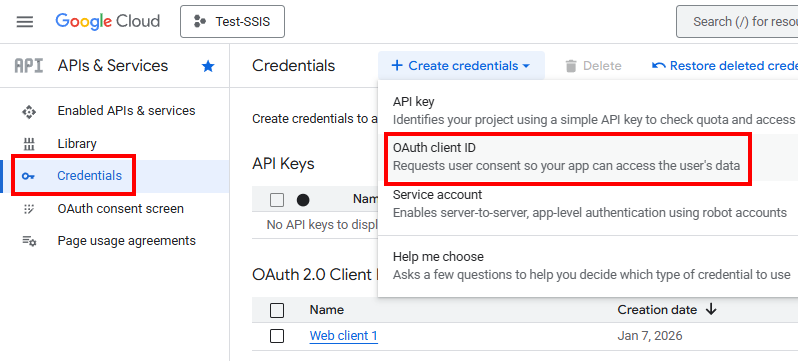
Step 4: Generate the OAuth Credentials
With the platform configured and APIs enabled, you can now generate the keys required for the handshake between the connection manager and the Google services.
Navigate to the Credentials tab, click Create Credentials, and select OAuth client ID.
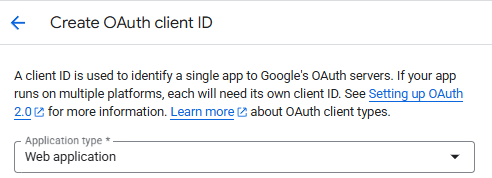
Application Type & Redirect URI
Select Web application as the application type. This is a critical step for ensuring the Connection Manager can receive the authentication code properly.
Under Authorized redirect URIs, you must enter a valid, static HTTPS URL that does not redirect. We typically use our landing page URL (e.g., https://www.kingswaysoft.com), though any URL that fits the listed requirements will work.
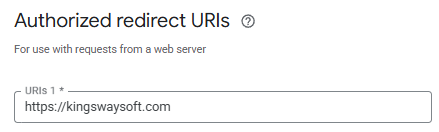
Note: This specific URI acts as the default listener for our components. If this does not match exactly in your configuration, the authentication flow will fail to pass the authorization code back to the component.
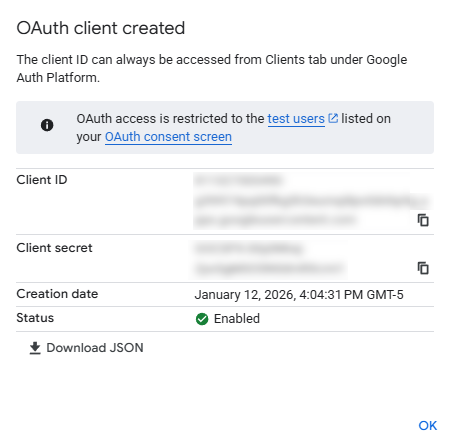
Once created, you will receive your Client ID and Client Secret. Be sure to store these values securely.
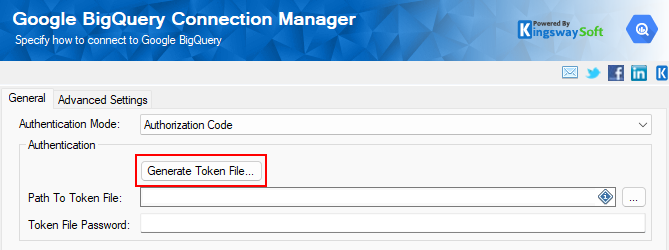
Step 5: Configure the Connection Manager
Now that the Google side is ready, return to Visual Studio and open the specific Connection Manager for the service you are using. In our example, we will be working with the Google BigQuery connection manager, but it can be replaced with any other Google Services, such as Google Drive, Google Analytics, Google Ads, etc.
-
Set the Authentication Mode to Authorization Code (if applicable).
-
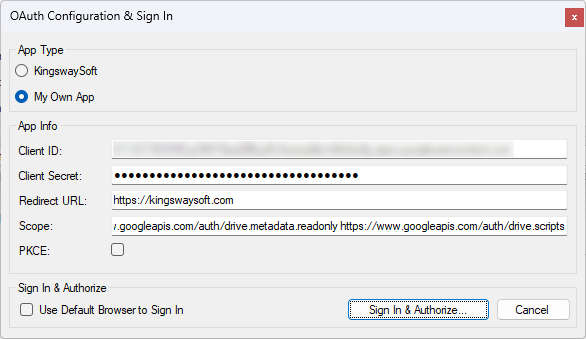
Click the Generate Token File button.
-
Select My Own App as the App Type.
-
Paste in your Client ID,Client Secret, and Redirect URI.
-
Click Sign In & Authorize.
This will launch a browser window. Once you authorize the app, the browser will redirect to your configured redirect URI with a code. When the Use Default Browser to Sign In option is not checked/used, the Connection Manager will automatically detect this code and complete the token generation.

Step 6: Token Management & Deployment
To ensure your SSIS package can run on a schedule without requiring manual re-authentication, you must manage the token file.
In the Connection Manager, specify a local Token File Path to save the .token file and set a Password.
- The Token File: This file stores the refresh token, allowing the component to automatically renew access.
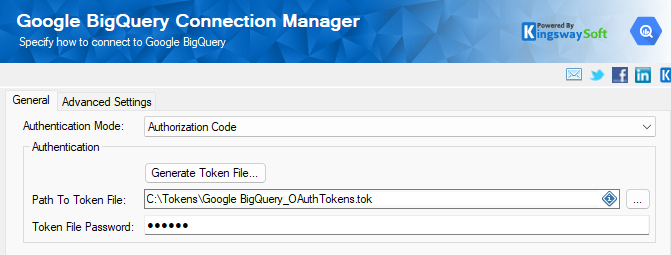
Note: Token refreshes are automatically handled by the component. And due to that, when deploying to a server, ensure that the user account running the job has full Read/Write permissions to this token file so that when a refresh occurs, the ETL process can properly save the updated token file.
Conclusion: The Universal Advantage
By following this blueprint, you now have a production-ready authentication setup.
One of the greatest advantages of this approach is reusability. If you initially set this up for Google Drive but later need to connect to any other Google service, you do not need to create a new project. Simply enable the required API in the console, create a new Connection Manager in Visual Studio, and reuse your existing Client ID and Client Secret. This modular approach keeps your integration environment clean, organized, and easy to manage.