As an ETL Developer, you may have use cases where you would need to process tabular data in order to produce an XML/JSON file and save it in a cloud location. Usually, this is done by first merging and creating an XML file in a local or network path and then, on a regular basis, moving it to the cloud storage. However, for users who are running their SSIS packages on the cloud via ADF and who do not wish to use local storage, this could be a roadblock. In such cases, you can instead use KingswaySoft's SSIS Productivity Pack components to write directly to the storage solution, skipping the step of writing to a local file. It also allows you to keep the data within SSIS, reducing the complexity of your SSIS package.
In this blog post, we will show you how to convert data to an XML format and create a file for that data to be saved in a cloud-based storage directly. In this demonstration, we will write our data to the Amazon S3 location. Nevertheless, the same solution applies to all supported cloud locations, including Azure Blob Storage, Box, Dropbox, OneDrive, SharePoint, etc.
We will use the following components for this case:
- Data Spawner (Note: This can be replaced by any data source that you have.)
- XML Merge component
- Premium File System Destination
- Amazon S3 connection manager
All the components above are available as a part of our SSIS Productivity Pack.
Design and Configuration
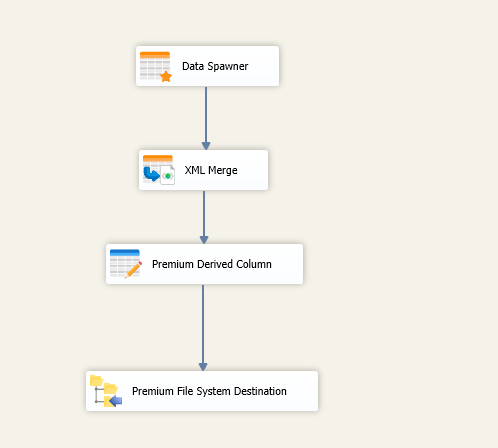
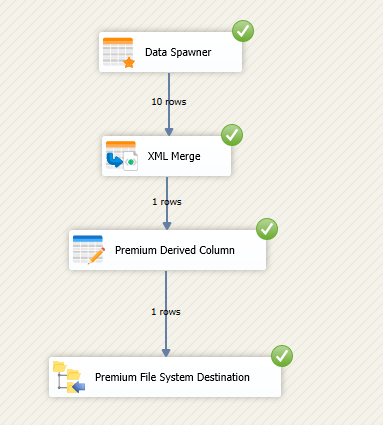
Let's look at the example of data flow configuration that we will use to achieve our end goal. We'll employ the Data Spawner to generate some random sample data that can be replaced with any other meaningful source components. Next, we'll pass this data into our XML Merge component, which will take the incoming data from our source component and merge it into one SSIS column data based on the XML data structure defined in the component. Then, we can pass that XML data into our Premium File System Destination to write our XML file to Amazon S3. However, before this, we will use a Premium Derived Column component to convert the XML string into a binary data field.
Within the XML Merge component, you can set the XML data structure using the component’s Document Designer. If you already have a preset XML data structure, you can choose to import that design using the import feature.
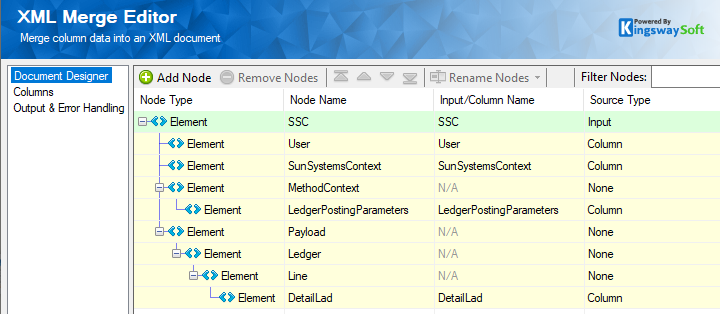
In the component’s XML Merge Output & Error Handling tab, you can choose the Column name; however, this will only be necessary if you intend to use the XML data as a column instead of writing it as a File.

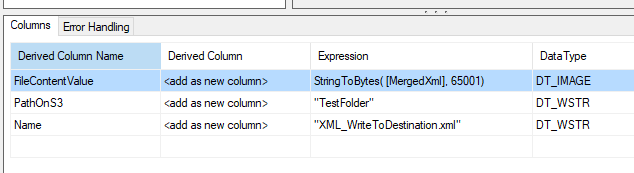
After this, we will use the Premium Derived Column function StringToBytes() to convert the XML content in string format (MergedXML) to a binary value, so that it can be used as an input of the Premium File System Destination for writing. Additionally, we have also added the column for the final file path on S3 and the file name that will eventually be saved. It is worth noting that those two values can be static or dynamic, depending on your business needs. When they need to be dynamic, most likely the values should come from upstream columns or in some cases an SSIS variable.
Then, we will use our Premium File System Destination Component as our Destination component. This allows for a greater variety of connections compared to the XML Destination component. You can find the list of connections in our Help Manual for Premium File System Destination. Within the Premium File System Destination Component, you can connect to a connection manager of your choice, and in our case, we will be using the Amazon S3 Connection Manager.
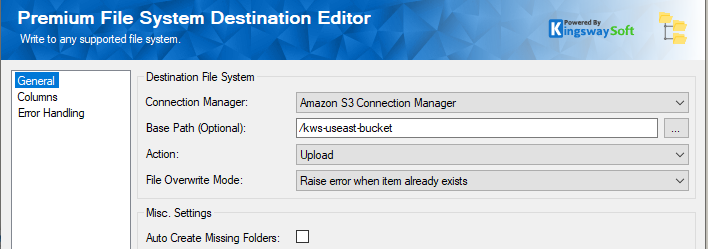
You can click on the ellipses to select your File Path. You can also choose to parameterize the Destination File Path in case you need to write to different locations, such as a multiple bucket or a different folder on Amazon S3.
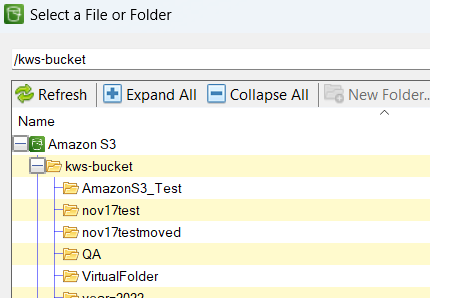
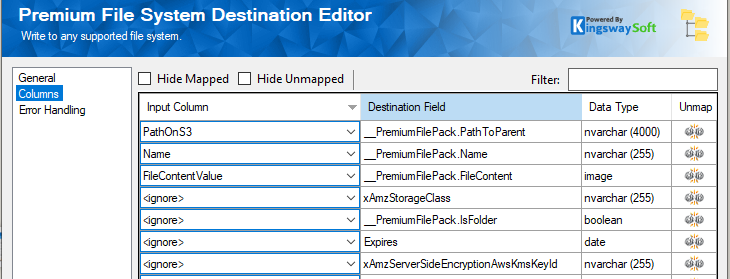
Once the general page is done, go to the columns page and perform the required mappings as shown below. Essentially, we need to make sure that we provide a path, a file name, and the file content for the writing.
Running the Data Flow
After executing the process, it should look like this. Whatever data you have will be merged into an SSIS column that contains the XML content in text format. This column will then be converted to binary content before passing to the Premium File System Destination component, which will decide how and where to save the file in the cloud.
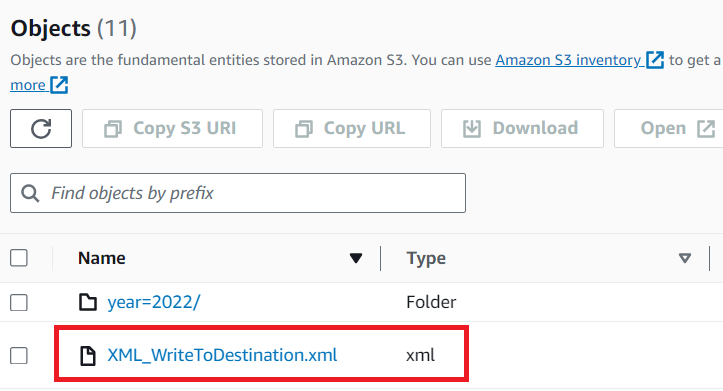
Eventually, the XML data will be available as an XML File in Amazon S3, which is what we intend to achieve.
Conclusion
As illustrated, the XML Merge component provides the infrastructure to generate XML file content, which can be written directly to the cloud storage solution of your choice using the Premium File System Destination component. Such design can simplify your integration solutions to make them straightforward and easy to maintain.
We hope this has helped!