

As organizations continue to build and maintain NetSuite integrations, the service endpoint and authentication method used for those connections are becoming increasingly important. NetSuite is continuing its transition away from SuiteTalk SOAP Web Services, with REST Web Services now being the recommended direction for new integrations. As of NetSuite 2026.1, Oracle recommends that newly built integrations use REST Web Services with OAuth 2.0 authentication. The 2025.2 SOAP endpoint is the last planned SOAP endpoint, and SOAP Web Services are scheduled to be fully removed with NetSuite 2028.2. If you are currently using SOAP-based integrations, you can learn more about the remaining timeline and available migration options in our NetSuite SOAP Deprecation: Retiring Web Services resource.
When using the REST service endpoint, the KingswaySoft NetSuite Connection Manager supports both OAuth Client Credentials and Token-based authentication. We previously covered how to configure a REST connection using Token-based authentication in our Implementing OAuth REST Connections for NetSuite in SSIS Processes blog post. In this post, we will focus on the OAuth 2.0 Client Credentials option, which uses certificate-based authentication.
We will walk through how to configure the required integration record in NetSuite, generate a certificate and private key using OpenSSL, create the Client Credentials mapping, and use the resulting information to configure and test the KingswaySoft NetSuite Connection Manager in SSIS.
Before You Begin
Before setting up the connection, make sure REST Web Services and OAuth 2.0 are enabled in your NetSuite account. These features can be found under Setup > Company > Enable Features > SuiteCloud.
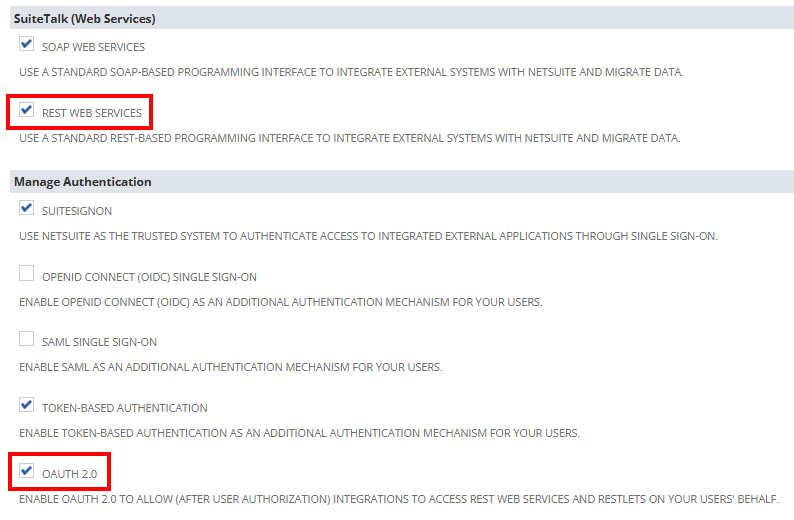
You will also need an existing NetSuite entity and role to use with the connection. The role must be assigned to the selected entity and include the Log in Using OAuth 2.0 Access Tokens and REST Web Services permissions, along with any additional permissions required to access the records your integration uses. The entity and role can already exist in your NetSuite account. In this walkthrough, we will focus on the configuration required specifically for the OAuth 2.0 Client Credentials connection.
Creating the Integration Record
The first step is to create an integration record in NetSuite. This record represents the application that will be used for the connection and provides the Client ID required later in the KingswaySoft NetSuite Connection Manager.
In NetSuite, navigate to Setup > Integration > Manage Integrations > New. Enter a descriptive name for the integration and make sure State is set to Enabled. Under the OAuth 2.0 section, select Client Credentials (Machine to Machine) Grant. Then, under Scope, select REST Web Services. The other authentication options and scopes are not required for the REST connection used in this walkthrough.
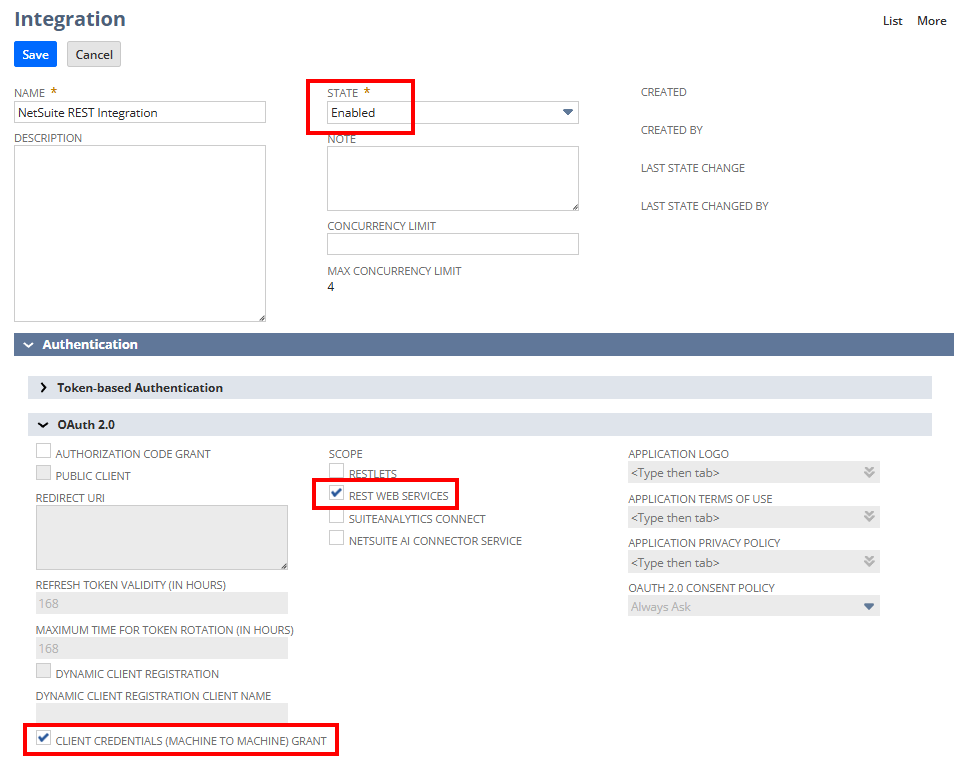
Click Save to create the integration record. When the integration record is saved for the first time, NetSuite displays the generated Client ID and Client Secret. These values are only displayed on the initial setup page and cannot be retrieved later, so make sure they are recorded securely before leaving the page. If the values are lost, they must be reset to generate new ones. For the OAuth Client Credentials connection in this walkthrough, we will only use the Client ID. The Client Secret is not required by the KingswaySoft NetSuite Connection Manager for this authentication method.
Generating the OAuth 2.0 Certificate
The OAuth 2.0 Client Credentials setup also requires a certificate and its corresponding private key. The public certificate will be uploaded to NetSuite, while the private key will be used when configuring the KingswaySoft NetSuite Connection Manager. We will use OpenSSL to generate the files. If OpenSSL is not already installed, install it using your organization's preferred method before continuing.
For this example, we will use the ES256 algorithm. The NetSuite Connection Manager also supports the other algorithms available in the Algorithm dropdown. If you would like to use a different algorithm, refer to NetSuite's Certificate Conditions documentation for the corresponding certificate requirements and OpenSSL examples.
First, create a folder where the certificate and private key will be stored, and then navigate to that folder in PowerShell:
mkdir C:\NetSuiteOAuth
cd C:\NetSuiteOAuth
Next, run the following OpenSSL command to generate an ES256 certificate and private key:
openssl req -new -x509 -newkey ec -pkeyopt ec_paramgen_curve:prime256v1 -pkeyopt ec_param_enc:named_curve -nodes -days 365 -out public.pem -keyout private.pem
OpenSSL will prompt you to enter certificate information such as the country, state or province, locality, organization, organizational unit, and common name. Once the information has been entered, OpenSSL will generate the certificate files in the folder created above.
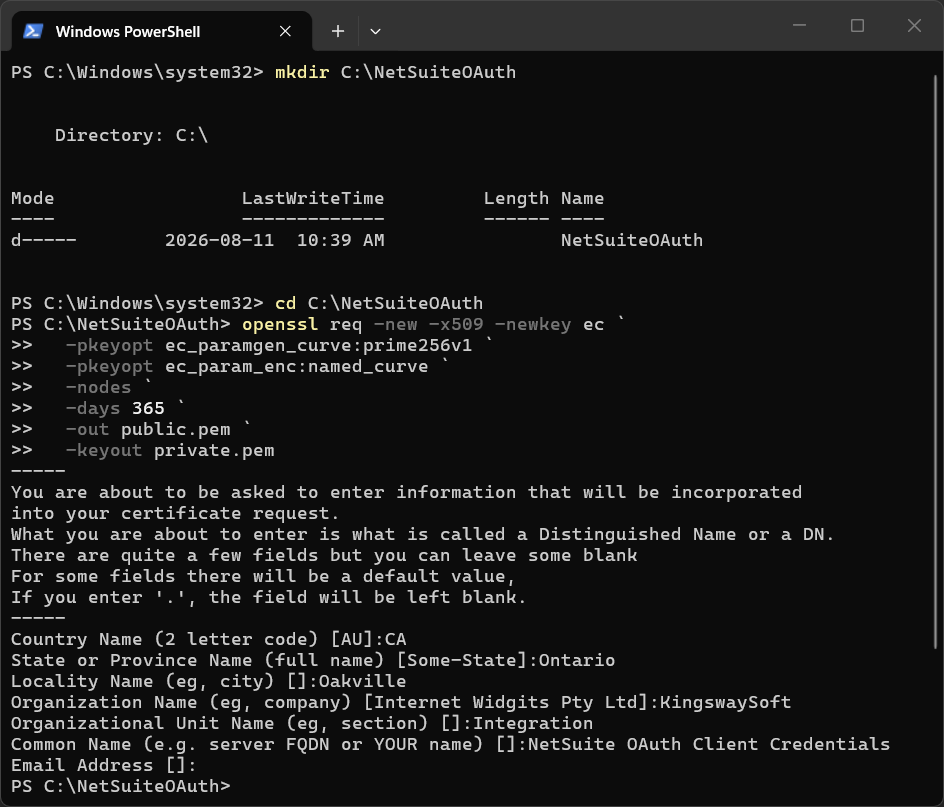
The command creates two files: public.pem and private.pem. The public.pem file contains the certificate that will be uploaded to NetSuite in the next step. The private.pem file is the corresponding private key and will be selected later in the KingswaySoft NetSuite Connection Manager. Keep the private key secure and do not upload it to NetSuite. NetSuite accepts X.509 public certificates using the .cer, .pem, or .crt file extensions.
Creating the Client Credentials Mapping
With the certificate generated, the next step is to create a Client Credentials mapping in NetSuite. This mapping connects the certificate to the application, entity, and role that will be used for the integration.
Navigate to Setup > Integration > Manage Authentication > OAuth 2.0 Client Credentials (M2M) Setup.
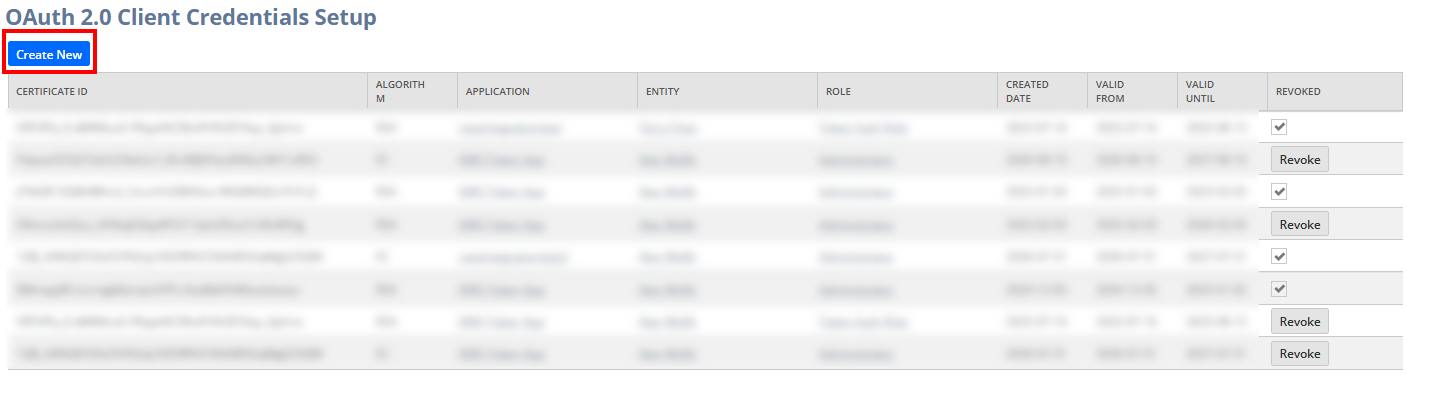
Click Create New. Select the Entity and Role that will be used for the connection. For Application, select the integration record configured earlier. Finally, upload the public.pem certificate generated in the previous step.
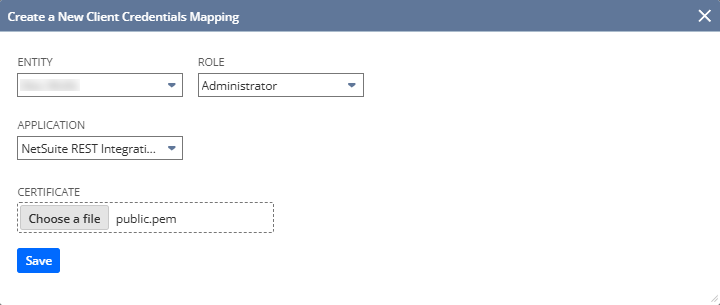
If the integration record does not appear in the Application dropdown, confirm that Client Credentials (Machine to Machine) Grant is enabled on the integration record. Click Save to create the mapping. The new entry will appear on the OAuth 2.0 Client Credentials Setup page along with its Certificate ID. Make a note of the Certificate ID. Along with the Client ID from the integration record, this value will be used when configuring the connection in SSIS.
Configuring the KingswaySoft NetSuite Connection Manager
At this point, the required NetSuite configuration is complete. We can now use the Client ID, Certificate ID, and private key to configure the KingswaySoft NetSuite Connection Manager. In your SSIS project, add a NetSuite (KingswaySoft) Connection Manager and open its General page. Set Service Endpoint to REST, and then select OAuth Client Credentials for the authentication type.
Enter the connection information using the values from the previous steps:
- Account ID: Enter your NetSuite account ID.
- Client ID: Enter the Client ID generated for the integration record.
- Algorithm: Select the algorithm used when generating the certificate. In this example, we are using
ES256. - Certificate ID: Enter the Certificate ID generated when the Client Credentials mapping was created.
- Private Key File: Select the
private.pemfile generated with the certificate.
The Connection Manager also provides additional settings on the General page such as User Timezone, Max Concurrent Requests, and Timeout. These can be configured as needed for your NetSuite connection.
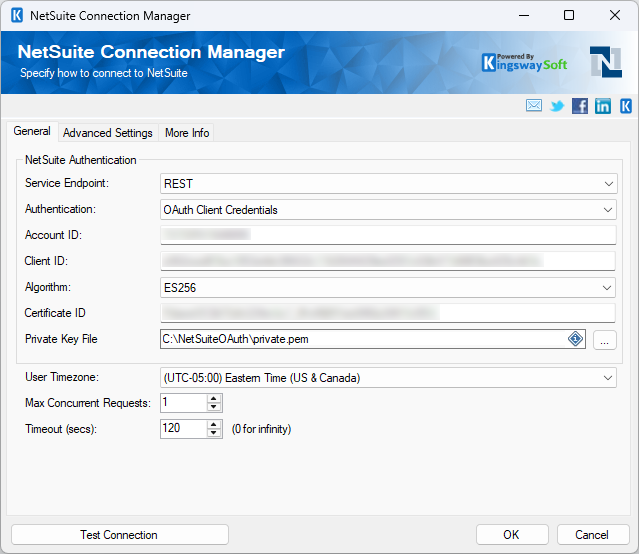
In this example, the private key is stored at C:\NetSuiteOAuth\private.pem. This is the private key that corresponds to the public.pem certificate uploaded to the NetSuite Client Credentials mapping. Once all the required connection information has been entered, click Test Connection.
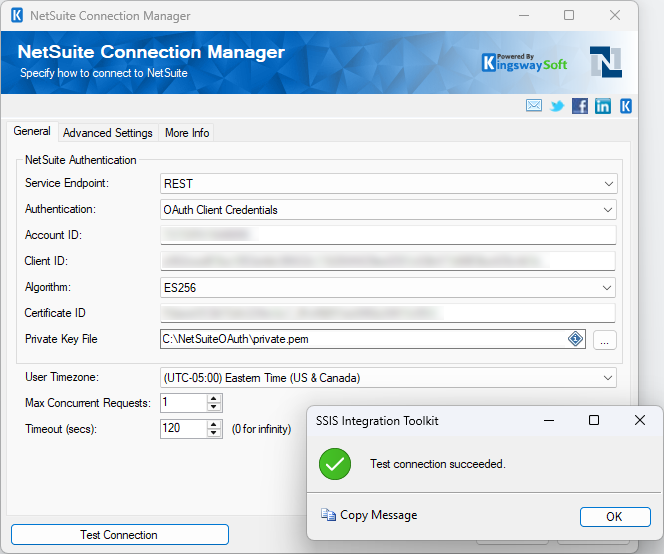
If the connection has been configured correctly, the Connection Manager will return a successful connection test. The connection is now ready to be used by the KingswaySoft NetSuite components in your SSIS package.
Conclusion
With NetSuite moving toward REST Web Services and OAuth 2.0 for new integrations, OAuth 2.0 Client Credentials provides a straightforward certificate-based option for configuring REST connections in the KingswaySoft NetSuite Connection Manager.
The setup involves a few connected pieces: an OAuth-enabled integration record, a certificate and private key, and a Client Credentials mapping that associates the certificate with the appropriate NetSuite application, entity, and role. Once those pieces are in place, the Client ID, Certificate ID, algorithm, and private key can be used to configure and test the REST connection in SSIS.
With the connection established, you can use the KingswaySoft NetSuite components to build new REST-based integration workflows while preparing your NetSuite integrations for the continued transition away from SOAP Web Services.
Related Blog Posts
Implementing OAuth REST Connections for NetSuite in SSIS Processes: Learn how to configure NetSuite REST connections using OAuth token-based authentication.