Organizing records and documents in SharePoint through tagging and categorization plays a critical role in enabling effective search, filtering, and content discovery. When businesses need to group or tag documents in SharePoint - such as flagging your documents to be development or marketing related - across different categories or dimensions, SharePoint’s Managed Metadata (Taxonomy) Field feature offer a flexible and scalable solution to make this happen. These fields draw from a centralized Term Store, allowing consistent metadata classification using hierarchical structures. Here are just a few of the benefits of using Taxonomy fields:
- Easier grouping of related documents
- Consistent metadata usage across sites
- Better filtering and search capabilities
- Elimination of rigid folder structure otherwise
- Support for multi-value tagging
In this post, we’ll explore how to create and use taxonomy fields in SharePoint and how the KingswaySoft SharePoint Integration Toolkit helps you read and write to these fields effortlessly in your SSIS data flows.
Setting Up a Taxonomy Field in SharePoint
Before creating a Taxonomy field, you need a Term Store set up in your SharePoint environment. To access the Term Store:
-
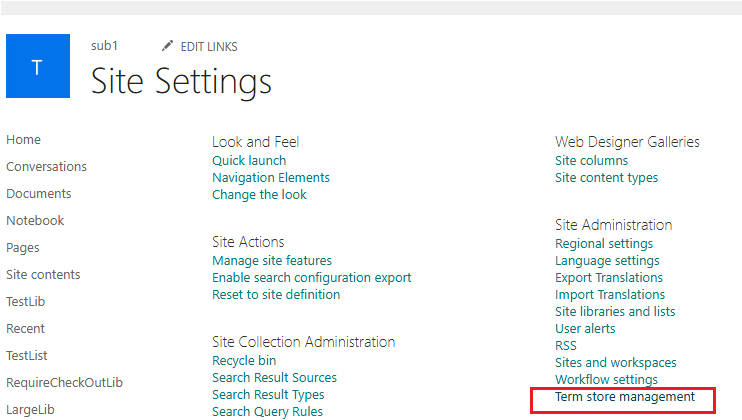
Navigate to Site Settings in your SharePoint site.
-
Click Term Store Management under Site Administration as shown below.
Term groups are of two types - Local, for site collection-specific Term Sets, and Global, for cross-site Term Sets. You can create a Term Set in either local or global term groups, depending on how you wish to use them for your taxonomy fields. In here, you could click on "Add Term group" if you do not have one. The Term Set you have would be shown as below.
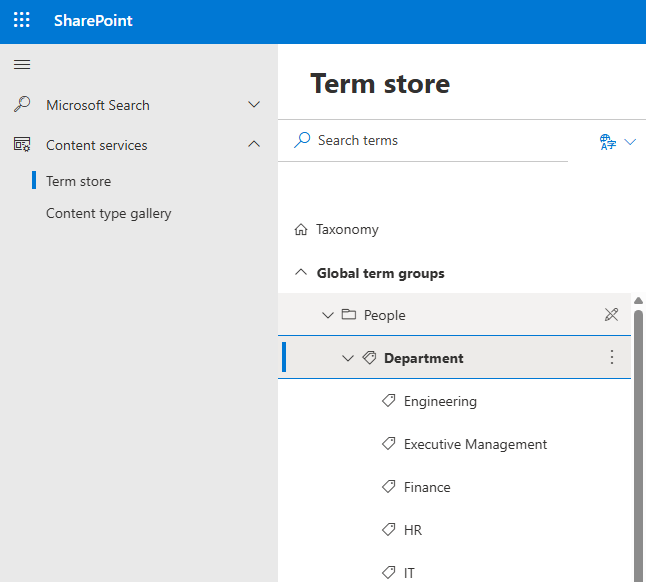
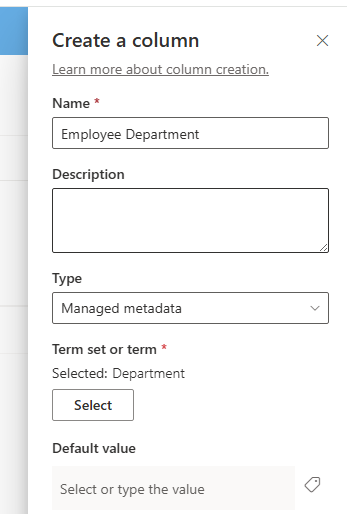
The above is what we would be selecting in the Taxonomy field that we create for our demonstration. Department Term Set comes under our Global Term group, and it has the list of departments that can be tagged to records (one or more). Now, in your document folder within your Site or Subsite, click on Add Column, which will open up the "Create a column" section. In here, choose the "Managed Metadata" type field, and click on Next.

Provide a Name, and Description (optional), and then verify the type selected and click on the Select button. This will open up the Term Set selection page, where you can make your choice. As mentioned above, we will be working with the Department Term Set, and so we are making that choice.
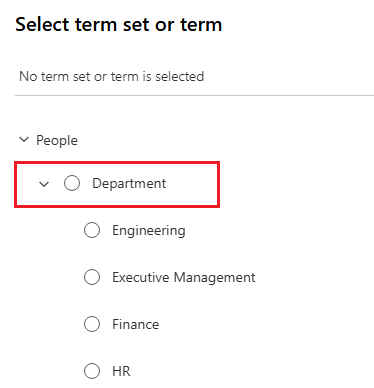
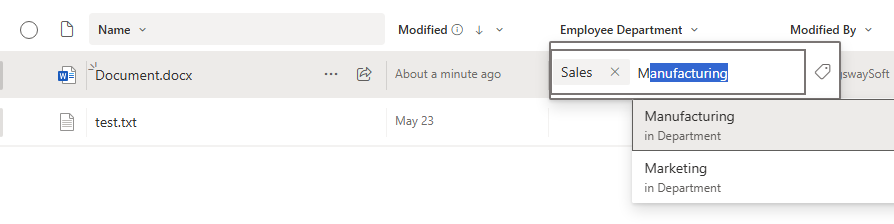
Once you have the above, you can choose one or more departments for a record or document in your site folder. This helps in categorizing various documents into its subsets, and can be easily retrieved by searching on the taxonomy tag.
Now, let's see how these can be handled for read and write actions using KingswaySoft.
Reading and Writing Taxonomy fields in SSIS
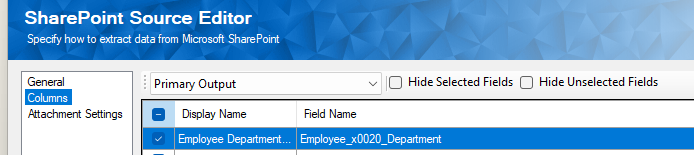
First, let's look at how Taxonomy field data can be retrieved within our package. For this, you would use the KingswaySoft SharePoint Source component, and within that, use the SharePoint Connection Manager to connect to your Site or Subsite. Once done, choose your document folder, and in the Columns Page, you will see the field which we just created on the SharePoint side. You can connect the Source component to any Destination or Transformation component of your choice to read the data.
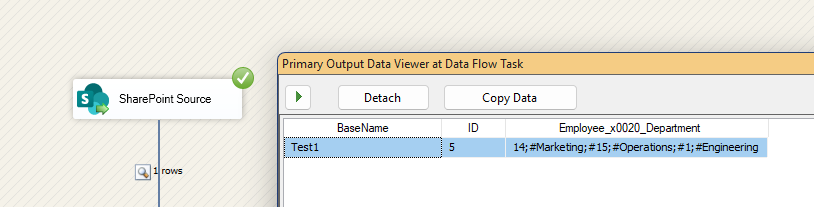
KingswaySoft supports both REST and SOAP service-based connections. The primary difference here would be that Taxonomy fields are returned in different formats when using different API services. When you use SOAP, the below is what you would receive when you read back from the Taxonomy fields. As you can see, it's in semicolon-delimited format, and the label and WssId are both returned in it. You could use SSIS transformations (like our Decomposition component, Premium Derived Column component, etc.) in order to parse out the values as required.
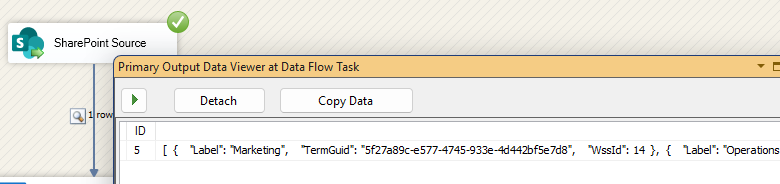
On the other hand, when you use a REST connection, the taxonomy field returns the values in JSON format with the Label, TermGUID, and the WssId as shown below. You can use our JSON Extract component to easily parse out the values.
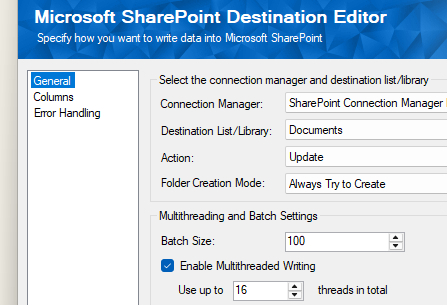
Now, in order to write to a taxonomy field, you could use our SharePoint Destination component. Irrespective of the API endpoint (REST or SOAP) that you choose, the SharePoint destination component works with semicolon-delimited input values for the write to work properly. The following is a simple sample of such an input value that can be accepted by the destination component.
Marketing;Operations;Engineering
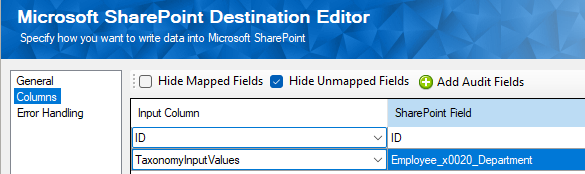
Choose the Update action and the Document object in the Destination component, and in the columns page, map the input value field to the Taxonomy field.
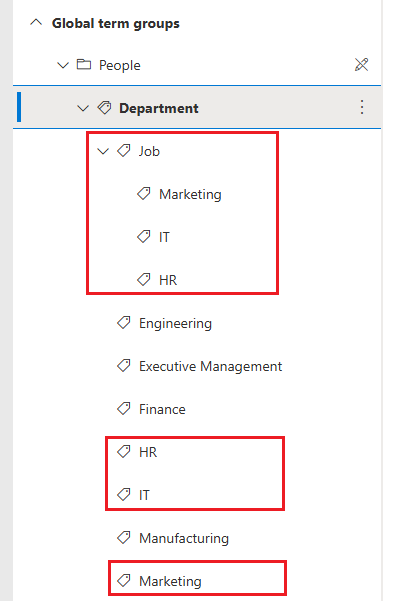
SharePoint supports nested terms — term sets within terms — allowing you to build complex hierarchies. For instance:
And when saved for a record or a document, these would be seen as below in your SharePoint grid view.

If two terms share the same label but exist in different paths, we need to disambiguate them using the full path. Using KingswaySoft Destination components, your input value should use the same delimited format, but use backslashes ("\") as the path delimiter. The following is a simple sample of such cases.
Marketing;IT;HR;Job\IT;Job\HR
The component internally handles the formats required by REST and SOAP APIs, ensuring your writing succeeds with no extra effort.
Conclusion
Managed Metadata (Taxonomy) fields are powerful tools in SharePoint for organizing content in a scalable, flexible, and consistent way. When paired with the KingswaySoft SharePoint Integration Toolkit, working with these fields becomes intuitive - whether you're extracting metadata or performing updates in bulk.
With built-in support for both REST and SOAP APIs and a range of helpful transformation components, our components make the reading and writing extremely easy, which significantly reduces the effort involved in integrating SharePoint’s Taxonomy values into your data processes.
We hope this has helped!