Applications and processes often rely on external resources, which can be expensive to retrieve or obtain. Therefore, modern applications often employ cache strategies to save these external resources in the local file system and achieve improved performance. In some other cases, you might have an application that keeps creating random temporary files to facilitate certain system requirements which cannot be achieved otherwise. However, as every coin has two sides, these caches or temporary files, in the long run, can build up in the system and occupy large disk space, which could have adverse effects and result in volume deficiency in the system. Caches are beneficial in improving performance, but scaling up the hard drive to accommodate them may not always be feasible. Implementing a scheduled cleanup of the cache folder by removing those files that are older than a certain age can become necessary in your ETL process.
One such case that our team recently handled for a client was a similar issue that arose with the DevOps integration using our Team Foundation Server (TFS) connection. The TFS application maintains a local cache folder which is generally used to speed up the process so that it does not have to constantly download a whole chunk of data from the server (which would be a more expensive process). The cache grows over time, that is, the more the application is used, the more cache is built up. And this over time, uses up a good amount of space or volume in the client's local hard drive on the integration server. If the drive doesn't have enough space allocated, this would adversely affect the process and create some serious issues for the overall system's health. With this situation happening, we have come up with a solution that uses components from our SSIS Productivity Pack product to clean up those old cache files to regain disk space. When designing the solution, we have determined that it would not be a good idea to remove all cache, such as recently created, but instead, retain them for a few days, while removing the historical ones. In this blog post, we will show you how this can be achieved. The components that we will use in this scenario are listed below:
Create the date time value for deletion
In order to delete historic caches, first you would need to establish for what time frame you would need to retain them. In our scenario, we are going to keep the caches that are until 14 days old. Anything older than that will get deleted. Please note that you may make changes to the function that we demonstrate in order to modify the date range, as it is relative to your specific process and requirements. Now, we drag and drop a Premium Expression Task and then write a simple expression to subtract 14 days from the current date by using the
DateAdd() function. After this, assign it to a variable.
DateAdd("dd", -14, GetDate())
Please note that the variable created would need to be of datetime type as shown below.

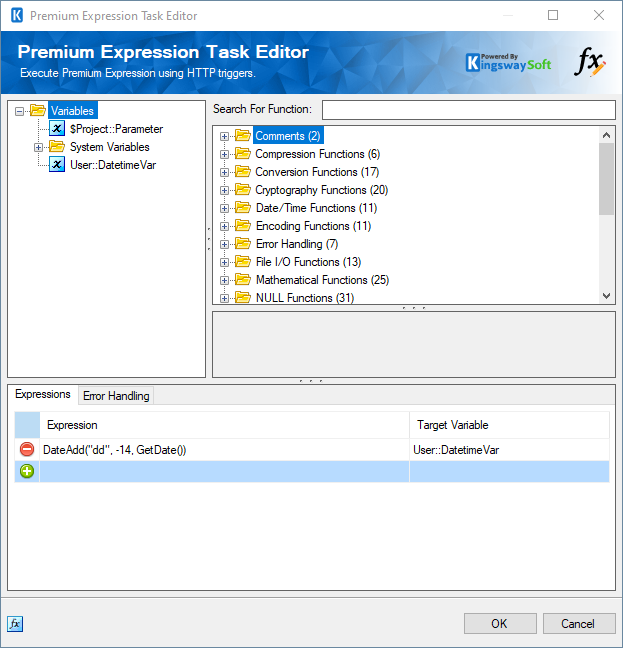
This variable will be used inside a Premium File Transfer Task to filter and Delete the contents inside the cache folder.
Filter and Delete using Premium File Transfer Task
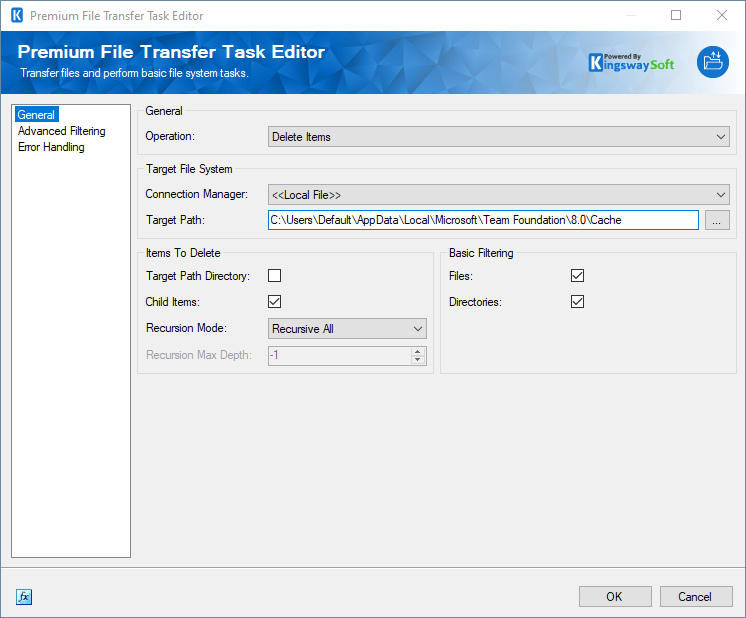
Now that we have the Datetime function that dynamically generates the required value for our filter, we will use a Premium File Transfer Task and use a Delete action to implement the automatic cleanup.
For the client case that we worked on, the path of DevOps client cache is at the following folder path:
C:\Users\Default\AppData\Local\Microsoft\Team Foundation\<version>\Cache
Having gathered the cache folder information, we would add the Premium File Transfer Task to the ETL process. On the general page of the newly added task, we set up the action and the path, and then choose it to run using the recursive mode.
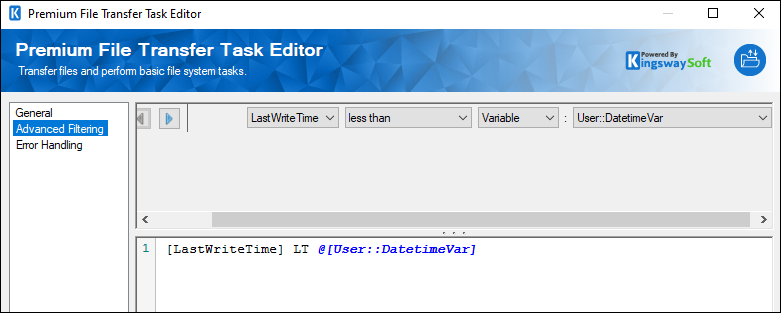
On the Advanced Filtering page, we would add a filter to pick the values lesser than the variable value that we have from our previous data flow. With the variable setup that we have discussed, we are basically selecting all files under the folder that are older than 14 days for the Delete operation.
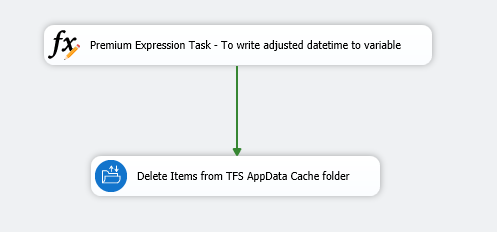
That has very much concluded the entire design of the solution after we have connected the two tasks. The following is what the control flow looks like.
Conclusion
In summary, we use the Premium Expression Task to create a variable that contains a datetime value that is n days before the current date time, and we have it assigned to a variable in the task. Then, the Premium File Transfer Task will use that variable to filter the cache files, deleting anything older than n days in each run. This design would allow us to clean up aged cache files for better space efficiencies without impacting the current process that requires the cache. For the client case, our implementation of automation has been proven to be useful, and the risk of running out of space on the server is eliminated.
We hope this has helped!