There are often cases where you would receive a zipped file dropped into your cloud location (like Azure blob, Google Cloud Storage, etc.), and such zip file would contain files that need to be parsed out and stored in a database table. To do this, a manual and traditional way would be to first download the zipped file to a local machine or server, unzip them, use a process to read the files within, and finally send them to the SSIS pipeline before writing them to a database table. This can be a tedious process to implement, and, since you would need a local machine or server to store the files as a staging until you unzip them, you would spoil the convenience of having a fully integrated cloud environment. Therefore, it would be ideal to have a way to perform all this in your SSIS package without needing to stage the files in a local path. Leveraging the components offered in KingswaySoft's SSIS Productivity Pack, we can easily achieve this. In this blog post, we will assume that in our Azure Blob Storage Container location, there are zipped files that need to be picked up, and these files contain similar flat files that need to be read and written to a database table. The components that we will use from this package are:
- Azure Blob Storage Connection Manager
- Azure Blob Storage Source component
- Premium Derived Column component
- Premium Flat File Source component
- Premium ADO.NET Source component
- Out-of-box ADO.NET connection manager
Please note that we have a sample package available (link here) which you can download for free to follow along with the exercise demonstrated in this blog post. The above components are all available to download as part of our SSIS Productivity Pack.
Reading the zipped files
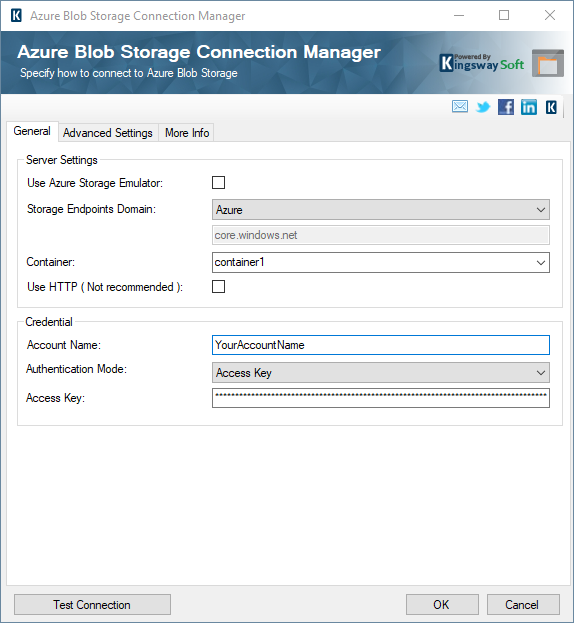
In order to read the zipped files, we will use our Azure Blob Storage Source component, connected to a blob instance using the Azure Blob Storage connection manager. The connection manager has various authentication modes, apart from what we have used below. For more details, please refer to our Online Help Manual link here.
In our blob container, the zipped folder below exists with a report file inside it.

In the Azure Blob Storage Source component, select the connection manager, and point the Source Item Path to the zipped folder path as shown below.
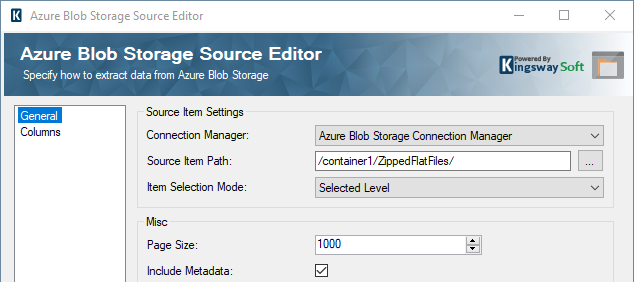
On the columns page, uncheck all the fields, and check the "FileContent". This contains the actual binary content of the zipped file which we will use further below.
Unzipping the file in SSIS
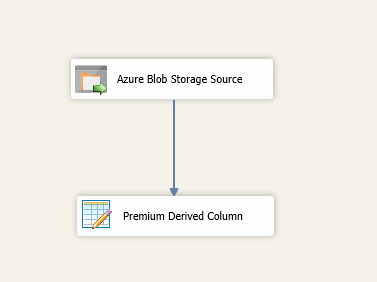
Now that we have the binary content of the zipped file, we can go ahead and unzip the file using our Premium Derived column component. The data flow would look as shown below.
And the expression inside the Derived column would be as shown below. As you can see, the Unzip() unzips the file, and the DecodeBase64() converts it into a string, and then we use the WriteValueToVariable() to write this converted string value to a string variable. Note that 12345 in the expression happens to be the password of the zip file.
WriteValueToVariable(@[User::FileContentVar], DecodeBase64(Unzip([FileContent], "Report1.csv", "12345"), 65001))
The variable being referenced here is a string variable.

Once you have the above data flow ready, it's time to move to the next one, where we will read the unzipped flat files.
Read and write flat file data to a database table
Start a new data flow task and chain it to the previous one in series using the Precedence constraints.
And inside the new DFT, drag and drop a new Premium Flat File Source component. Here, the "connection manager" field can be chosen as a "File Content in Variable" and specify the variable to which we have written the fileContent in the previous data flow task.
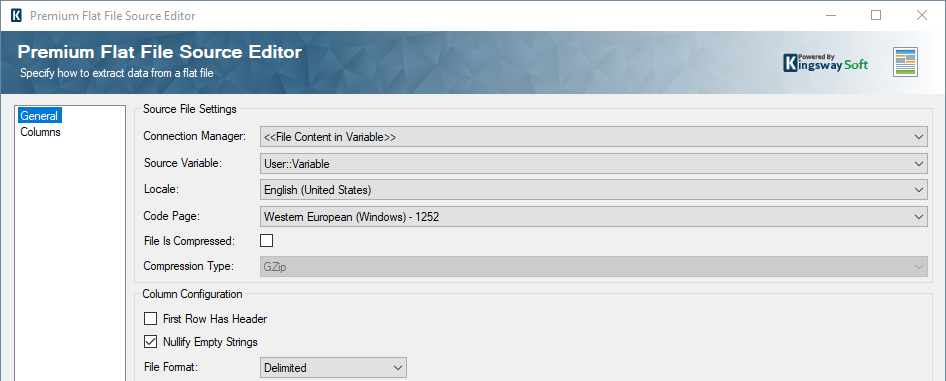
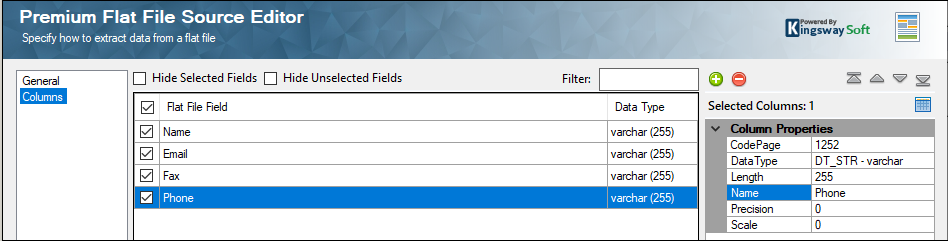
On the metadata (columns) page, as a one-time setup, add the metadata for the flat file using the "+" button. This is required because in SSIS, metadata is static, and once you provide this, as long as the flat file metadata is the same, it would parse the files in the same way in each iteration.
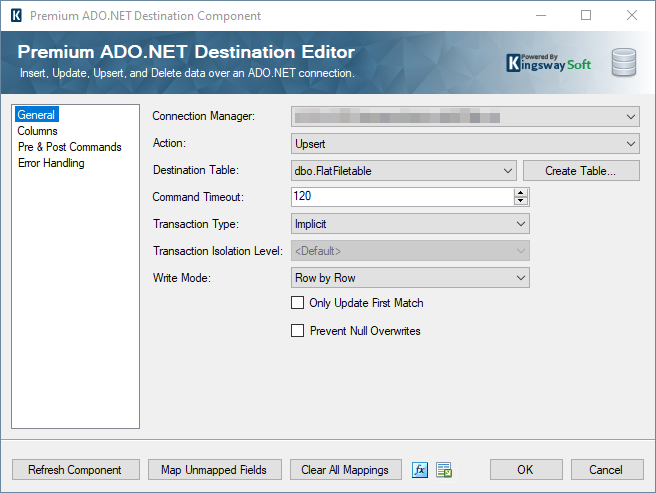
Now, drag and drop a Premium ADO.NET Destination component and choose the required table. If you do not have one yet, you can create a new table by clicking on the "Create Table" button. Choose Upsert action, map the values in the columns page, and choose your Upsert matching key. This would be a recommended approach when you are performing an ongoing integration.
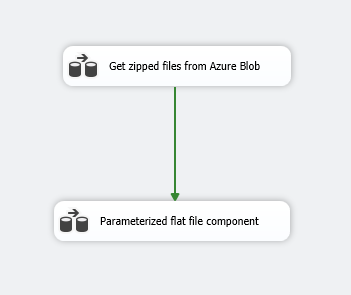
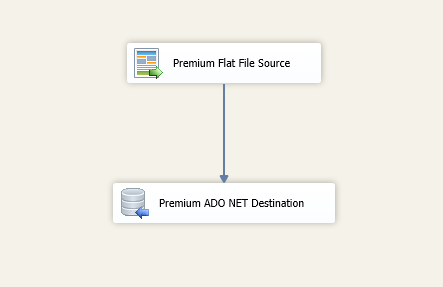
The data flow would look as shown below.
Conclusion
The above demonstration is for getting a CSV file from inside a zip file from an Azure Blob container and parsing through it without the need of a staging local location. We believe that this would be an example of how a fully integrated data flow can be built using our components. Irrespective of which cloud storage location you are using, the above design should be applicable, and the package would just need some slight tweaks based on how the files are received and what components would need to be used to read the file content. It is important to note that this package cannot be used to work with very large zip files since the package will save the entire file content in memory before processing.
We hope this has helped.