Managing files and attachments is a common requirement when working with Microsoft Dynamics 365. Since the system is not designed to store or manage documents, documents are often saved as a note. This is not the most desired appealing approach, particularly for those who require more complex document management capabilities. Additionally, saving documents as a note can become expensive for those using 365 Online due to limited storage availability.
With Dynamics 365, you can use the document management capabilities of SharePoint from within Dynamics 365. This option was introduced in Microsoft Dynamics CRM Online 2016 Update 1. With this option, you can store and manage document in the context of a Dynamics 365 record on a SharePoint Server, and leverage the SharePoint infrastructure to share, manage, and collaborate efficiently.
In this blog post, we are going to work with the server-based SharePoint integration to accomplish the document integration job.
Prerequisite
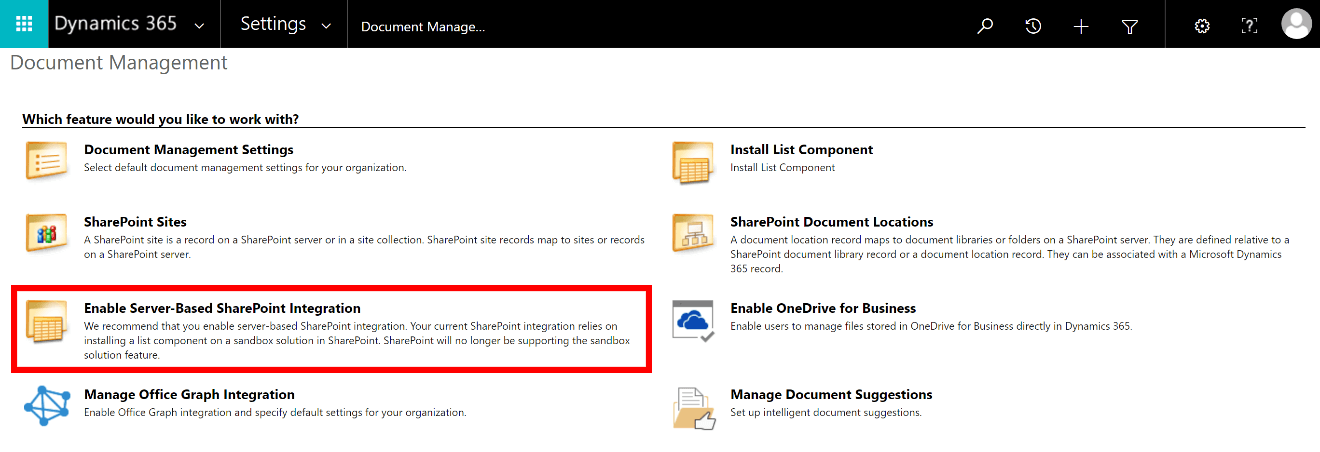
To manage 365 CE/CRM documents via SharePoint server, you would need to first set up the server-based SharePoint integration on your Dynamics 365 system. In CRM, go to Settings | Document Management and click Enable server-based SharePoint integration, then follow the steps described here to complete the Enable server-based SharePoint integration wizard.
Once this is done, you can go to Document Management Setting to enable SharePoint document management for specific entities.

Once you have it configured, the SharePoint toolkit can be used to interact with the SharePoint system in order to upload documents and maintain the relationship between SharePoint and Dynamics 365.
To summarize, following are the prerequisites to work with the sample in this blog post:
- Set up the server-based SharePoint integration for Dynamics 365
- Install SSIS Integration Toolkit for SharePoint
- Install SSIS Productivity Pack
SharePoint Folder Hierarchy
Once the server-based SharePoint integration is enabled, corresponded entity folders will be created in the SharePoint site based on the Document Management Settings in CRM. As shown in the screenshot below, entity name for the entity is used to create folders in SharePoint, such as Account, Invoice, or Opportunity.
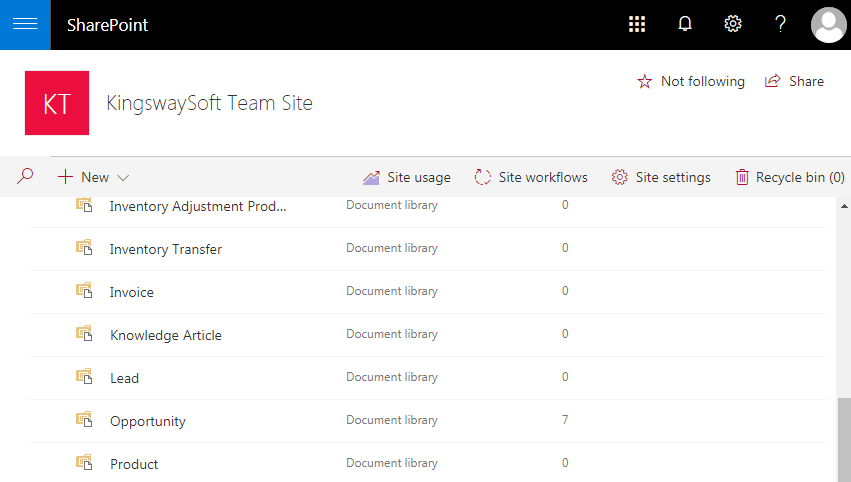
Within each entity folder, there will be several subfolders corresponding to the records in your CRM system.
Let’s have a deeper look at the Opportunity folder, there is a subfolder called “Test Opp_FF238DA4DA4FE811A954000D3AF481F1” in our test site, which is the document location of the “Test Opp” opportunity record.
As you can see from the below screenshot, the format of the record level subfolder’s name is “[Primary Field value]_[Record’s GUID in upper case without dash characters]”. Kindly note that you would need to follow this format to create folders in SharePoint as behind the scene this folder will be automatically linked to the associated CRM record.

Sample Data Flow
To work with different entity records, you would just need to upload files to the corresponded folder with a formatted folder name. We are going to show you the process of how to upload and associate a document with a CRM opportunity record.
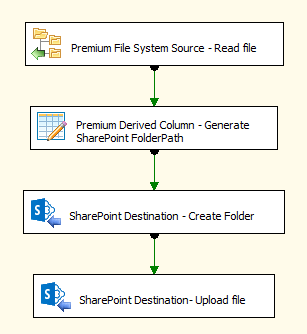
3.1. Read local file
In or example we used the Premium File System Source component in our SSIS Productivity Pack to read file from local test environment, you can certainly use any other components to perform the same operation as long as the document is being read and imported as binary content. If you want to read file from another SharePoint site, the SharePoint Source component would be the best fit for this kind of operation.
This step will output two columns:
- Name: name of the file
- FileContent: binary content of the specific file
3.2 Generate folder name
Here we used a Premium Derived Column component to provide the SharePoint folder name which represents a CRM record. We followed the naming format that we’ve mentioned above to build the folder path, which are record’s primary field value and record’s GUID value concatenated by an underscore symbol.
For demo purpose, we hardcoded the value via the Premium Derived Column component, while in real integration scenario, you may need to read these values from CRM in order to build the FolderPath. There are some functions including Upper() and Replace() which can be used to generate the correct FolderPath.
- Upper(): returns result as all upper case characters.
- Replace(): returns result with all occurrences of search expression replaced with replace expression.
This step will generate one column:
- FolderPath: the folder path that is going to be created in SharePoint
3.3 Create SharePoint folder
Next we used a SharePoint Destination component to create subfolder under the Opportunity folder. This will create a document location and associate it with the corresponded CRM record. Our SharePoint Destination support CreateFolder action to create folder in SharePoint, we provided the FolderPath to create the related folder.
3.4 Upload file to SharePoint
In this step, we used another SharePoint Destination component to upload files to the document location that we just created. The action we used here is Create, we mapped the following columns to upload the test file:
- Attachment_1_BinaryContent: the image file field of the attachments for Document Libraries and Lists.
- Attachment_1_FileName: the name field of the attachments for Document Libraries and Lists.
- Virtual_LocalRelativePath: the folder path that attachment is going to be uploaded to.
After you have done these steps, you should find the file is created in the target folder in SharePoint and also listed under the Document Associated Grid for the corresponded opportunity record.
Please note that the SharePoint subfolder name cannot be changed, otherwise you may lose the association with CRM record even if the name of your CRM record has been updated.
Sample Package
A sample SSIS package is available for download here. The sample package was prepared in a SQL Server 2008 R2 format, and it should automatically upgrade if you are using any newer version of SSIS.