

Managing updates across different stages of your reports, such as Development, Testing, and Production, is crucial for keeping your analytics reliable. This is where Power BI deployment pipelines come in. A Power BI deployment pipeline provides an Application Lifecycle Management (ALM) framework within the Power BI Service, enabling BI teams to develop, validate, and publish reports in an organized and predictable way. Rather than modifying live analytics directly in a shared production space, a deployment pipeline connects up to three dedicated environments (workspaces) based on standard software delivery practices:
-
Development: An isolated space where report authors draft visuals, create new measures, and experiment without impacting active report users.
-
Test: A dedicated area where analysts and stakeholders verify calculation accuracy, review performance, and perform quality checks using representative data.
-
Production: A secure, locked-down environment housing official dashboards and reports accessed by end-user decision-makers.
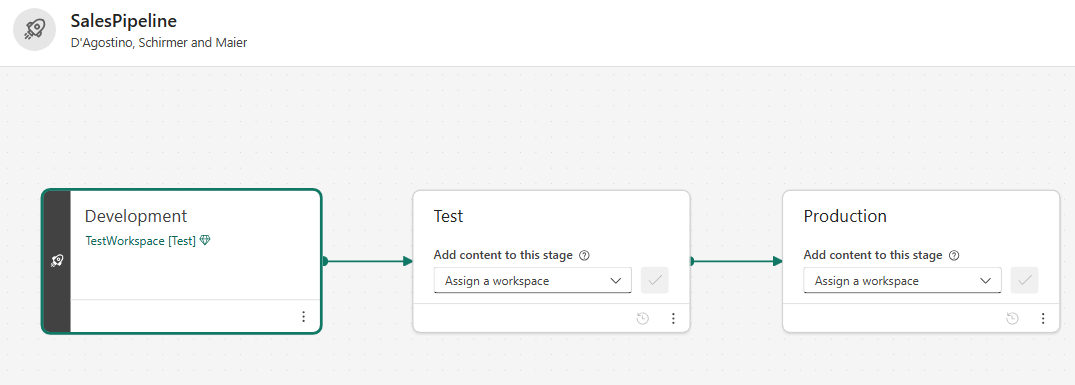
Think of a deployment pipeline as a structured assembly line for your reporting environment. It allows BI teams to build and test new features, measures, or datasets in an isolated Development workspace without risking breaking the live reports that decision-makers rely on every day. Once updates are tested and approved, they move smoothly into Testing and Production stages. Proper deployment is important because manual copy-pasting or re-uploading report files directly into production leads to costly mistakes, such as pointing production reports at test databases, breaking user bookmarks, or accidentally exposing unverified data.
While setting up these pipelines natively often requires manual portal clicks or complex scripting, KingswaySoft enables you to easily design a package just by dragging and dropping and configuring the components, and automate this lifecycle. An automated solution like this allows you to connect workspaces, manage releases, and push updates seamlessly, giving you full control over your reporting lifecycle without writing a single line of code. The KingswaySoft SSIS Integration Toolkit has the components required to build such a solution with ease. With your SSIS package, the overall design in the control flow would look as shown below.
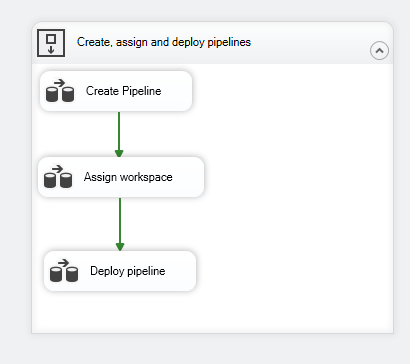
We’ve also provided a downloadable sample SSIS package that contains the designs illustrated below, so that it can get you started quickly.
Note that our package design provides a foundation for creating a pipeline, binding a workspace to the initial Development stage, and triggering the deployment. If your process includes additional stages, you can easily replicate this control flow logic to assign workspaces and promote content across the remaining phases of your lifecycle.
Let's take a closer look at each of the Data Flows.
Create Pipeline Data Flow Task
This data flow ingests source data from a database table containing your desired pipeline names and workspace assignment mappings. The data stream is then routed to a REST Destination component configured with a Power BI Connection Manager to execute the API actions.
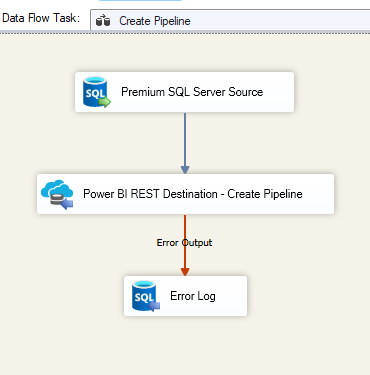
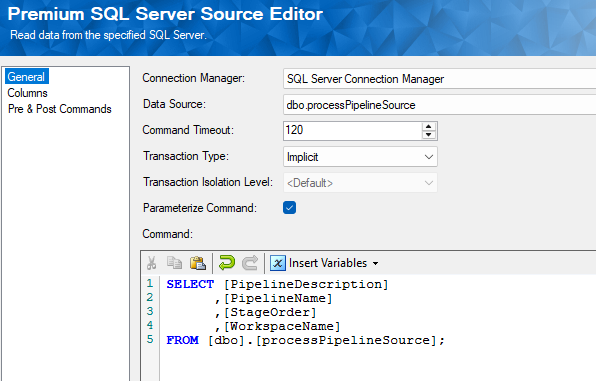
The Premium SQL Source component here acts as a common source table that holds the pivotal process-related information, which we'll also use in other Data Flows. Note that your Source can be anything and would depend on how you hold the data. In our case, it's as follows:
- PipelineDescription: A short description of what the pipeline is for.
- PipelineName: The name to be assigned to the pipeline.
- StageOrder: The stage in which the pipeline is created and from which it is later deployed.
- WorkspaceName: The name(s) of existing workspace(s).
The REST Destination connected to your Power BI instance would use the action Pipeline_CreatePipeline on the Pipelines endpoint. This gives the metadata in the Columns page to map as the Pipeline Name and Description.
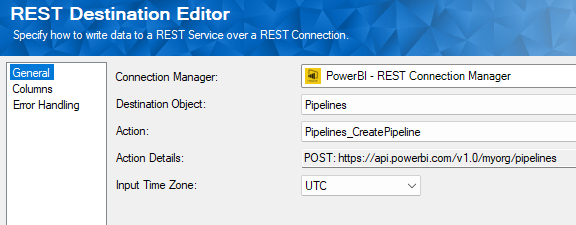
We have enabled error handling as a standard best practice. With that in place, let's move on to the next Data Flow Task.
Assign Workspace Data Flow Task
Here, we use the same source data and perform a lookup to retrieve the Pipeline ID for the one we created in the first data flow, based on your specified pipeline name. Next, we use the workspace name from our source data to look up its corresponding Workspace ID from your Power BI instance, before assigning that workspace directly to the pipeline stage.
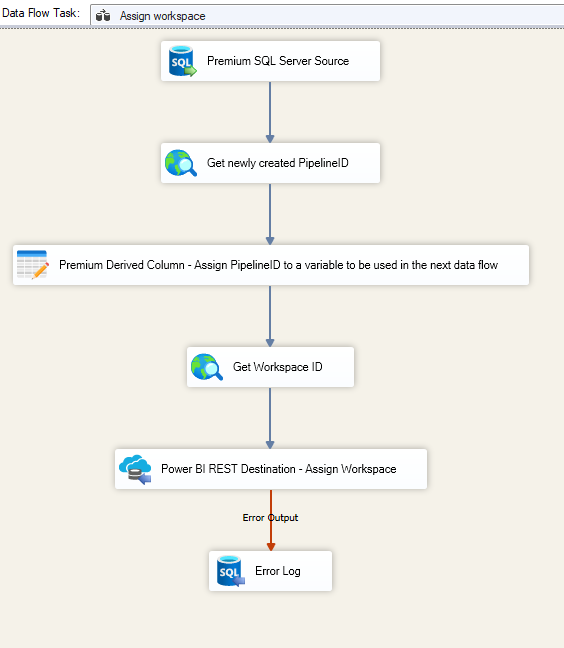
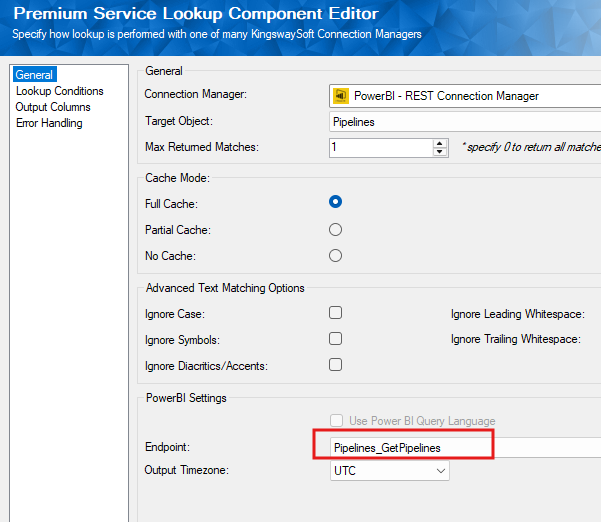
Taking a closer look at the firstPremium Service Lookup component (Get newly created PipelineID), you can see that we are targeting the Pipelines object to get the newly created Pipeline. The endpoint can be chosen to list all that matches the conditions.
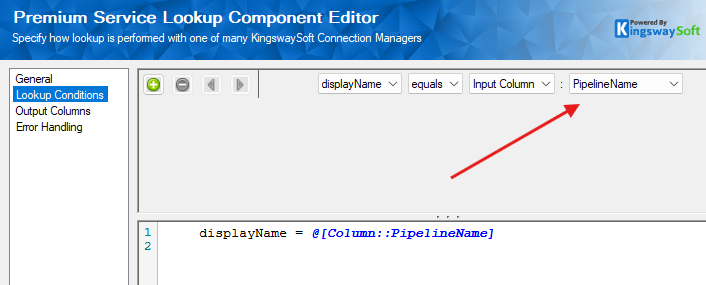
The Lookup conditions are where we equate the PipelineName from the Source to the displayName in the instance and get the newly created one.
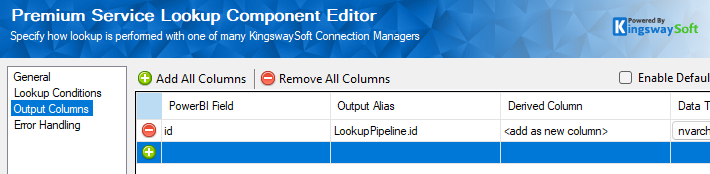
In the Output Columns page, we specify the Power BI field ID as the output, which we will be using in the downstream data pipeline. We can provide an alias, LookupPipeline.id, to identify this value.
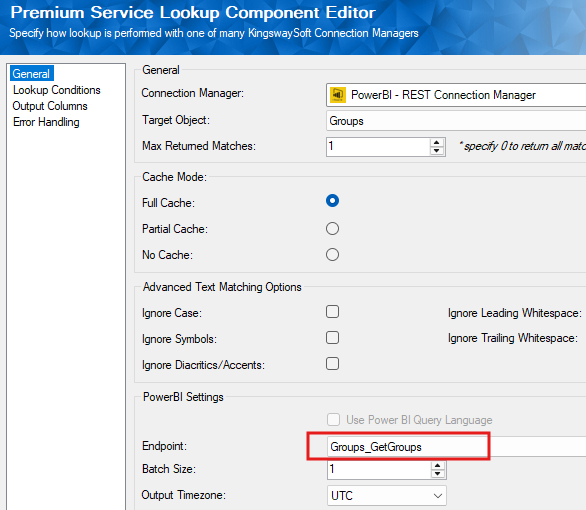
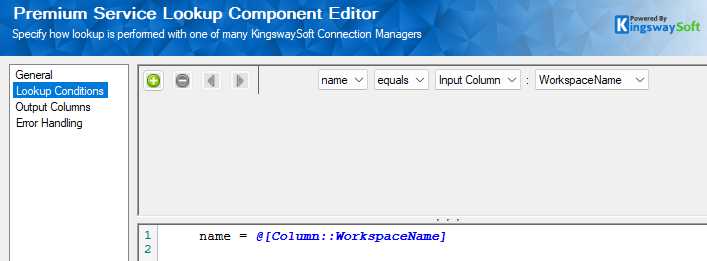
Similarly, the second Premium Service Lookup component (Get Workspace ID) gets the Workspace ID from the Groups object, using the WorkspaceName in the lookup condition.
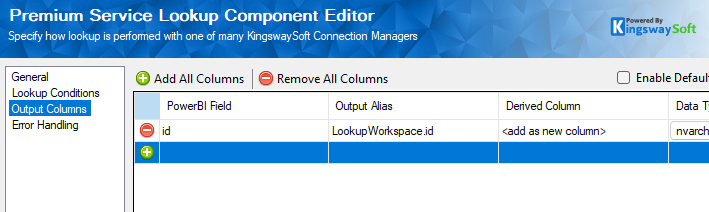
The Output Columns page lets you pick the Power BI field ID that holds the Workspace ID. We can provide an alias called LookupWorkspace.id as an identifier.
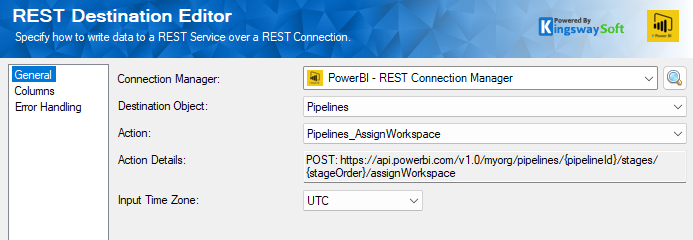
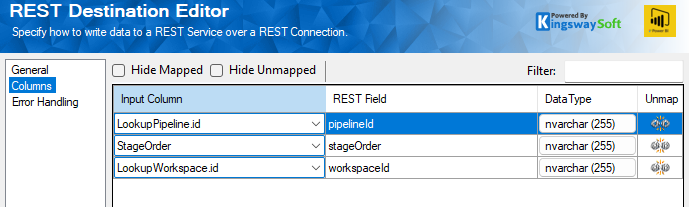
And these are written to the Power BI REST Destination component, using the Pipelines_AssignWorkspace action. The Columns page shows the mapping, where the Pipeline ID returned by the Lookup and Workspace ID are mapped along with the stageOrder.
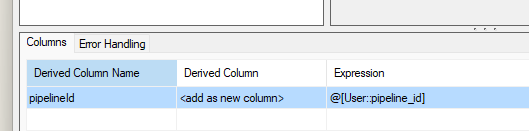
One thing to note in the Data Flow is the use of the Premium Derived Column component after the Get newly created PipelineID step. This saves the Pipeline ID received into a user-defined variable @[User::pipeline_id], so that it can be used in the third Data Flow Task. The function used for this is as follows:
WriteValueToVariable( @[User::pipeline_id], [LookupPipeline.id] )
Deploy Pipeline Data Flow Task
In this Data Flow Task, we trigger the pipeline deployment. The structure of this flow is configured as shown below.
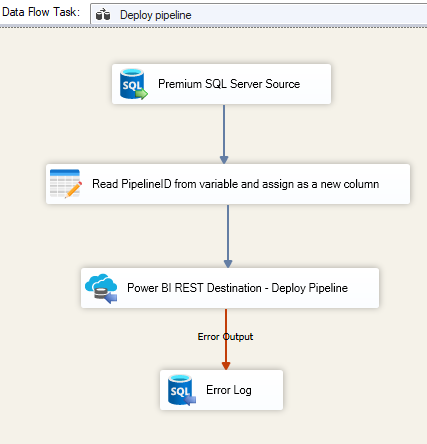
The Source provides the WorkspaceName and other necessary details (if any are required for selective deployment), and the Premium Derived Column component captures the variable @[User::pipeline_id] into a column to be used to map the Destination.
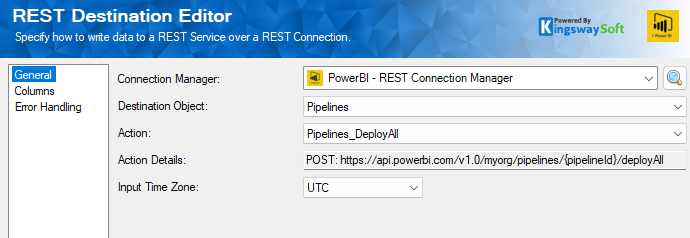
The REST Destination component can be used to trigger the deployAll/SelectiveDeploy action based on how you wish to deploy. The metadata mapping would depend on the action, and you can provide the necessary input, including the Source Stage, WorkspaceName, and Pipeline ID.
Conclusion
By following the design above, you could achieve controlled automation of your pipeline management within Power BI. A few things to note:
- We have used the DeployAll action, in which all supported items from the Source stage are deployed. However, if you wish to deploy only selected items from the stage, you could use the SelectiveDeploy action. The metadata requirements for each of these can be found in the API documentation pages we have linked above.
- The design we have demonstrated has pipeline creation as its first step, but if you wish to just assign stages and deploy already existing pipelines, the design can easily be modified to just perform those tasks.
- The Source data would need to have some specific mandatory information regarding the pipeline, workspace, and other deployment-related metadata. What we have demonstrated is a minimal approach, and it can be adjusted as required.
We hope this has helped!