

Supporting documents, including vendor invoices and receipts, are often stored outside QuickBooks Online even though the related financial transactions already exist in the system. As document volumes grow, locating each transaction and attaching its corresponding file manually becomes time-consuming and difficult to manage.
KingswaySoft's SSIS Integration Toolkit can automate this process. It can retrieve documents from an external file location, match each document to the appropriate QuickBooks Online transaction, and upload the file as an attachment. In this walkthrough, we show how to retrieve vendor invoice PDFs from a file system, identify their corresponding bills in QuickBooks Online, and automatically upload and associate each document by using the KingswaySoft SSIS QuickBooks components.
Integration Scenario
In this example, bills received from vendors already exist in QuickBooks Online, while the related invoice documents are stored as PDF files in a separate location. Each file follows a naming convention that contains the vendor name and the document number for the corresponding bill. For example:
Northstar Office Supplies_INV-10452.pdfThe value before the underscore is the vendor name, and the value after it is the bill document number. In this example, the vendor name is Northstar Office Supplies and the document number is INV-10452. The package extracts these values from the file name and uses them to identify the corresponding QuickBooks Online bill.
After a matching bill is found, its QuickBooks bill ID is used to create the reference required to associate the uploaded document with that transaction. Although this example matches documents by vendor name and document number, the matching logic can be adapted to suit the identifiers available in your integration. The same overall approach applies: retrieve a supporting document, identify its QuickBooks record and ID, and include that ID in the AttachableRef when uploading the document.
Overall Data Flow Design
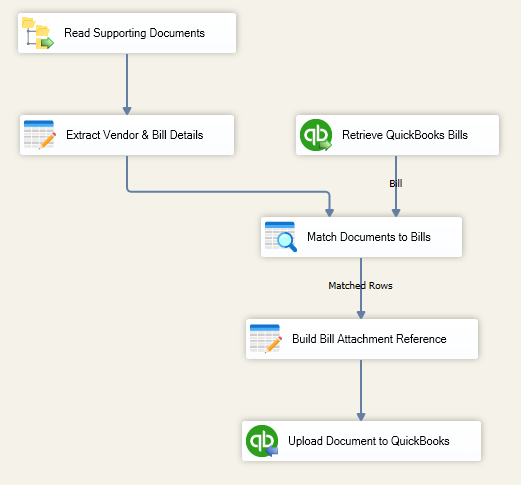
The package uses one Data Flow Task to retrieve the supporting documents, identify their related QuickBooks bills, and upload the files. First, a Premium File System Source component retrieves the PDF files and their contents. A Premium Derived Column component then extracts the vendor name and document number from each file name and adds the content type required for upload.
In parallel, a QuickBooks Source retrieves the existing bills used as reference data. Both streams feed a Premium Lookup component, which compares the vendor name and document number from each file with the corresponding QuickBooks fields. For matched rows, the QuickBooks bill ID returned by the lookup is used in a second Premium Derived Column component to create the AttachableRef. This reference specifies the record type and ID of the QuickBooks transaction to which the uploaded file should be linked. Finally, a QuickBooks Destination uploads the document and associates it with the existing bill.
Configuring the Data Flow
To get started, add a Premium File System Source to the Data Flow and configure it to read the folder that contains the supporting PDF documents. This example retrieves files from a local file system. Include the file name, file name without extension, and file content in the source output. The __PremiumFilePack.FileContent column contains the binary data that will be uploaded to QuickBooks Online, while __PremiumFilePack.NameWithoutExtension supplies the values needed for matching.
Next, add a Premium Derived Column component. Because the files follow the <VendorName>_<DocNumber>.pdf naming convention, use the GetTokenAtPosition function to extract both values. Create a VendorName column with the following expression:
GetTokenAtPosition([__PremiumFilePack.NameWithoutExtension],"_",1)
For Northstar Office Supplies_INV-10452.pdf, this expression returns Northstar Office Supplies. Then create a second derived column named DocNumber with the following expression:
GetTokenAtPosition([__PremiumFilePack.NameWithoutExtension],"_",2)
This expression returns INV-10452. Because the documents in this example are PDFs, also create a ContentType column with the following value:
"application/pdf"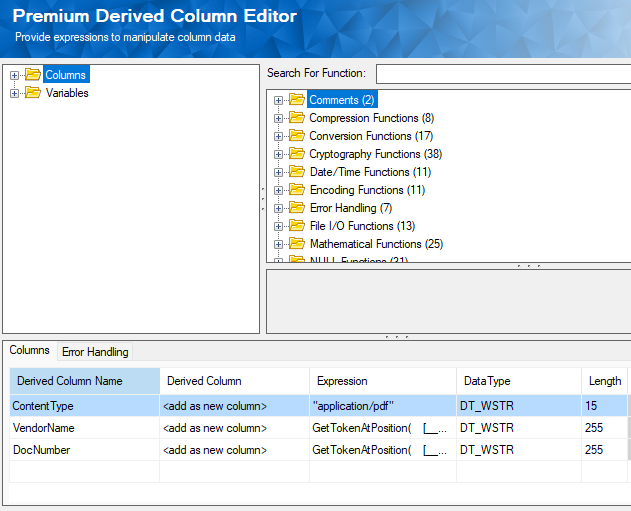
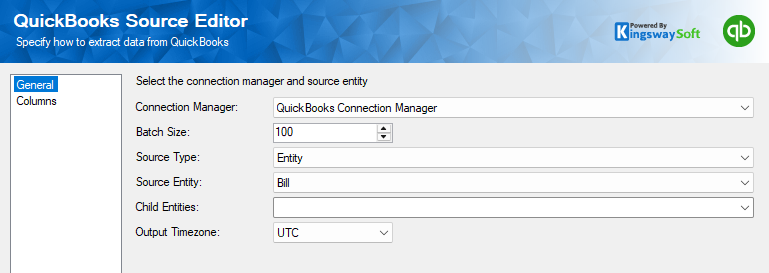
Next, use a QuickBooks Source component to retrieve the existing Bill records. Include only the fields required for downstream matching: Id, VendorRef.name, and DocNumber. The vendor name and document number identify the appropriate bill, while Id provides the internal QuickBooks record ID needed to create the attachment reference.
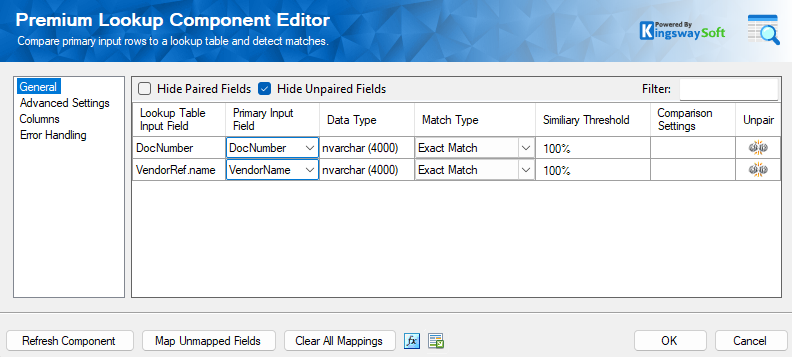
Add a Premium Lookup component and connect the file stream as the Primary Input and the QuickBooks Source as the Lookup Table Input. Configure the lookup to compare VendorName with VendorRef.name and DocNumber with DocNumber. Matching on both values is more reliable than matching on document number alone because different vendors can use the same document number.
On the Columns page, include the fields required for upload and assign clearer output aliases where appropriate. In this example, rename __PremiumFilePack.FileContent to FileContent, rename __PremiumFilePack.Name to FileName, pass through ContentType, and expose the QuickBooks Id returned by the lookup as BillId.
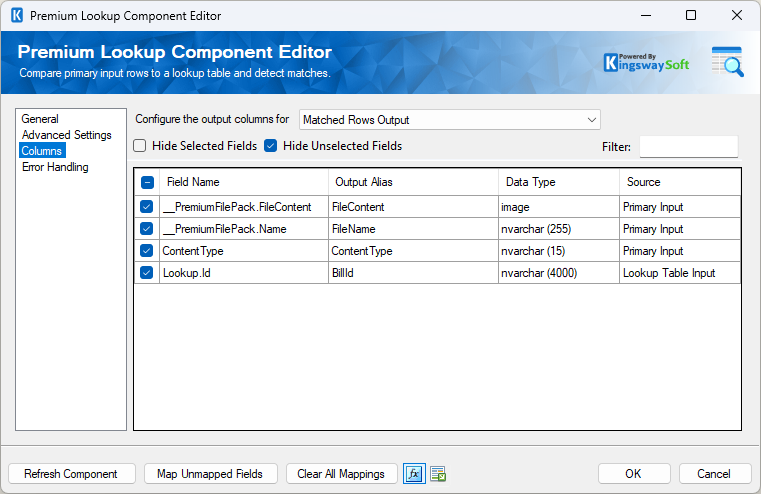
Documents that do not find a matching bill can be redirected through the unmatched output for review or additional handling. This ensures that only successfully matched documents proceed to the upload step.
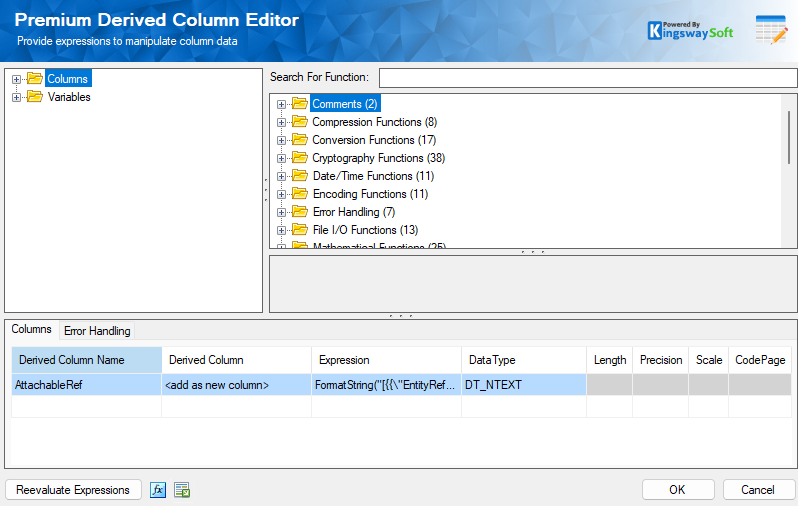
For matched rows, add another Premium Derived Column component to create the AttachableRef that links the uploaded document to the matching QuickBooks bill. The reference includes the bill record type and the BillId returned by the lookup. Use the following expression:
FormatString("[{{\"EntityRef\":{{\"type\":\"Bill\",\"value\":\"{0}\"}}}}]", [BillId])
The {0} placeholder is replaced by the bill ID returned from the lookup. Because FormatString uses curly braces for placeholders, double the curly braces required by the AttachableRef structure so that they are treated as literal characters. For example, when the matching bill ID is 437, the resulting value is:
[{"EntityRef":{"type":"Bill","value":"437"}}]
This value tells QuickBooks Online which bill should be associated with the uploaded document.
Finally, add a QuickBooks Destination component. Set the Action to Upload and the destination entity to Attachable. On the Columns page, map the following values:
AttachableReftoAttachableRefContentTypetoContentTypeFileContenttoFileContentFileNametoFileName
The QuickBooks Destination uploads the document together with its reference to the matched bill. QuickBooks Online can then create the attachment and associate it with the existing transaction.
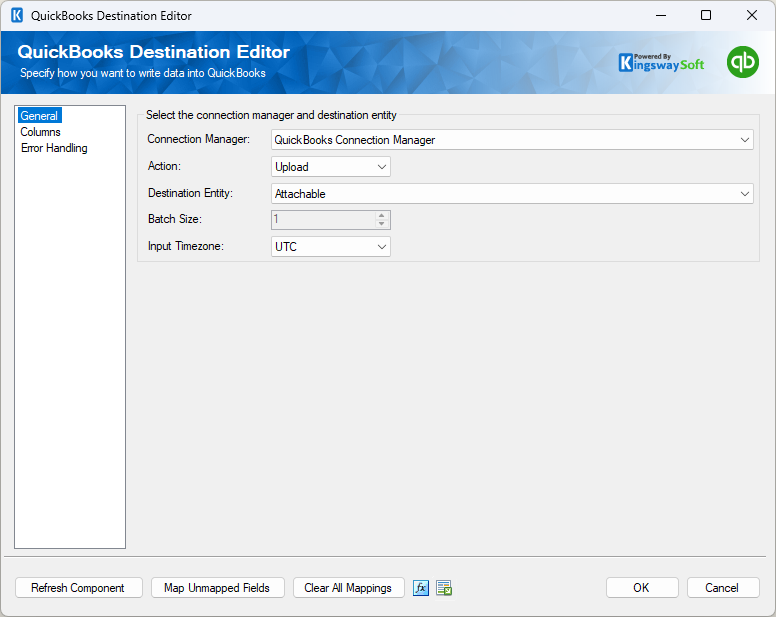
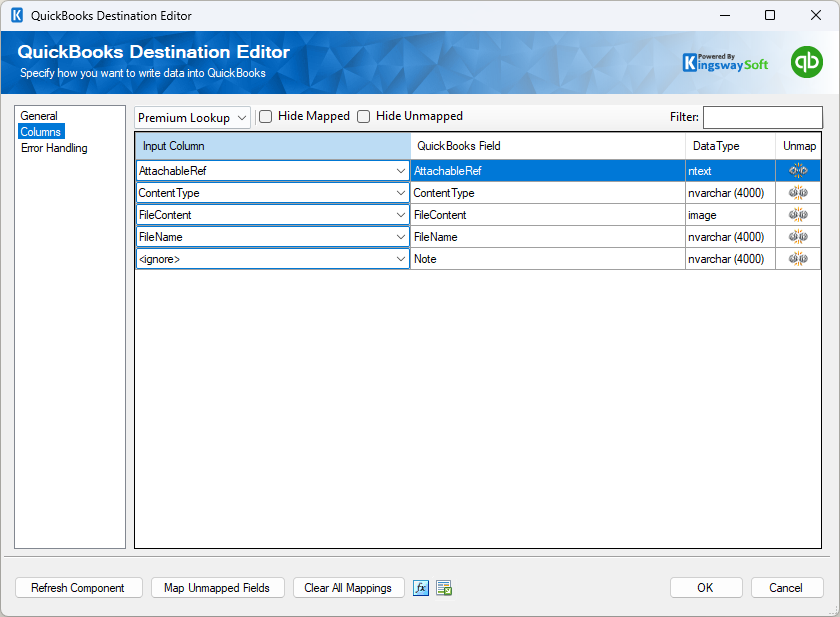
When the package completes successfully, each supporting document has been retrieved from the file system, matched to the appropriate bill by vendor name and document number, and uploaded to QuickBooks Online with the corresponding bill ID in its AttachableRef.
Conclusion
When supporting documents are stored separately from their QuickBooks Online transactions, manual attachment management becomes increasingly inefficient as the number of files grows. Automating the process lets you retrieve documents from an external location, match them to the appropriate QuickBooks records, and upload them with the reference needed to associate each document with its transaction.
Although this example uses vendor invoice PDFs matched to bills by vendor name and document number, the same pattern can support many other QuickBooks Online document-integration scenarios. The method used to identify the corresponding record may differ, but once the record ID is available, it can be included in the AttachableRef when the supporting document is uploaded.