The components we developed at KingswaySoft generally discover metadata automatically whenever possible - That is, our software retrieves metadata information made available by the API itself in order to properly populate our ETL components. In most cases, the metadata in our components is generally accurate, provided the target system has a reliable metadata API. This includes services like Dataverse/Dynamics 365 CE, Salesforce, SharePoint, etc. Accurate metadata is vital for data integrity in ETL processes. However, there are occasional cases where some ETL metadata fine-tuning may be necessary due to unique situations. For instance, you might encounter cases where a text field contains more data than what is indicated by its metadata, potentially causing the source extraction to fail. In such instances, manual editing of the metadata will be required in order for the ETL process to work. In this blog post, we will show you how such changes can be made properly for your ETL components.
For reference purposes, a common error that you could receive is an error message as shown below:The input value for 'description' field does not fit into the output buffer, please consider increasing the output column's Length property or changing its data type to one that can accommodate more data such as ntext (DT_NTEXT). This change can be done using the component's Advanced Editor window.When you receive this error, you can follow the approaches below to have the issue fixed. Please note that we will be using our Dynamics 365 CRM/CE component as an example here. However, the logic applies to all our SSIS components.
Working with the Advanced Editor
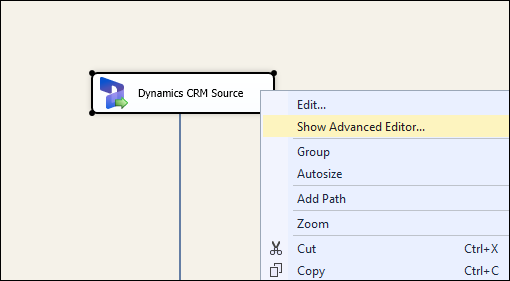
When working with an SSIS source or destination component, metadata discovery generally occurs after the source object/entity has been selected for the component. At this stage, the metadata of the ETL component should be fully populated. You can confirm this by navigating to the columns page, where you'll find a list of all available fields, along with data type, length, scale, and precision information. These details are populated based on the metadata information retrieved from metadata service calls. Assuming you've saved the metadata by accepting all configurations using the OK button, your component should be ready for execution. If you encounter an error related to data overflow such as the above one, you'll need to manually fine-tune the metadata. The first option to try in such cases would be using the Advanced Editor window. To do this, right-click on the component and select the 'Show Advanced Editor...' menu item to open the Advanced Editor.
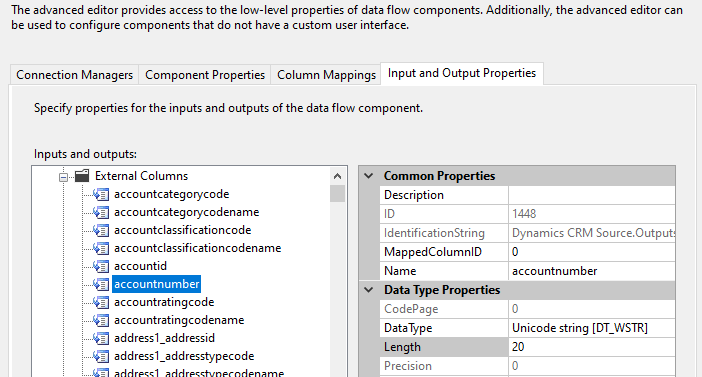
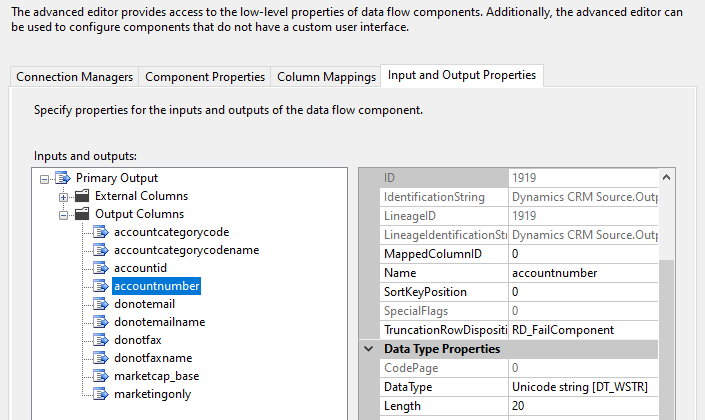
Next, in the window that opens up, navigate to the "Input and Output Columns" page. Here, you'll find two folders under Primary Output: External Columns and Output Columns.

Open both External Columns and Output Columns, then select the column you wish to modify. In the right-side panel, you can adjust the datatype or length as needed.
Once you've made the changes, you may click the OK button and save them. Once done, run the ETL process again to ensure it's now functioning correctly.
Working with XML Source code
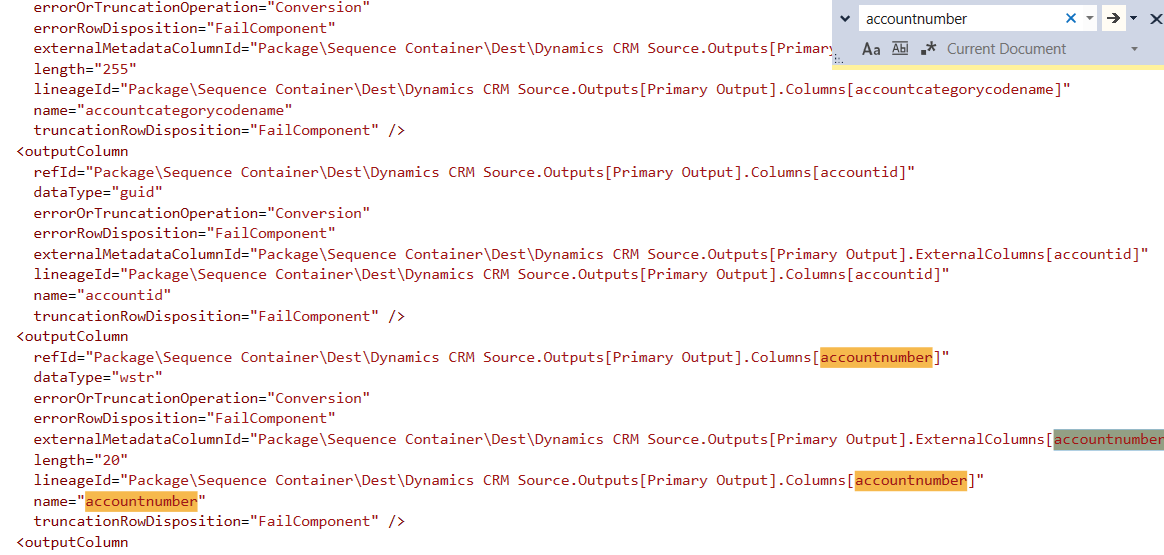
In certain cases, the Advanced Editor might not be visible in the SSIS options. In such situations, right-click on the package in the Solutions Explorer, and select View Code.
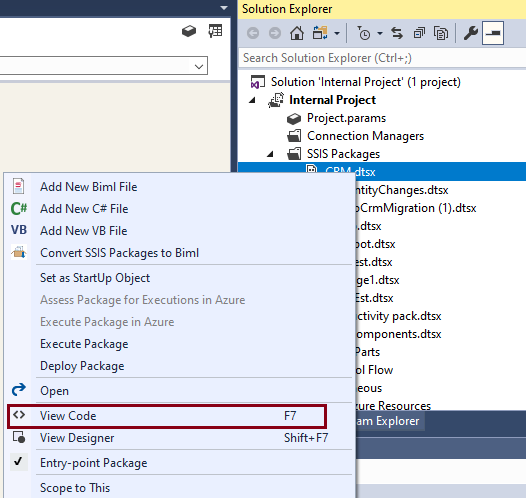
This will open the XML code in a separate window. Here, you can perform a search (CTRL+F) to locate the KingswaySoft Source and/or Destination components and the required column names.
Conclusion
By following the steps above, you can easily modify the metadata as needed, contrary to the initial discovery. Please note that these changes will be retained until you refresh the metadata within the component.
We hope that this has helped!