When working with data integration development for Microsoft Dynamics 365 Business Central (BC) online instance, you typically start by creating a connection manager. In the case of our SSIS Integration Toolkit product, this is done by creating a new DynamicsNAV connection manager, which can be utilized for both traditional Dynamics NAV installations and the latest Business Central online applications. In order to work with Dynamics 365 Business Central online, you must use OAuth authentication, as it is the only option available after Microsoft retired Basic authentication support a couple of years ago.
This blog post will walk you through the process of properly creating a connection manager using the OAuth authentication type to connect to your Dynamics 365 Business Central online application for integration purposes. Before we begin, let's have a quick review of why an OAuth connection is necessary. OAuth is a modern application authentication and authorization infrastructure that provides a secure way to access your application data. The token-based method is more secure than sharing user credentials directly with an application. A compromised token can be revoked at any time, and a new one can be created. Users can each have their own token with different levels of access given to each user.
OAuth has obvious benefits over basic authentication, making it the better option for data integration projects involving processing or consuming your Dynamics 365 Business Central data. We hope that this blog post can serve as a quick guideline on how to establish a successful connection to your Business Central application, allowing you to start your integration development journey.
The steps included, in summary, are listed below:
- Create an Azure App in Azure Portal
- Add permissions and grant consent in the app
- Add a client secret
- Configure the Connection Manager
Creating an Azure App
First, we will need to register an App on Azure Portal in order to be able to use OAuth. If you already have an App created, you may skip to step 4 and continue from there.
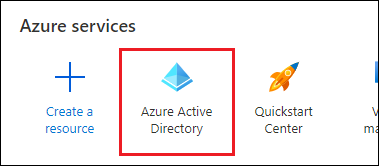
- Log in to Azure Portal and navigate to Azure Active Directory in the same tenant as your Dynamics 365 Business Central instance.
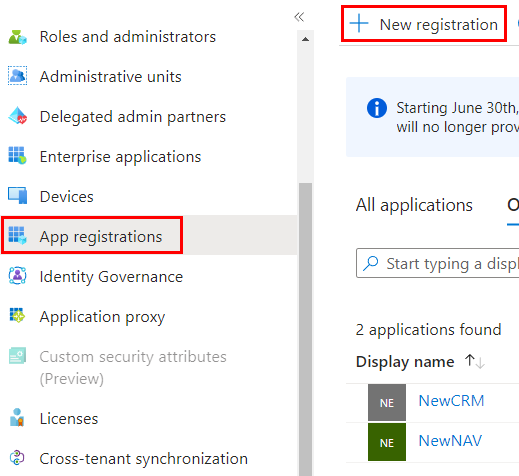
- On the left side, you can create a new registration by selecting "App registrations." On this page, you will also be able to see existing applications, as shown on the right side.
- In the App registration, you will need to name your app, select the account type, and set a redirect URI if desired. Make sure the URI you set is valid. In our example, we used our website's main page. It is important to note that the URL does not have to be a working one. It should be a URL that you can trust, and the URL should not perform any redirections. Redirections can cause the loss of the authorization code during the authentication process. If you don't have a proper URL, you can even use something like https://localhost, even though you are not hosting the website on your computer at all.

- When you go back to the App registrations page, you will see your new app, which will not have a secret set. You can click on the app we have highlighted below to continue the setup.

Configuring API Permissions
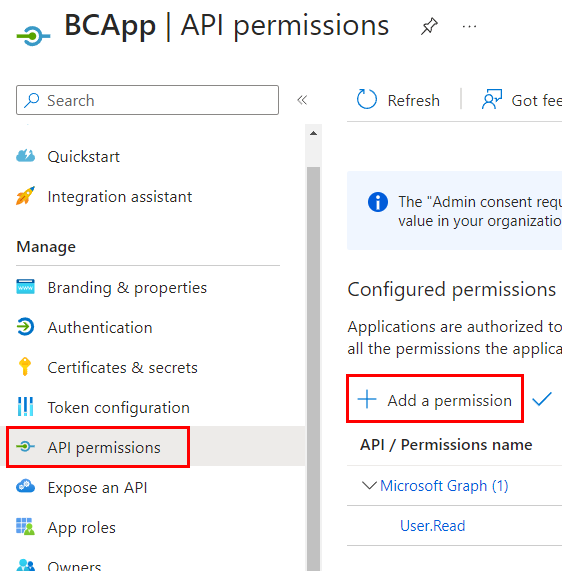
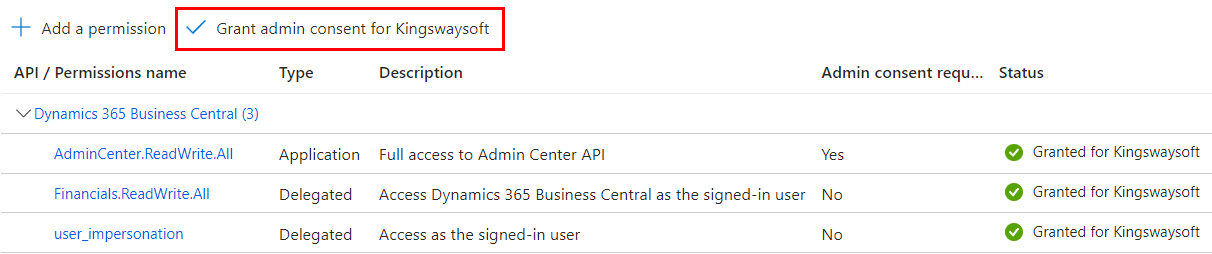
- On the left side, select "API permissions" and add a permission. Delegated permissions allow the app to act on behalf of a user, while application permissions allow the app to act as its own entity, rather than on behalf of a user.
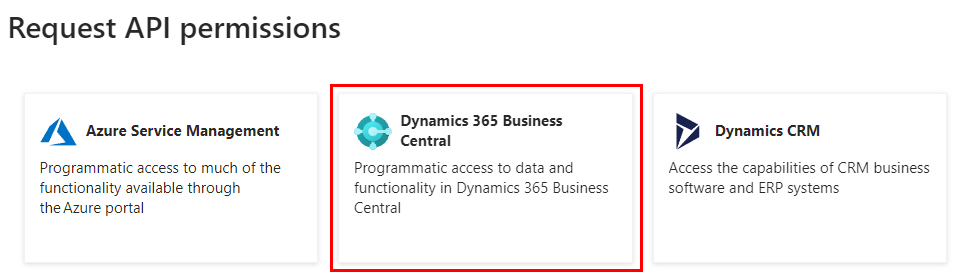
- On the right side, you will find the option for Dynamics 365 Business Central.
- You will be able to see the permissions you have added. At this point, you may also choose to Grant Admin Consent for the permissions. This will grant the permissions we have set to all users.
Creating a Client Secret
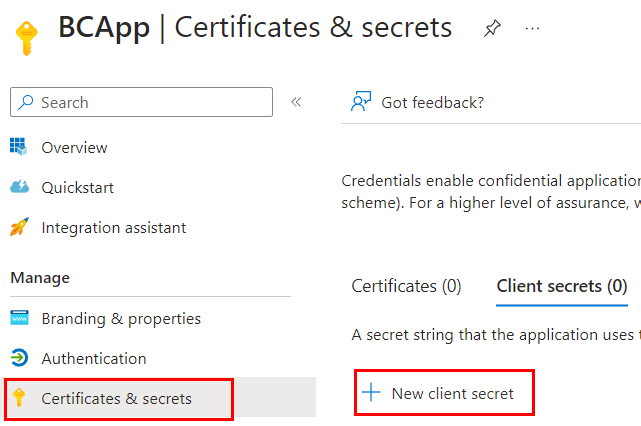
8. On the left side, when you select "Certificates & Secrets," you can create a new client secret that will be used in our connection manager. You can set the description of your secret as well as when the secret will expire. Please note that the client secret is only available to view and copy at the time of creation. If you forget to copy it during creation, there is no way to reveal the client secret, as shown in the second image below. In such cases, the only option is to create a new client secret. If you know that the unrecoverable client secret is not used elsewhere, you may remove it.
When you leave the instance and come back, the client secret will be hidden as shown below and will not be available again.

The client secret has been created, and now we can proceed to gather a few more details before creating the NAV Connection Manager.
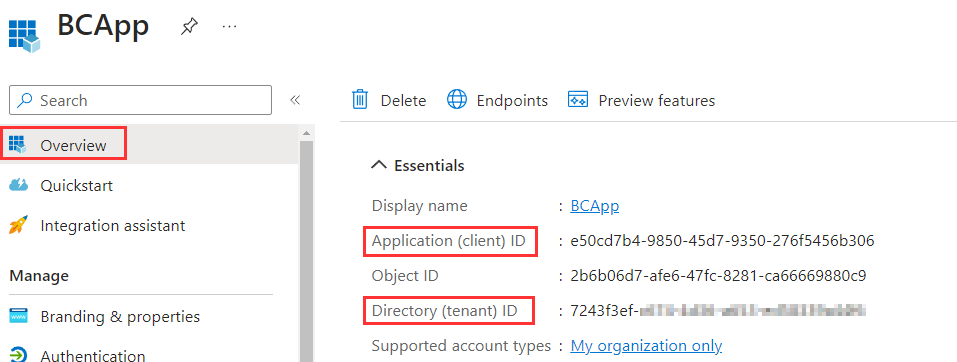
9. When we look at the overview of the App, both the Application Client ID and Azure Tenant ID can be found here. Both of these will be used later in the connection manager component.
Configure the Connection Manager in SSIS
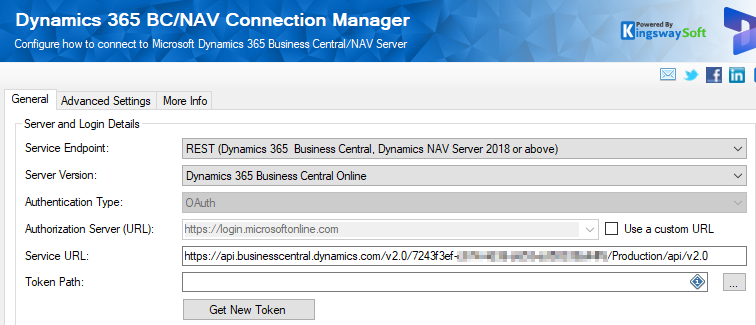
Once you have completed the above steps, you may now head to your SSIS development environment to complete the connection setup. If you are working with a package that already has a connection, you may simply switch your BC/NAV connection to use OAuth. Otherwise if your package does not currently have any connection, you may simply create one. As shown in the screenshot below, you can use the information gathered earlier to fill out the connection properties for the OAuth connection.
Initially, you will need to set your ServiceURL and replace <AzureTenantId> with your Azure Tenant Id. After clicking OK in the component to save the configuration, when you open the connection manager again, you will be able to switch between the three Service Endpoints, and the ServiceURL will automatically adjust based on the chosen endpoint. Below is the format for each endpoint.
- For Dynamics 365 Business Central Online (REST): https://api.businesscentral.dynamics.com/v2.0/<AzureTenantId>/Production/api/v2.0
- For Dynamics 365 Business Central Online (SOAP): https://api.businesscentral.dynamics.com/v2.0/<AzureTenantId>/WS
- For Dynamics 365 Business Central Online (OData): https://api.businesscentral.dynamics.com/v2.0/<AzureTenantID>/Production/ODataV4
You will then select "Get New Token" and enter the details from the previous steps to authorize and generate the token.
- Client ID: You can find the client ID in step 9.
- Client Secret: You should have saved this from step 8.
- Azure AD Tenant: You can also find the Tenant ID in step 9.
- Scope: Set the scope according to your requirements. We have provided a default setting as an example.
- Redirect URI: The URI provided in step 3.
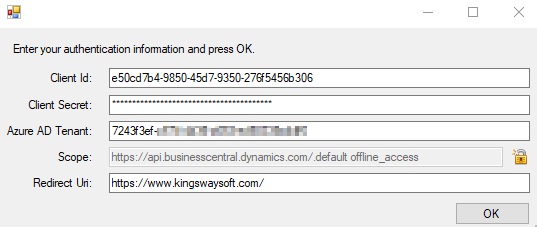
Lastly, you will be prompted to set a password for the token, and the process will be complete. You can test the connection without using the "Test Connection" button to verify if you can access the instance. Press OK to save the configuration you have created.
Closing Notes
We hope this has been helpful, and by following this blog post, you should be able to create a new Business Central (BC) connection using OAuth authentication. We have covered both the setup required in the Azure Portal and how to configure the connection manager in SSIS to use this new authentication method. We have also briefly discussed why this is currently the recommended approach when working with Dynamics 365 Business Central and how it is a more secure way to authenticate.