NetSuite Custom fields are fields that you can add to records and transactions which can be used to save some additional information. This provides quite some flexibility when working with the NetSuite application if we have some special business requirements which cannot be accomplished using those out-of-box fields. Once added, those fields require some special attention in order to use use them in SSIS ETL data flows. In this blog post, we will show you how this can be done easily by using KingswaySoft components.
To get started, let's quickly review the list of custom fields that can be created in NetSuite, they include:
- Custom CRM Fields
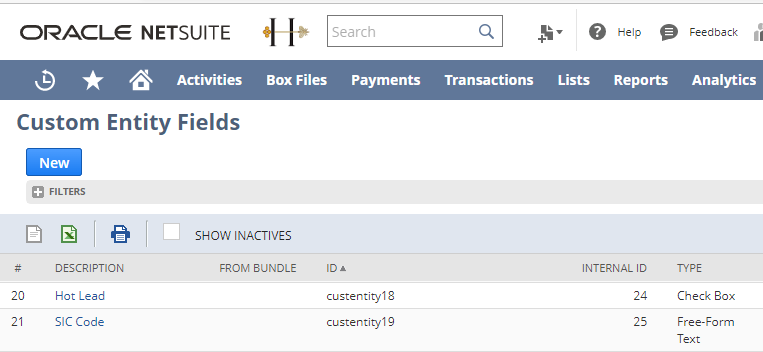
- Custom Entity Fields
- Custom Item Fields
- Custom Transaction Body Fields
- Custom Transaction Line Fields
- Custom Transaction Item Options
- Custom Item Number Fields
- Other Record Fields
There are many standard fields and field types available in Netsuite. And each type of custom field has a default field that you can use as a source. Also, there are numerous field types you can create, such as checkboxes, free-form text, percentages, phone numbers, and hyperlinks etc. We will show you a particular example below.
Create a custom field in NetSuite
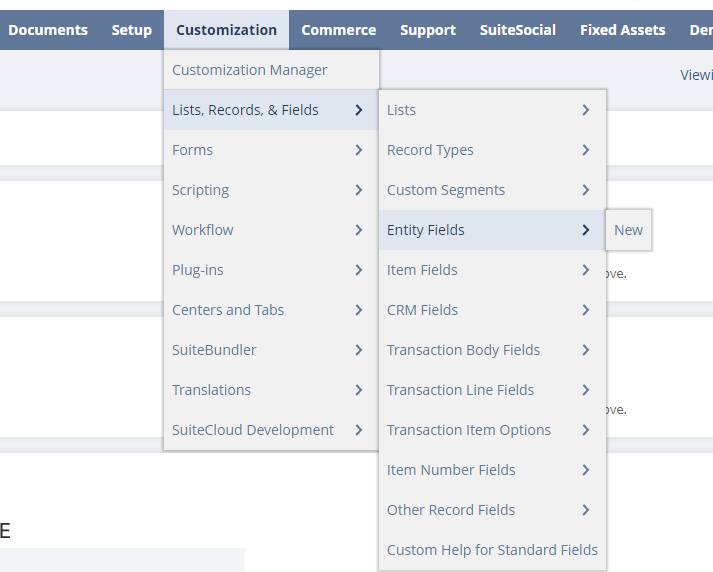
To create a custom field in NetSuite, you can go to Customization > Lists, Records, & Fields > [Entity Fields] > New.
And this will bring up the window below.
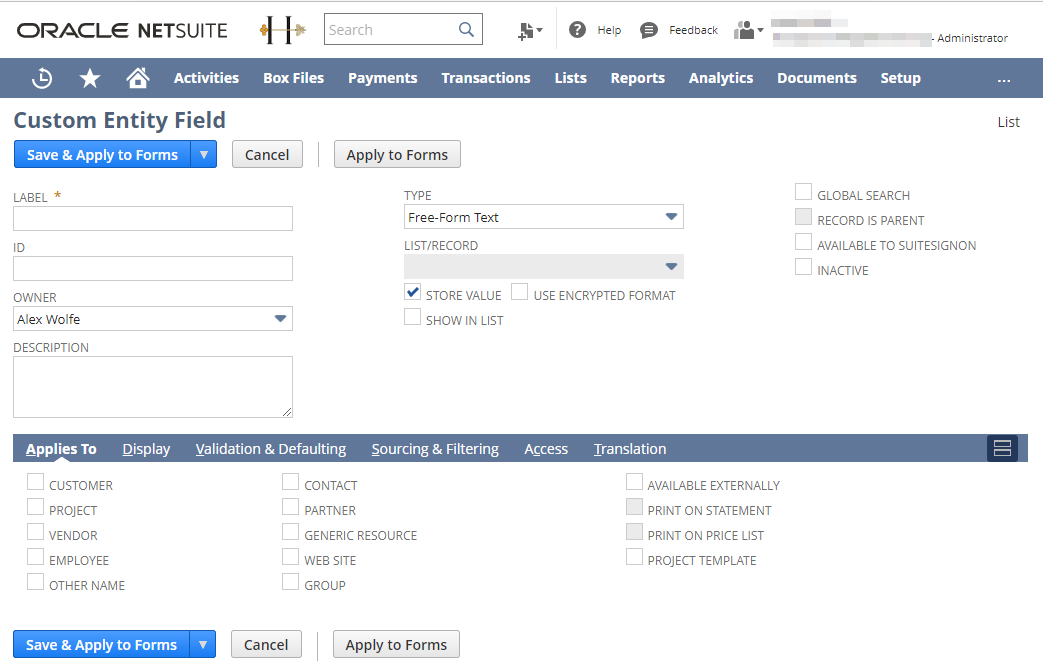
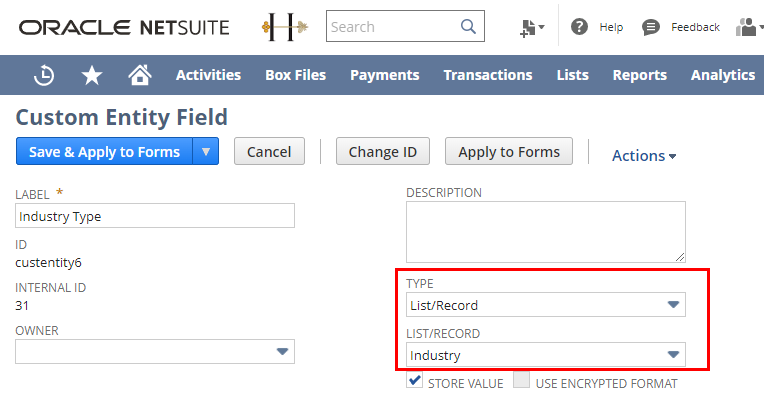
On this page, there are a few properties that should be filled in in order to create a custom field. The following are the required properties for the Custom Entity Field:
- Label: In the Label field, you can enter a name or description for the field. This label will appear in the field for the selected Entity.
- ID: If you do not enter an ID here, NetSuite will automatically assign you an ID. This ID value is the Script ID value of the field.
- Owner: You can select the owner of this custom field from this field. Please note that only the owner can modify this record.
- Type: Select the type which is suitable for the custom field. There are different types in the dropdown menu that you can select of them.
At the bottom of the page, there are different tabs that you would see, like:
- Applies to: In this tab, you will define the entity in which you want to access the custom field which is the necessary item.
- Display: In this tab, you can specify the exact position in the form where the field will be displayed.
- Validation & Defaulting: Validation options are constraints that can be placed on your custom fields to help control the information that is entered in the field. Defaults are values you specify for your custom fields that display automatically when a record or transaction is first created.
- Sourcing & Filtering: Custom fields can get information from another record in your account. The information entered in a custom field depends on the field associated with the record selected in another field within that form. Sourcing improves NetSuite forms by reducing data entry errors and keeping customers and employees up to date.
- Access: You can keep your business information secure by controlling who can access the information in your custom fields. The access you define determines how the field is accessed in both records and search results and reports.
- Translation: If your account has Multilanguage enabled, you can translate custom field labels and field-level help to match the NetSuite user interface language.
You can find more information about the fields in the details from the link below:
After you have set all the configurations, you can click on Save & Apply to Forms to finish creating the custom field.
Recognizing the custom metadata using KingswaySoft components
Now with the custom fields created in the system, we are now ready to use them in the NetSuite SSIS components offered in our SSIS Integration Toolkit for NetSuite product.
In the NetSuite Source/Destination component, after you have select a source or target object is selected, the "Custom Fields" button will become available on the columns page. Clicking the Custom Fields button will launch the "Manage Custom Fields" window, which is a dialog box that allows adding custom fields to the component. There are two different ways to add custom fields, we add them through the auto-detection or otherwise you may add them manually.
Let's show you how Autodetect works first.
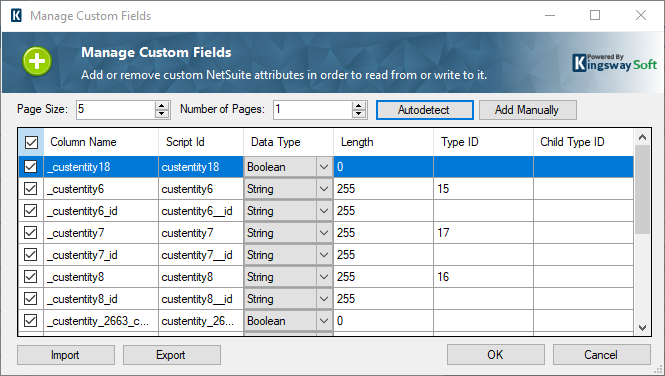
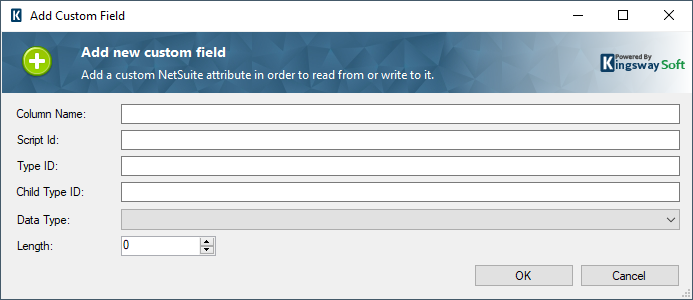
When you use the Autodetect option, the component will try to read a particular number of records from NetSuite using the Page Size and Number of Pages, scan each row in the returned records in order to find out if there are any custom fields available. Once done, it will populate the grid with any custom fields found. In theory, the Autodetection option should be able to automatically detect your custom fields provided that you have records in the system with those custom fields populated. You could increase the Page Size and Number of Pages options to increase the chance (of course it will take longer for the process to complete). However, if the Autodetect option could not detect any custom fields, you can use the Add Manually button to add custom fields manually. When the "Add Manually" button is clicked the "Add new custom field" dialog box will be launched where you can configure the custom field properties.
Find the Script ID and Type ID of the custom field in NetSuite
In the Add Custom Field page shown above, the column name can be set to anything. However, in order to find the ScriptID and TypeID of the custom field, you would go to Customization > Lists, Records, & Fields and click on the type of custom field that you want to find the Script ID for it. On the new page, you will see the list of custom fields and their specifications in which the ID is the ScriptID.
If the custom field is List/Record or Multiple Select type, TypeID is required when specifying the custom field. Given the "custentity6" custom field from the Autodetect screenshot as an example, it has a TypeID of 15. We can see this "custentity6" is a List/Record type field and referenced to the Industry list.
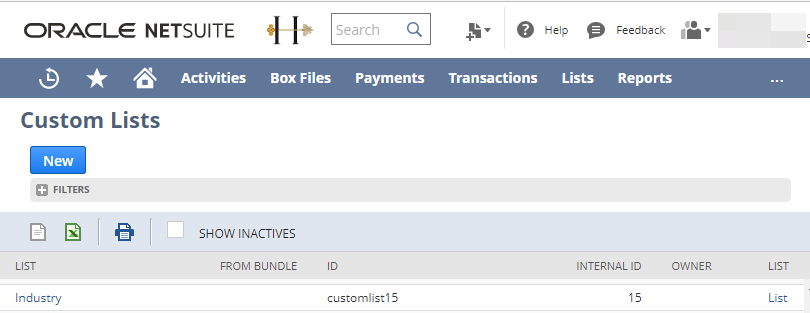
You can get the Industry list's Type ID from Customization > Lists, Records, & Fields > Lists, the list ID value would be the TypeID value of the custom List/Record or Multiple Select field.
And thus, by using the KingswaySoft Netsuite components, as seen above, you can easily add custom fields to the metadata columns page in order to read from them or write to it.
This concludes the blog post, we hope you find this helpful.