Custom fields have some special behaviors in the QuickBooks desktop application, which makes them to some degree difficult to work with if we don't know exactly how to work with them. This can create some substantial challenges for any integration projects that we might be working on. In this blog post, we will explain how to work with custom fields using our SSIS Integration Toolkit for QuickBooks product by giving you some detailed instructions which we hope you may leverage in your integration projects.
Let's get started.
Setup QuickBooks Desktop Gateway and Establish Connection
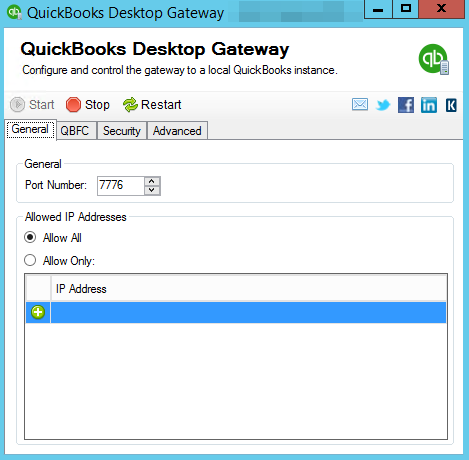
Our first step is to configure the QuickBooks Desktop Gateway which provides an API access to the underlying QuickBooks application which is otherwise not accessible from a different computer or server. QuickBooks desktop gateway is a program shipped with our SSIS Integration Toolkit for QuickBooks product, and it is a required component for us to connect to the application in an SSIS ETL process. In order for the it to work, the QuickBooks Desktop Gateway program has to be installed on the computer where the QuickBooks desktop application is installed and operated on. Once the gateway has been installed, it exposes a set of APIs which provide access to the SSIS components installed on a different development workstation or SSIS runtime server. The following is a screenshot of the gateway program in operation.
Once the QuickBooks Desktop Gateway has been configured and running, we will be moving to our SSIS development environment. From within the Visual Studio (SSDT) environment, we will create a QuickBooks Connection Manager that connects to the desktop gateway in order to facilitate data integration with the QuickBooks desktop application behind the scenes.
Within the connection manager, we would set the Deployment type to Desktop and provide the Service URL and credentials by following the QuickBooks Desktop Gateway setup. The Service URL should have an address in the following format:
- http(s)://<server-name>:<port>
The <port> number in the Service URL is the port number used in the QuickBooks Desktop Gateway.
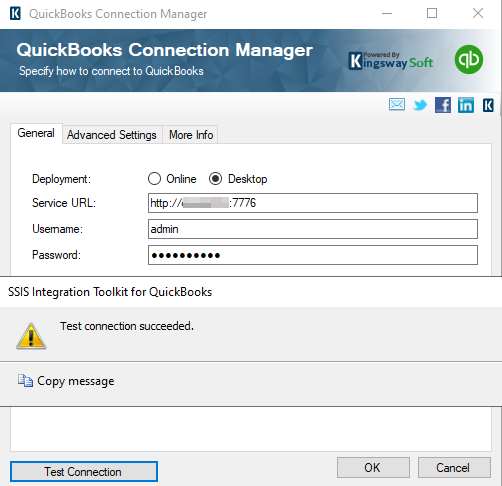
If everything has been set up correctly, clicking the Test Connection button at the bottom left of the editor should return a “Test connection succeeded” message as shown above.
Reading Custom Fields Values
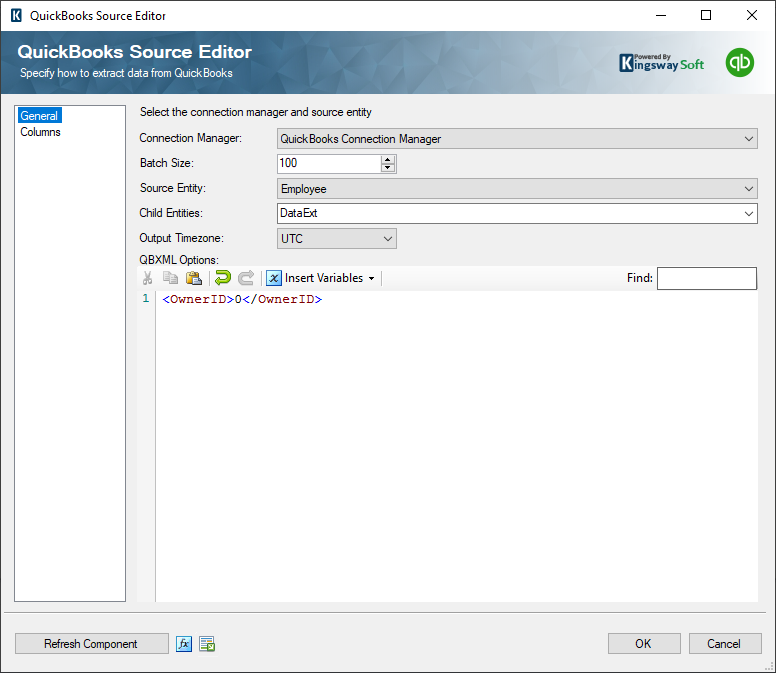
Reading data from QuickBooks is generally accomplished by using the QuickBooks source component shipped in our SSIS Integration Toolkit for QuickBooks product. Custom fields are stored as data extensions in QuickBooks Desktop applications. To retrieve the values of custom fields from an object (such as the list object or transaction object), you would need to enable the DataExt child entity in the QuickBooks source component, and apply an OwnerID filter of 0 in the query. To elaborate a little further, OwnerID of 0 is specifically reserved for custom fields, which is the reason that this query is required in the source component when reading custom field values.
The screenshot below shows a configuration that will retrieve all Employee records along with all Employees’ custom field data:
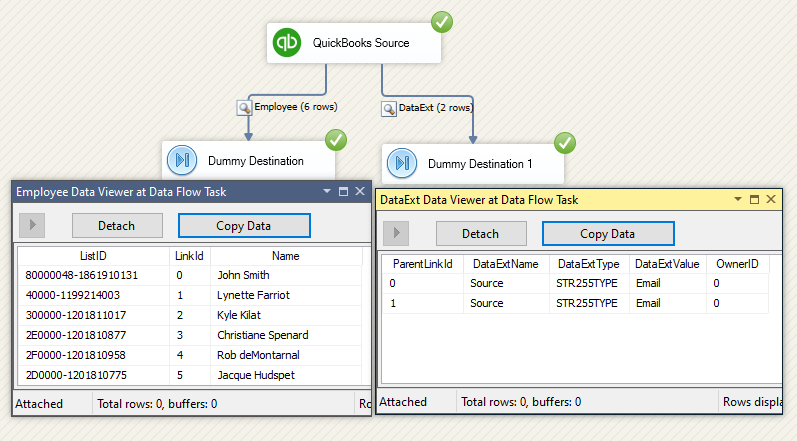
Now, with the OwnerID filter provided, let's setup two dummy destination components that would receive the data from the QuickBooks source component. When doing so, we have enabled the Data Viewer before the two destination components in order to view the data flowing through the SSIS pipeline while debugging the data flow. As shown in the screenshot below, the QuickBooks custom field data is returned in the DataExt child entity output (the data viewer on the right). The DataExt rows can be linked back to the parent Employee rows by the virtual LinkId field and ParentLinkId field, which are made available to the QuickBooks Source component's two outputs.
Writing Custom Fields Values
Now let's talk about the writing. In order to write data to QuickBooks custom fields, we need to work with the DataExt object as well in the QuickBooks Destination component, in which you will find 3 actions available to the DataExt object, including Create, Update and Delete.
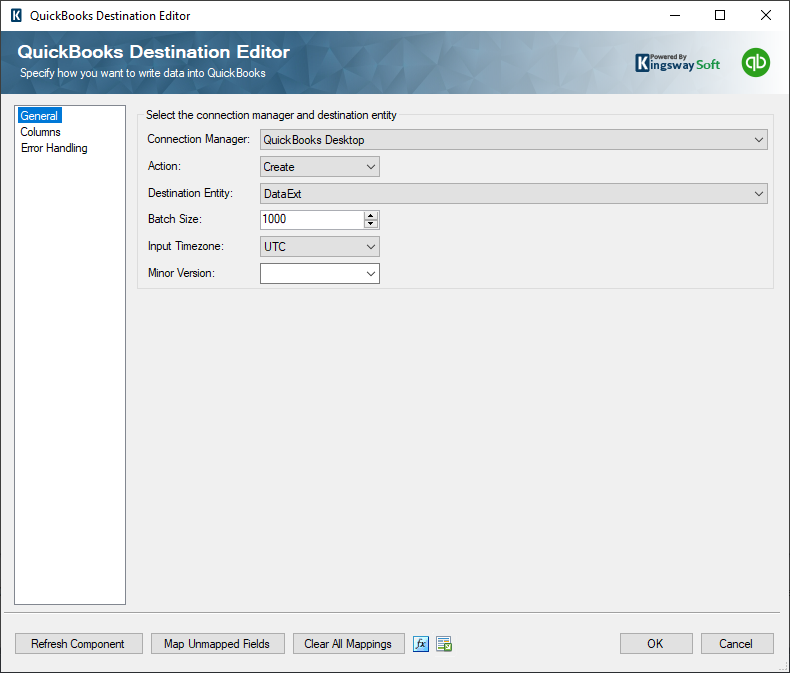
In our case, we will be working with the same custom field under the name of "Source" which we have just discussed in the reading section above and will be adding values to the field in the Employee object. Before we set up the destination component, we use a Premium Derived Column component to generate our hard-coded value, which is "Email", as shown below. Then, it will be added to the Employee record that has an EmployeeId of “40000-1199214003”, this is an Employee record that already exists in QuickBooks.

The screenshot below shows the columns mapping of the QuickBooks Destination component for writing purpose:
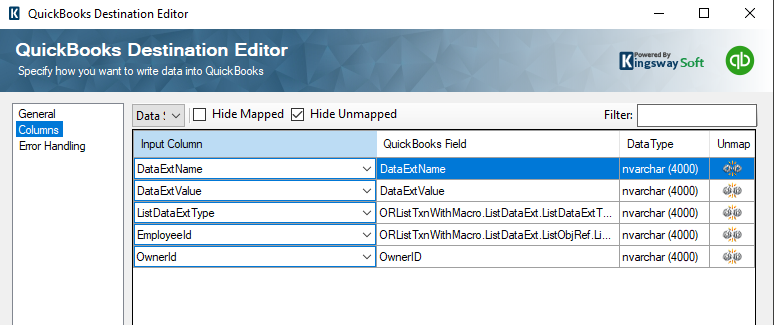
Once we have the destination component properly configured, as shown above, we should be able to run this data flow task. When executed, we will write to the custom field successfully.
Conclusion
In conclusion, working with QuickBooks Desktop data can be extremely easy using the KingswaySoft QuickBooks components without the needs of writing a single line of code. We hope you find this post helpful.

