Using the Azure Functions Destination
The Azure Functions Destination Component can be used to execute Azure Functions using HTTP triggers. The major difference between the Source and Destination components is that the Azure Functions Destination component takes in input values, whereas in the Azure Functions Source component, the input values are static. You can choose the items (Variables or Columns) from the Tree view and drag and drop them to any property field to merge that value at runtime.
It has three pages.
- General
- Columns
- Error Handling
General Page
This page allows you to configure the general settings of the component.
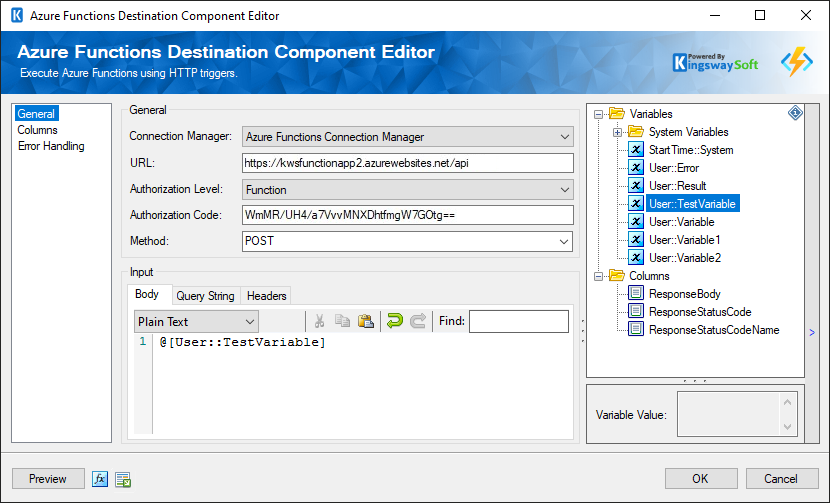
- Connection Manager
-
The Azure Functions Destination Component requires a connection in order to connect the specific Azure Functions. The Connection Manager drop-down will show a list of all connection managers that are available to your current SSIS packages.
- URL
-
The URL specifies the route of the function, and it is usually in the below format:
http://<APP_NAME>.azurewebsites.net/api/<FUNCTION_NAME>
- Authorization Level
-
The Authorization Level controls whether the function requires an API key and which key to use. You can choose from the below three types depending on how it has been specified in the Azure portal for the function.
- Function - Default value. Uses a function key, found in the 'keys' management panel on the portal.
- Admin - Uses your master key, found in the 'keys' management panel on the portal.
- Anonymous - No API key is required.
- Authorization Code
-
The code of the function generated from the Azure portal is to be specified here which goes in the request header.
- Method
-
An array of the HTTP methods to which the function responds. If not specified in the Azure portal, the function responds to all HTTP methods. You can choose from the below:
- DELETE
- GET
- HEAD
- OPTIONS
- PATCH
- POST
- PUT
- TRACE
- Body
-
Specify the values to be in the body of the request. You can choose the Editor pane to accept the below.
- HTML
- JSON
- Plain Text
- SQL
- XML
- Query String
-
The Query String values can be specified here. You can click on the “+” button to add the Query String Name and the Query String Value.
- Headers
-
Specify any header values to go with the request. You can click on the “+” button to add the Header Name and the Header Value
- Preview Button
-
The preview button launches the Preview dialog which will send the first request based on the current settings of the component, and show a preview of the response. You can execute the function with the button “Execute Function” and get the response in the second window.
- Expression fx Icon
-
Click the blue fx icon to launch SSIS Expression Editor to enable dynamic updates of the property at run time.
- Generate Documentation Icon
- Click the Generate Documentation icon to generate a Word document that describes the component's metadata including relevant mapping, and so on.
Columns Page
The Columns page of the Azure Functions Destination Component shows you the available columns based on the settings on the Document Designer page.
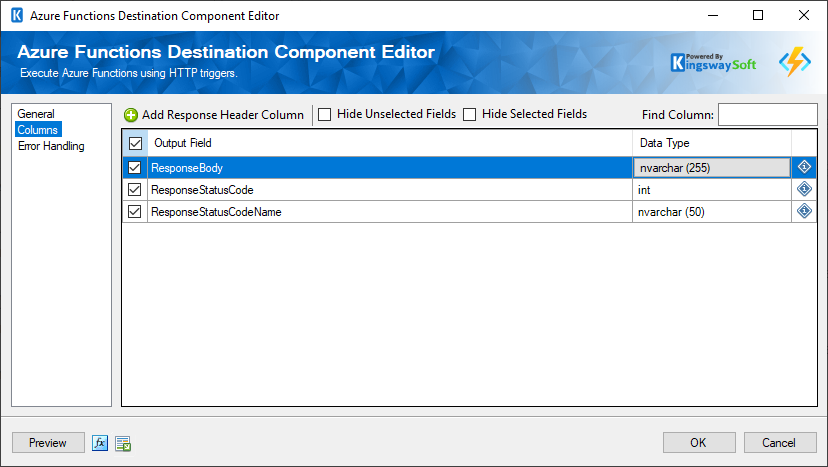
In the Grid, there are two columns that determine the output from the component.
- Output Field - The Output fields that are available from the Source component.
- Data Type - The datatype details of the output field. You click on the field to toggle it between nvarchar, ntext or image, depending on how you need the output.
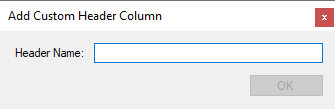
- Add Response Header Column
-
This button can be used to add a response header column that will be received in the responses.
- Hide Unselected Fields
- When the Hide Unselected Fields checkbox is checked unselected output columns will be hidden.
- Hide Selected Fields
- When the Hide Selected Fields checkbox is checked used selected columns will be hidden.
Error Handling Page
This page allows you to specify how errors should be handled when they happen along with the name of the output column.
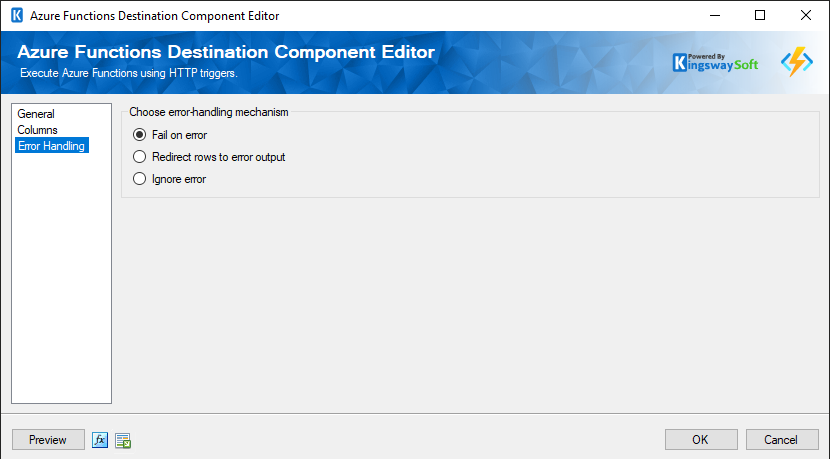
Error Handling has three options available.
- Fail on error
- Redirect rows to error output
- Ignore error
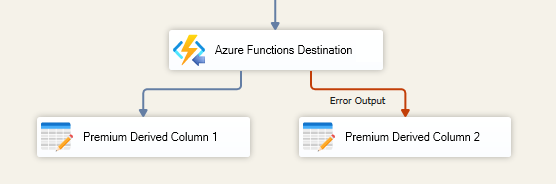
When the Redirect rows to error output option is selected, rows that failed to be sent will be redirected to the 'Error Output' output of the Transformation Component. As indicated in the screenshot below, the blue output connection represents rows that were successfully sent, and the red 'Error Output' connection represents rows that were erroneous. The 'ErrorMessage' output column found in the 'Error Output' may contain the error message that was reported by the component.