Using the AS2 Connection Manager
Web Service comes with an SSIS connection manager component that can be used to establish AS2 Connections.
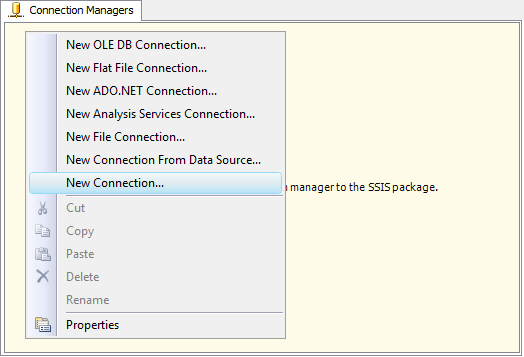
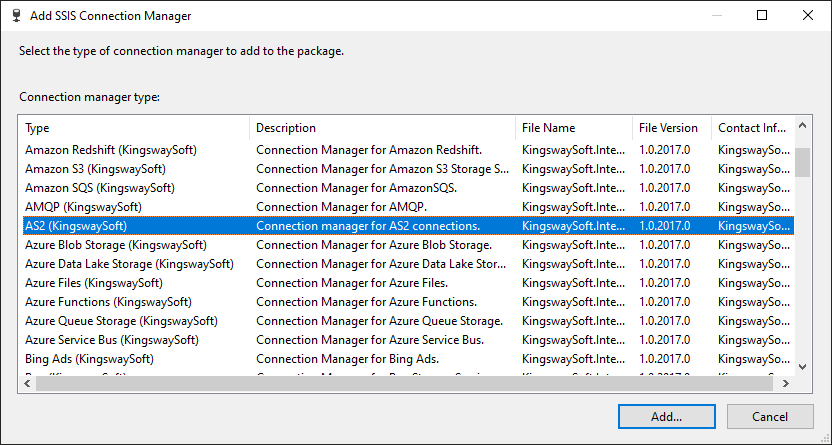
To add a connection to your SSIS package, right-click the Connection Manager area in your Visual Studio project, and choose "New Connection..." from the context menu. You will be prompted the "Add SSIS Connection Manager" window. Select the "AS2 Connection Manager (KingswaySoft)" item to add the new connection manager.
It is worth noting that AS2 connection is essentially an HTTP connection with additional security features added, which help provide a more secured communication over the public network (or even private network). There is usually a mutually agreed configuration between you and your vendor/partner. Most often, it is your vendor or partner who would dictate those AS2 configurations that will be covered below.
The AS2 Connection Manager contains the following five pages to connect to the HTTP server.
- General
- Authentication
- AS2 Settings
- Proxy Settings
- Advanced Settings
In this page, we will only cover those options on the AS2 Settings page.
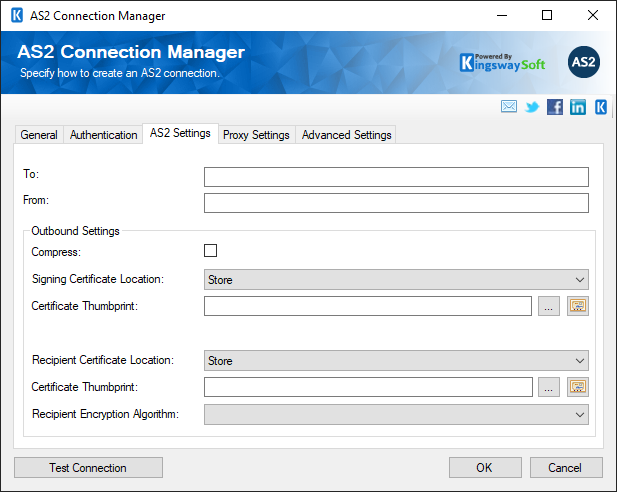
AS2 Settings Page
The AS2 Settings Page can be used to specify the settings for the AS2 connection.
Note that you would typically receive such information from your vendor/partner who has the AS2 communication requirement. As we previously mentioned, when AS2 is required, your vendor or partner would usually have an established practice in place, in which case they would typically provide the information below. Most importantly, they would share two certificates with you for the configurations below.
- To
-
The To field can be used to specify the address of the recipient. This is generally optional, and the information will be sent in the AS2-To HTTP header if provided.
- From
-
The From field can be used to specify the Address of the sender. This is generally optional as well, and the information will be sent in the AS2-To HTTP header if provided.
- Outbound Settings
-
- Compress
-
Check this field to enable compression.
- Signing Certificate Location
-
The certificate location can be either of the below.
- Store
- File System
- Path to Certificate
-
Provide the path to the certificate file to use for authentication. Click the ellipses button to browse their file system for the certificate. This option is available when you choose File System as Certificate Location.
- Signing Certificate Password
-
Provide the password to the certificate file. This option is available when you choose File System as the Certificate Location.
- Certificate Thumbprint
-
This option allows you to specify the thumbprint of the selected certificate in order to authenticate using your Google Service Account.
- Recipient Certificate Location
-
The certificate location can be either of the below.
- Store
- File System
- Path to Certificate
-
Provide the path to the certificate file to use for authentication. Click the ellipses button to browse their file system for the certificate. This option is available when you choose File System as Certificate Location.
- Certificate Thumbprint
-
This option allows you to specify the thumbprint of the selected certificate in order to authenticate using your Google Service Account.
- Recipient Encryption Algorithm
-
The following encryption algorithms are supported, which can be chosen from the drop-down list.
- RC2/40
- RC2/64
- RC2/128
- DES
- TripleDES
- AES/128
- AES/192
- AES/256
- RC4/40
- RC4/64
- RC4/128
Additional AS2 HTTP Connection Configurations
As mentioned, AS2 server is essentially an HTTP server with some specific AS2 configurations required which are covered above. For the rest connection configurations, including the General, Authentication, Proxy Settings, and Advanced Settings pages, you may refer to the HTTP Connection Manager documentation.