Modern Salesforce integration trends often prioritize Platform Events and Flow HTTP Callouts for outbound data processing. However, for mission-critical data provisioning and synchronization, the "reliable veteran" of the ecosystem, Salesforce Outbound Messages, remains one of the most effective tools available.
Functioning as a native, declarative webhook, Outbound Messages allow you to push record data to external services using a fully UI-based approach. When specific criteria are met on a record (e.g., a Contact or Account update), Salesforce automatically packages the data into a secure SOAP message and posts it to your endpoint. By leveraging a robust listener like the KingswaySoft Integration Gateway, you can seamlessly translate these XML payloads into actionable data, creating a resilient, zero-code bridge between Salesforce and your external systems.
Before we get started, let's have a quick review of why you should choose Salesforce Outbound Messages. The following are the main advantages that we have noticed:
- Native Retry Logic: If your listener is temporarily unavailable, Salesforce automatically retries delivery for up to 24 hours.
- Zero Coding Implementation: The entire configuration is handled via the Salesforce UI.
- Asynchronous Processing: Integration logic runs in the background, ensuring no latency for the end-user.
- Automatic Data Packaging: No need to manually construct complex SOAP/XML envelopes.
In this blog post, we'll see how Salesforce Outbound Messages can be set up to construct and send a SOAP/XML payload to an external system, and how to associate the Outbound Message with a workflow rule to make it conditional and event-driven. And we shall also see how KingswaySoft Integration Gateway can handle these messages as Inbound Webhooks.
Let's get started.
Step 1: Setting up KingswaySoft Integration Gateway
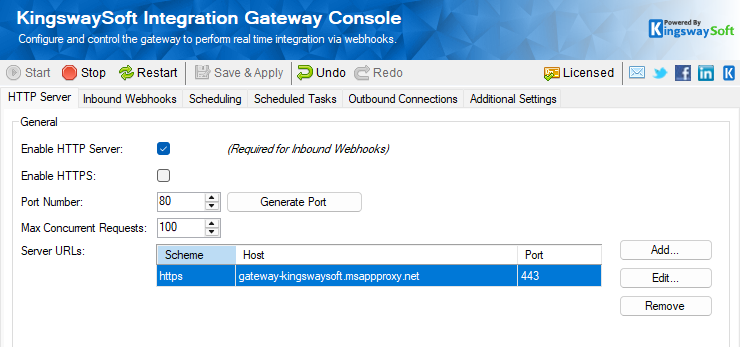
Integration Gateway functions as a high-performance entry point for HTTP requests from external webhook interfaces. By intercepting these incoming messages and immediately publishing them to a dedicated message queue or another supported connection, it decouples the initial request from the downstream processing logic, ensuring low-latency, real-time integration. In order for it to work with Salesforce Outbound Messages, you would need to make sure that the gateway is accessible from a public network. This can be done using a reverse proxy (such as an Azure application proxy) if the gateway operates inside your internal network. The goal is to make sure that the Salesforce Outbound Messages can reach the public-facing URL to send the payload to, whenever the workflow triggers the messages. Once you have the public-facing URL ready, you could configure it in the Integration Gateway as shown below. Click on the "Add" button next to the Server URLs and enter the host and port. In our example, we use an Azure application proxy.
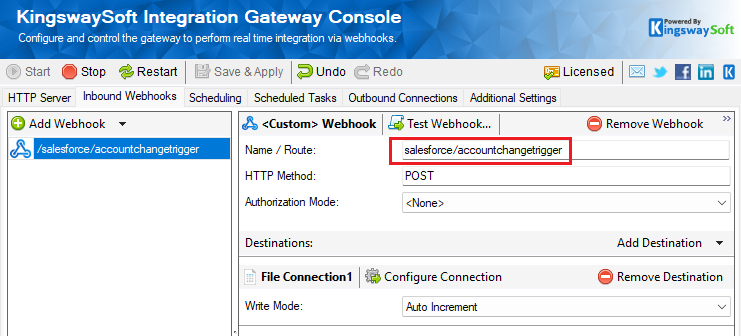
Once this is done, we can navigate to the Inbound Webhooks tab in the Integration Gateway and add a custom webhook by clicking on the "Add Webhook" dropdown. In here, provide a name for the webhook. We gave it a Salesforce root name so that it distinguishes itself from other services that might coexist in your gateway.
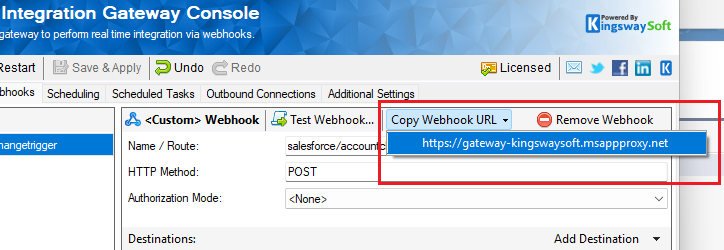
The Name/route can be any name since this would be appended to the Webhook URL, which we will be using on the Salesforce side in the upcoming sections. To generate the Webhook URL easily, click on "Copy Webhook URL" and select the URL that gets generated. Even though this displays only the Server URL, it will hold the relative path to the Webhook name you had provided.
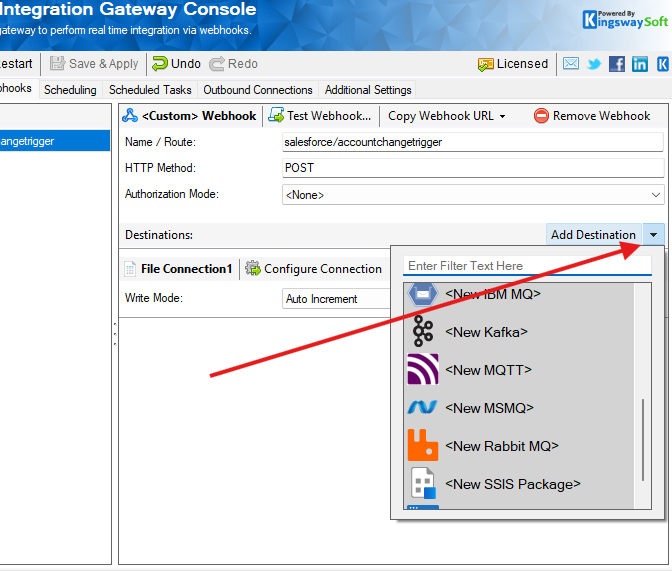
Now, you could add a destinationoutbound connection based on how you wish to handle the SOAP payload received. Integration Gateway supports a number of outbound connections. You can relay the message to a message queue, write to an SSIS package variable, or even as simple as write to a file.
Let's move over to Salesforce to see how we can set up an event-driven logic.
Step 2: Configuring Outbound Messages and Workflow Rules in Salesforce
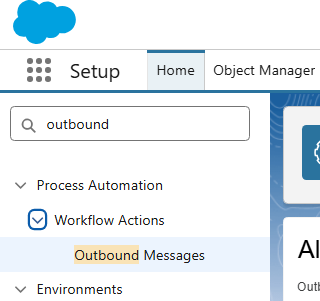
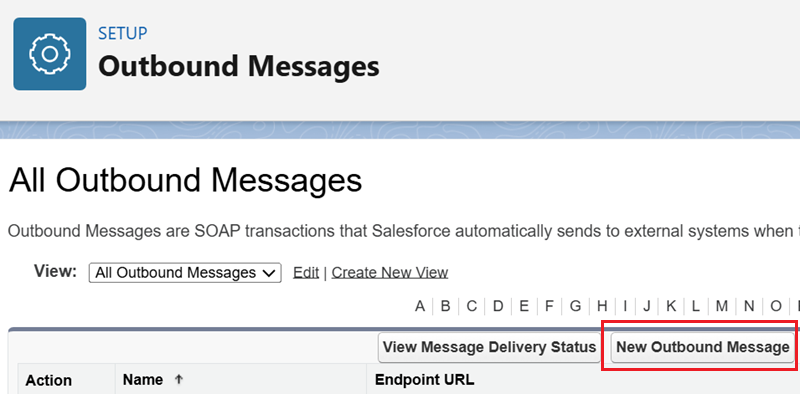
In your Salesforce instance, under Quick Find, you can search for Outbound Messages to get to it. Once on the page, click on "New Outbound Message" to create a new one.
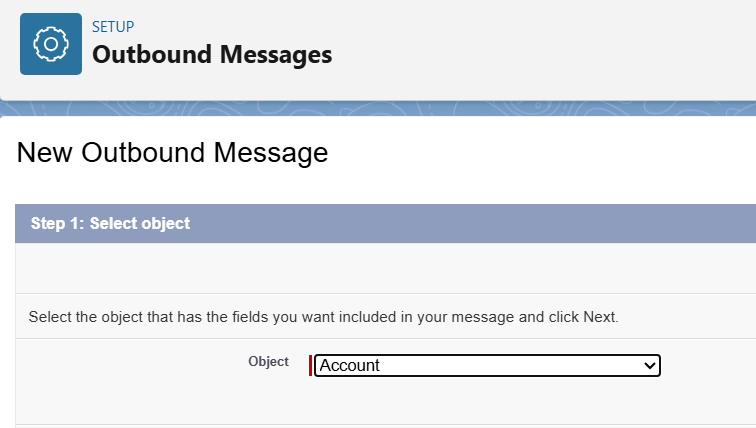
The first step in creating an Outbound Message is to choose the object it would be associated with. You can choose any of the out-of-the-box or custom objects available. In our example, we select the Account object.
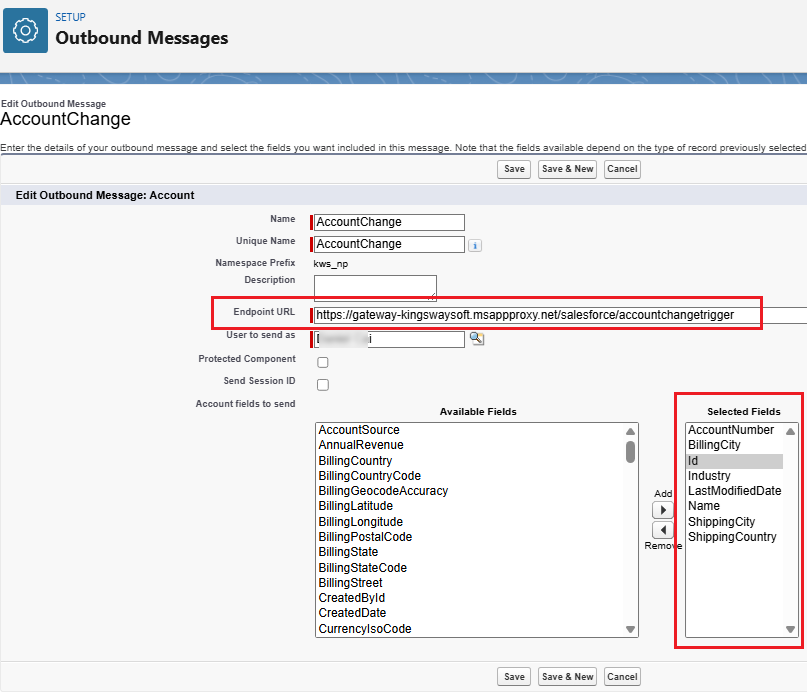
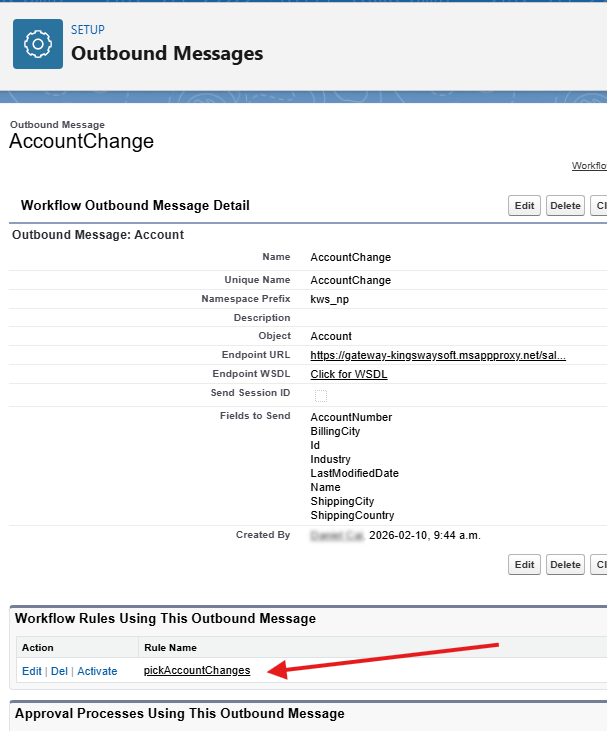
On the next page, you could provide a name for the Outbound Message, and in the Endpoint URL option, you would enter the Webhook URL that you had copied from the Integration Gateway from the previous section. In the Available Fields/Selected Fields section, you can choose the fields/metadata that you wish to include in your payload. This can be out of the box or custom fields that are available to pick.
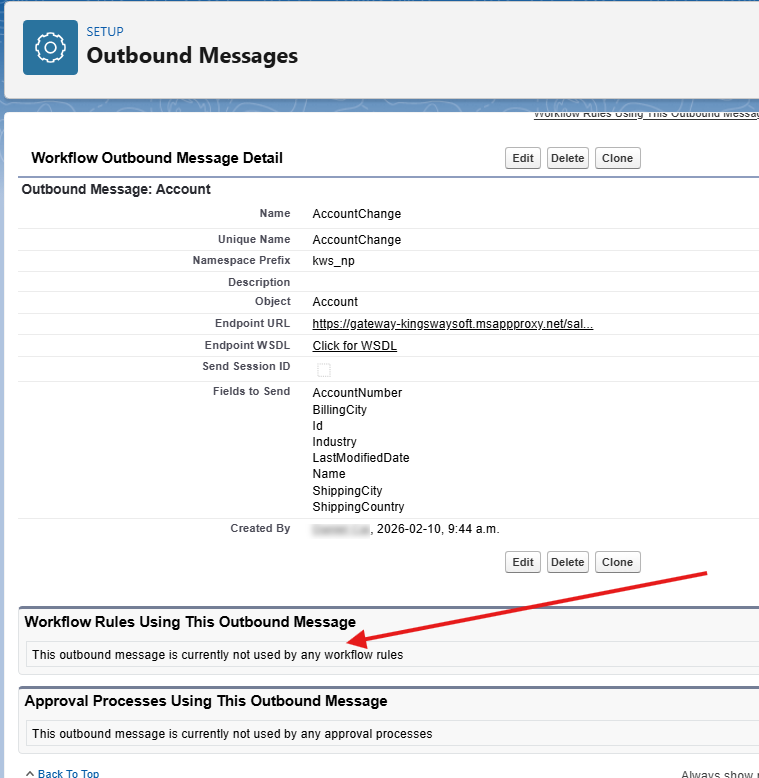
Save the configuration, and you should see a summary of the options you have chosen. Now, in order for the Outbound Message to send the payload, we need to create a Workflow rule that will be used for evaluation purposes. For this, unfortunately, Salesforce does not provide a direct link from Outbound Messages.
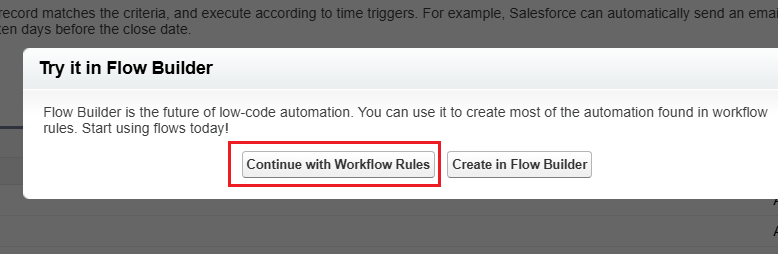
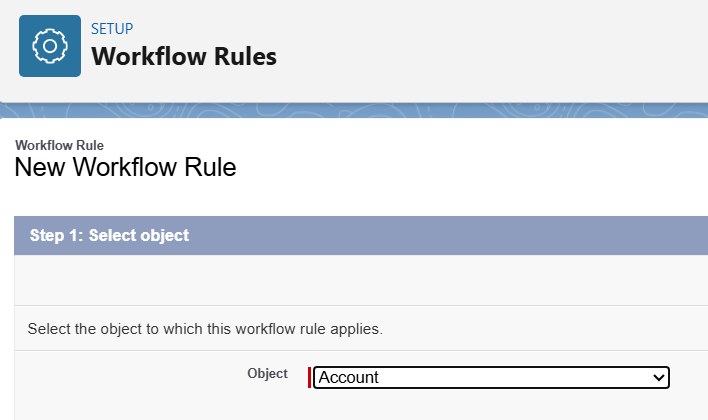
So once again, you can use Quick Find to search for Workflow Rules. Click on "New Rule", and in the pop-up that shows up, select "Continue With Workflow Rule". Then, in the New Workflow Rule page, choose the object. Here, in our example, we select the same Account object since we are going to set a rule to capture specific changes to the Account records.
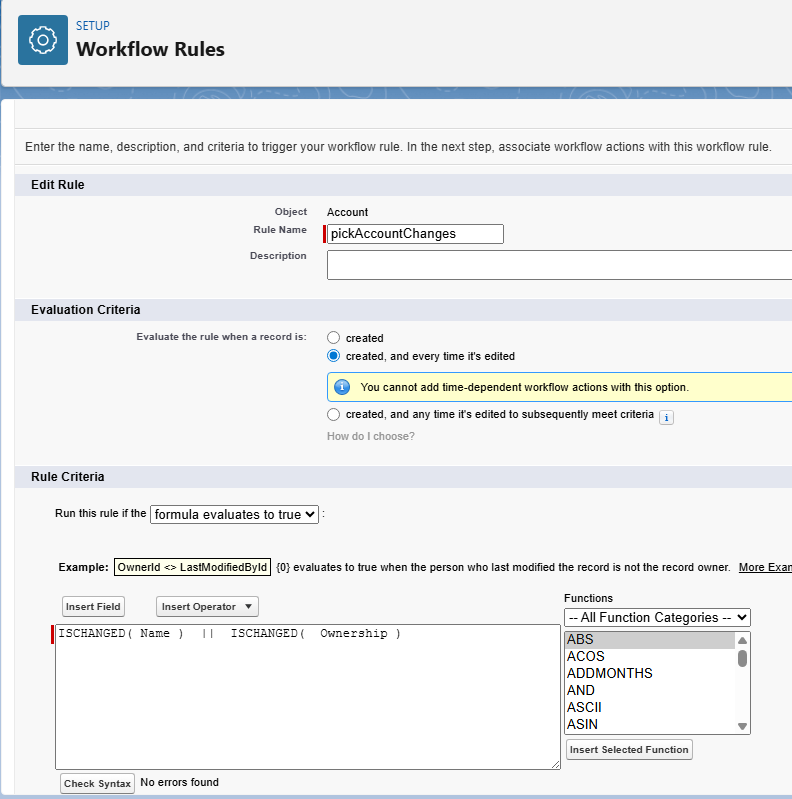
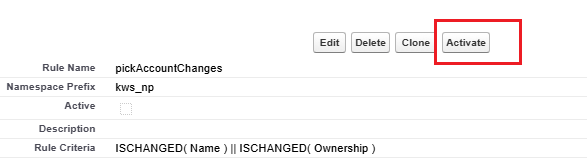
Provide a name for the rule, and select the Evaluation Criteria and Rule Criteria. In our example, we are setting the Evaluation for every record created, or every time it's edited and saved. The Rule would be to evaluate to True if Name (AccountName) or Ownership has changed (For edited records). The grid under Rule Criteria would allow you to pick and drop fields, operators, and functions, and also to check syntax to see if it evaluates syntactically. Note that you could even provide an expression such as "1==1" for all changes to be evaluated to True.
Once this is done, you would need to add an action to the workflow, and from the list, choose "Select Existing Action". This will allow you to pick the Outbound Message you had created in the previous step.


The final step would be to activate the Workflow Rule, which can be done by clicking on the "Activate" button. Please note that this step is required for the rule to function as expected.
After this, if you look at your Outbound Messages again, you will see that the new workflow rule you just created has been added to it.
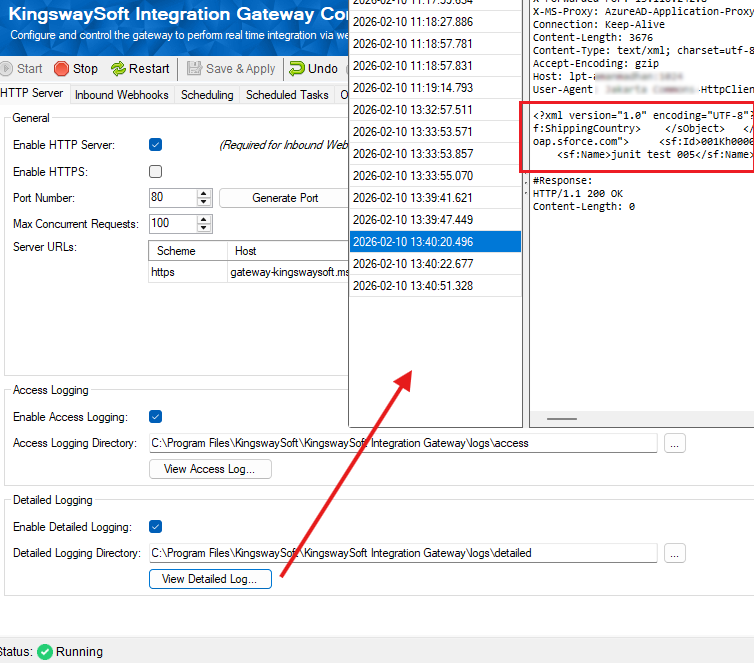
With this setup, you are now ready to capture the changes. Back in the Integration Gateway, you could Save and Start the console. When an Account record is created, or if the Account name is edited, the following chain of events occurs:
- The Workflow rule would be evaluated.
- A SOAP payload will be sent to the Endpoint URL by the Outbound Message.
- And this, in turn, will be captured by the Integration Gateway and passed onto the Outbound connection configured in the Gateway console.
You could monitor this by using the Detailed Log in the "HTTP Server" page of the Integration Gateway Console, as shown below. The XML body highlighted is the data payload, which contains the metadata we had selected while creating the Outbound Message.
Conclusion
As demonstrated above, Salesforce Outbound Messages are a reliable way to achieve a zero-code, real-time approach to capture event-driven changes and sync/send them to external systems. Using KingswaySoft's Integration Gateway allows you to effectively handle these payloads and send them to your desired destinations. This makes your configuration completely lightweight and free from any need to write code to perform any type of data provisioning or synchronization.
We hope this has helped!