Using the Project Server Destination Component
The Project Server Destination Component is an SSIS data flow pipeline component that can be used to write data to Project Server. You can Create, Update, Upsert, Delete, and Publish objects with this component. There are three configuration pages:
- General
- Columns
- Error Handling
The General page is used to specify general settings for the Project Server Destination Component. The Columns page allows you to map the columns from upstream components to Project Server fields in the destination object. The Error Handling page allows you to specify how errors should be handled when they occur.
General Page
The General page allows you to specify general settings for the component.
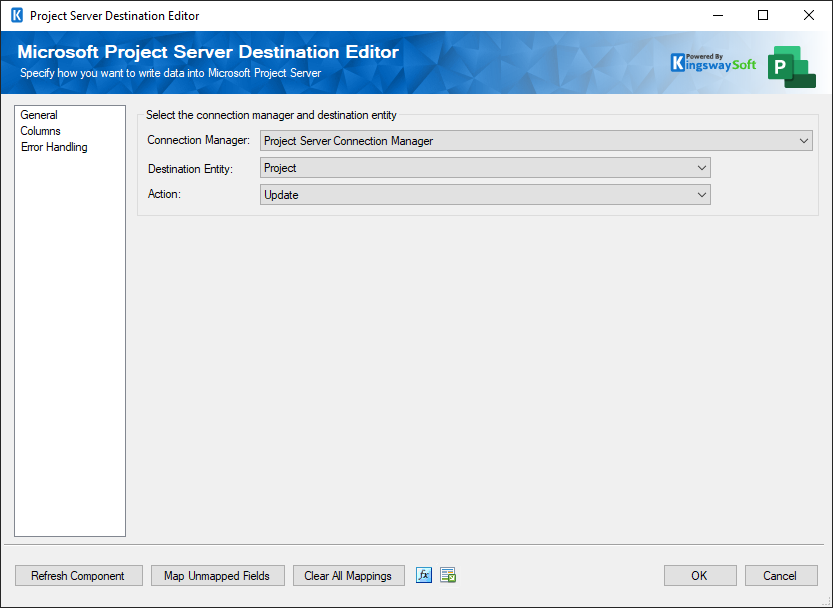
- Project Server Connection Manager
-
The Project Server Destination Component requires a Project Server connection. The Project Connection Manager option will show all Project Manager connection managers that have been created in the current SSIS package or project.
- Destination Entity
-
The Destination Entity allows you to specify the Project Server entity to write to.
- Action
-
The Action option allows you to specify how data should be written to Microsoft Project Server. The following are currently supported:
- Create: Create new record(s)
- Update:Update record(s)
-
Upsert: Update record(s) if the entity exists, otherwise create new record(s).
- Project: PROJ_UID field is required
-
Task:
PROJ_UID and
Id fields are required
- The Id field is the Task's GUID key.
- Resource: RES_UID field is required
- Timesheet: TS_UID field is required
- TimesheetLine: TS_UID and TASK_UID fields are required
- Project: PROJ_UID field is required
- Delete: Delete record(s)
-
Publish: Publish record(s)
- Available with the Project Entity - required field is PROJ_UID
- Refresh Component Button
-
Clicking the Refresh Component button causes the component to retrieve the latest metadata and update each attribute to its most recent metadata.
- Map Unmapped Fields Button
-
By clicking this button, the component will try to map any unmapped Project Server attributes by matching their names with the input columns from upstream components. This is useful when your source component has recently added more columns, in which case you can use this button to automatically establish the association between input columns and unmapped destination attributes.
- Clear All Mappings Button
-
By clicking this button, the component will reset all your mappings in the destination component.
Columns Page
The Columns page of the Project Server Destination Component allows you to map the columns from upstream components to the Project Server destination fields.
In the Columns page, you would see a grid that contains four columns, as shown below.
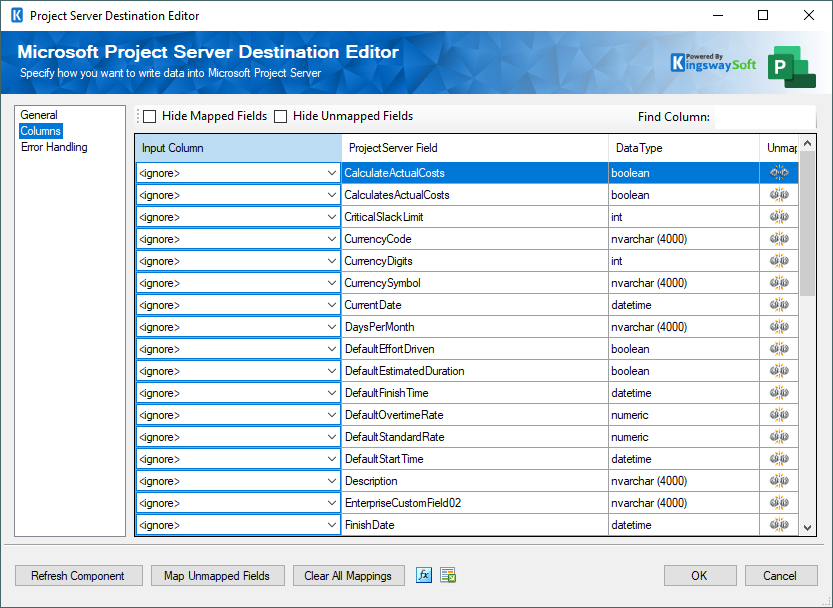
- Input Column: You can select an input column from an upstream component for the corresponding Project Server field.
- ProjectServer Field: The Project Server field where you are writing data.
- Data Type: This column indicates the type of value for the current field.
- Unmap: This column can be used to unmap the field from the upstream input column, or otherwise it can be used to map the field to an upstream input column by matching its name if the field is not currently mapped.
- Implicit Text Lookup
- For system and custom Lookup Fields, you would map the label values to this field. If the Input Column label value does not already exist as an option, the Destination Component will add this value to the field.
Error Handling Page
The Error Handling page allows you to specify how errors should be handled when they happen.
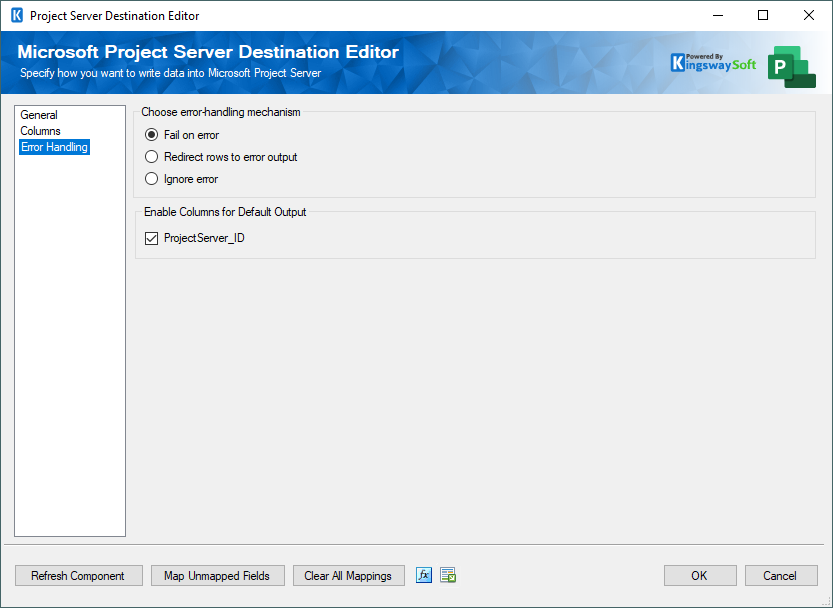
There are three options available:
- Fail on error
- Redirect rows to error output
- Ignore error
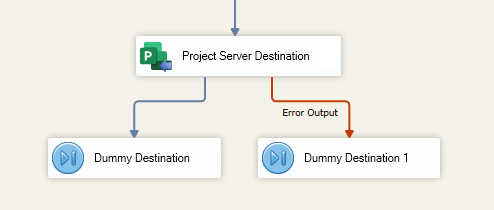
When the Redirect rows to error output option is selected, rows that failed to write to Project Server will be redirected to the 'Error Output' output of the Destination Component. As indicated in the screenshot below, the green output connection represents rows that were successfully written, and the red 'Error Output' connection represents erroneous rows. The 'ErrorMessage' output column found in the 'Error Output' may contain the error message that was reported by Project Server or the component itself.
In the Error Output, you can see the following columns:
- ErrorCode: Contains the error code that is reported by Project Server or the component itself
- ErrorColumn: Contains the name of the column that is causing the error. Note that this column is not always populated
- ErrorMessage: Contains the error message that is reported by Project Server or the component itself
Note: Use extra caution when selecting the Ignore error option, since the component will remain silent for any errors that have occurred.
On the Error Handling page, there is also an option that can be used to enable or disable the following output field for the destination component.
- ProjectServer_ID: Contains the newly created Project Server record's ID, which you can use to write to a log or further process using additional data flow components.