Assigning Permissions
Once authorized, the Oracle Marketing Cloud Connection Manager retrieves tokens from the Oracle Marketing Cloud app. These tokens are then stored in the Registry so that once they have expired, our component will automatically request new tokens from Oracle Marketing Cloud to minimize user effort. Existing tokens in the Registry will be replaced with new ones. In order to achieve this, proper permissions must be given to the KingswaySoft folder in the Registry.
Start by opening the Registry Editor, and navigate to the following folder:
- HKEY_LOCAL_MACHINE > SOFTWARE > KingswaySoft > SSIS Integration Toolkit for Oracle Marketing Cloud

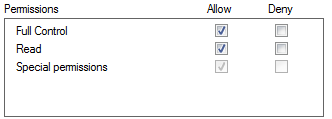
- Right-click on the SSIS Integration Toolkit for Oracle Marketing Cloud folder in the KingswaySoft folder and select the Permissions option. Enable the following permissions to give yourself permission to modify this folder.
Using the Oracle Marketing Cloud Connection Manager
The Oracle Marketing Cloud Connection Manager is an SSIS connection manager component that can be used to establish connections with Oracle Marketing Cloud.
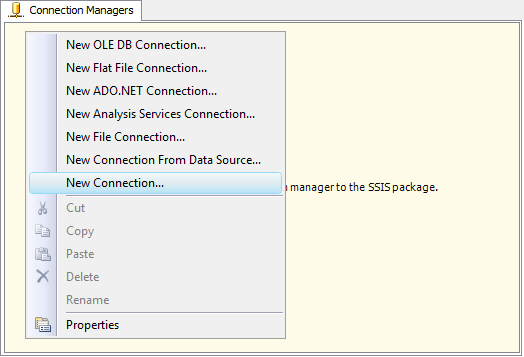
To add an Oracle Marketing Cloud connection to your SSIS package, right-click the Connection Manager area in your Visual Studio project, and choose "New Connection..." from the context menu.
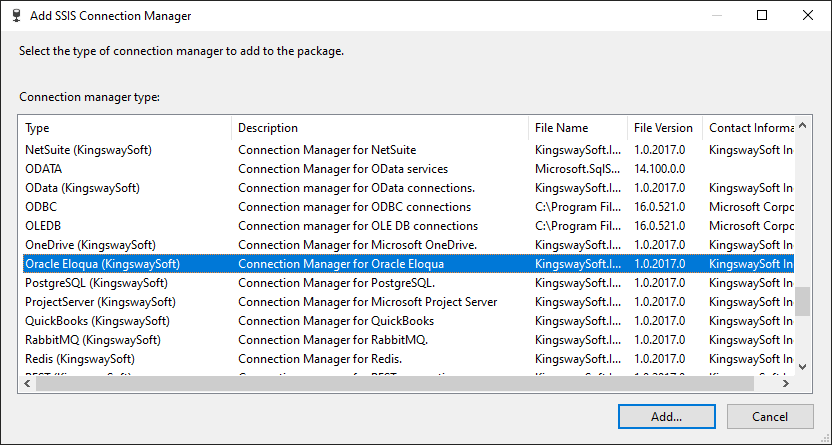
You will be prompted with the "Add SSIS Connection Manager" window. Select the "Oracle Marketing Cloud" type to add the new Oracle Marketing Cloud Connection Manager.
The Oracle Marketing Connection Manager contains the following three pages which configure how you want to connect to Oracle Marketing Cloud:
- General
- Advanced Settings
- More Info
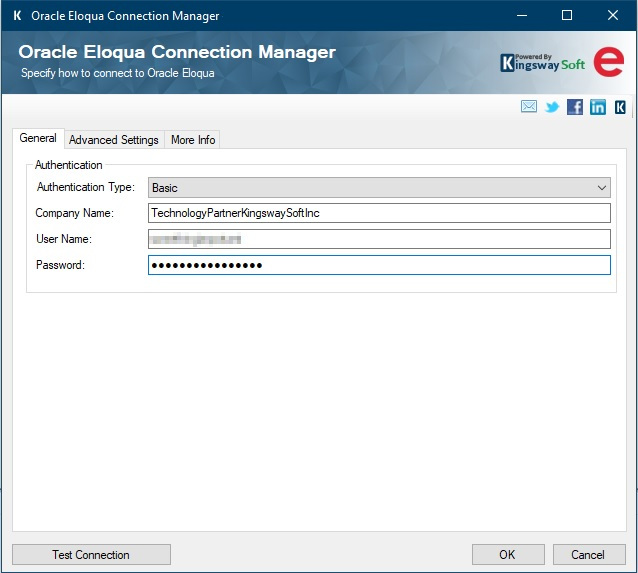
General Page
The General page on the Connection Manager allows you to specify general settings for the connection.
- Authentication
-
- Authentication Type
-
Oracle Marketing Cloud supports two types of authentication: Basic and OAuth2. Basic authentication is faster to set up but is considered less secure than OAuth2.
- Basic Authentication
-
Basic authentication for Oracle Marketing Cloud requires the following three properties:
- Company Name: The company name associated with the Oracle Marketing Cloud account
- User Name: The user name of your Oracle Marketing Cloud account
- Password: The password of your Oracle Marketing Cloud account
- OAuth2 Authentication
-
This option enables the component to work with a token file.
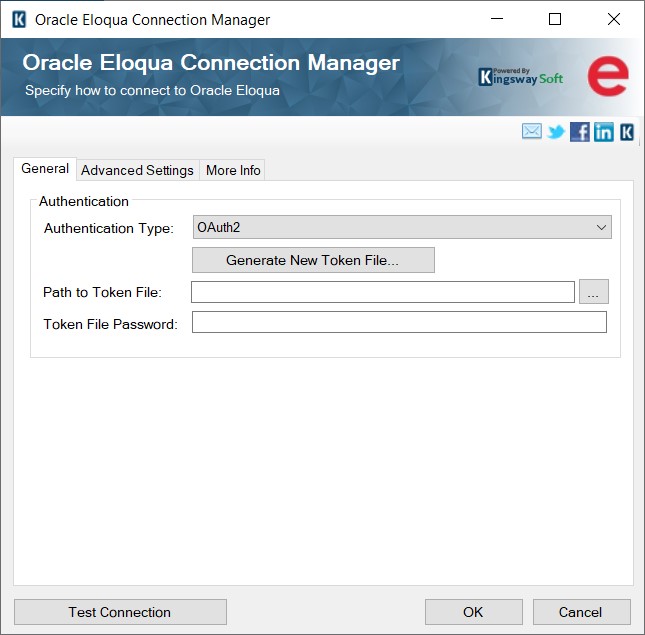
- Generate New Token File
-
This type of Authentication would require a token file generated using this button.
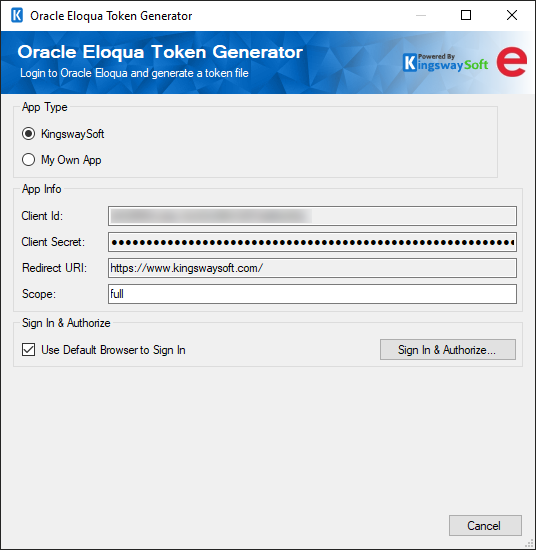
- App Type
-
- KingswaySoft: The Connection Manager will use the Client Id and Secret that is provided by KingswaySoft for your convenience when setting up the connection.
- My Own App: Selecting this option will allow you to use your own Client ID and Secret to connect to Oracle Marketing Cloud.
- App Info
-
- Client ID: The Client Id option allows you to specify the unique ID which identifies the application making the request.
- Client Secret: The Client Secret option allows you to specify the client secret belonging to your app.
- Redirect URI: The Redirect URI option allows you to specify the reply URL which was assigned to your app.
- Sign In & Authorize
-
- Use Default Browser to Sign In: When this option is checked the Sign In and Authorize button will open your default web browser in order to complete the OAuth2 authentication. When this option is unchecked, the Sign In and Authorize button will complete the entire OAuth2 authentication process inside of the toolkit.
- Sign In and Authorize: This button allows you to log in to the service endpoint and authorize your app to generate a token.
- Token File
-
- Password: This option allows you to assign a new password for the token file which will be created.
- Save To Token File: This option allows you to specify the location of where the token file will be saved.
- Path to Token File
-
This option allows you to specify the path to the token file on the file system. Now, you can work with the SAS URL as well, for the token file path.
- Token File Password
-
This option allows you to specify the password of the selected token file.
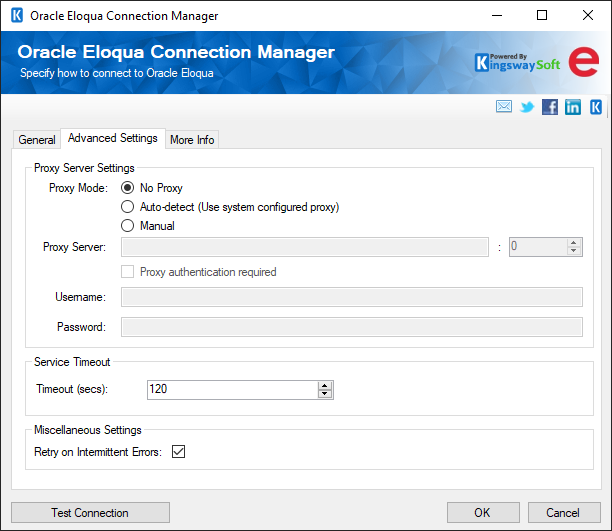
Advanced Settings Page
The Advanced Settings page on the Marketing Cloud Connection Manager allows you to specify some advanced and optional settings for the connection.
- Proxy Server Settings
-
- Proxy Mode
-
The Proxy Mode option allows you to specify how you want to configure the proxy server settings. There are three options available.
- No Proxy
- Auto-detect (using system-configured proxy)
- Manual
- Proxy Server
-
Using the Proxy Server option, provide a proxy server to connect to Oracle Marketing Cloud.
- Port
-
The Port option allows you to specify the port number of the proxy server for the connection.
- Username
-
The Username option allows you to specify the proxy user account.
- Password
-
Using the Password option (under Proxy Server Authentication) allows you to specify the proxy user's password.
Note: The Proxy Password is not included in the Oracle Marketing Cloud connection manager's ConnectionString property by default. This is done by design for security reasons. However, you can include it in your ConnectionString if you want to parameterize your connection manager. The format would be ProxyPassword=myProxyPassword; (make sure you have a semicolon as the last character). It can be anywhere in the ConnectionString.
- Service Timeout
-
- Timeout (secs)
-
The Timeout (secs) option allows you to specify a timeout value in seconds for the connection. The default value is 120 seconds.
- Miscellaneous Settings
-
- Retry on Intermittent Errors
-
This is an option designed to help recover from possible intermittent outages or disruption of service so the integration does not have to be stopped because of such temporary issues. Enabling this option will allow service calls to be retried upon certain types of failure. A service call may be retried up to 3 times before an exception is fired. Retries occur after 0 seconds, 15 seconds, and 60 seconds. Warning: Although we have carefully designed this feature so that such retries should only happen when it is deemed to be safe to do so. However, in some extreme occasions, such retried service calls could result in the creation of duplicate data.
- Test Connection
- After all the connection information has been provided, you may click the Test Connection button to test if the connection settings entered are valid.
More Info Page
The More Info page shows some basic information about the toolkit. On this page, you can find the version information of the toolkit.
Adding SSIS Components to Business Intelligence Development Studio's Toolbox
SSIS Integration Toolkit for Oracle Marketing Cloud includes two data flow components for use with Oracle Marketing Cloud. They need to be added to the SSIS toolbox before you can use them in an SSIS data flow task.
Note: If you are using SQL Server 2014 or later development environment, you should not need to do this, as SQL Server 2014 or later automatically lists all available pipeline components by scanning the system.
To add the data flow components, create a new data flow task if you do not have one yet and switch to the SSIS data flow page. Right-click on the toolbox area to bring up the context menu, where you can select the "Choose Items..." option as shown below.
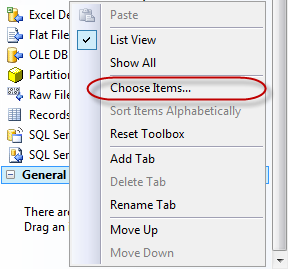
You will be presented with a window called "Choose Toolbox Items". Switch to the "SSIS Data Flow Items" tab, and select Oracle Eloqua Destination and Oracle Eloqua Source components from the list.
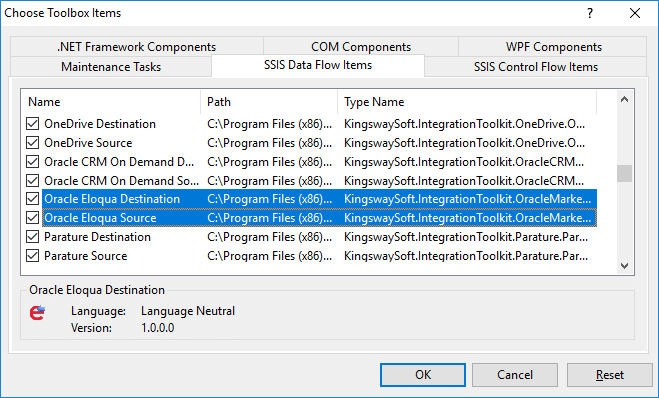
Both data flow components should now appear in your SSIS Toolbox, where you can drag and drop any of them to the design surface of your SSIS data flow task.