Scheduled Tasks
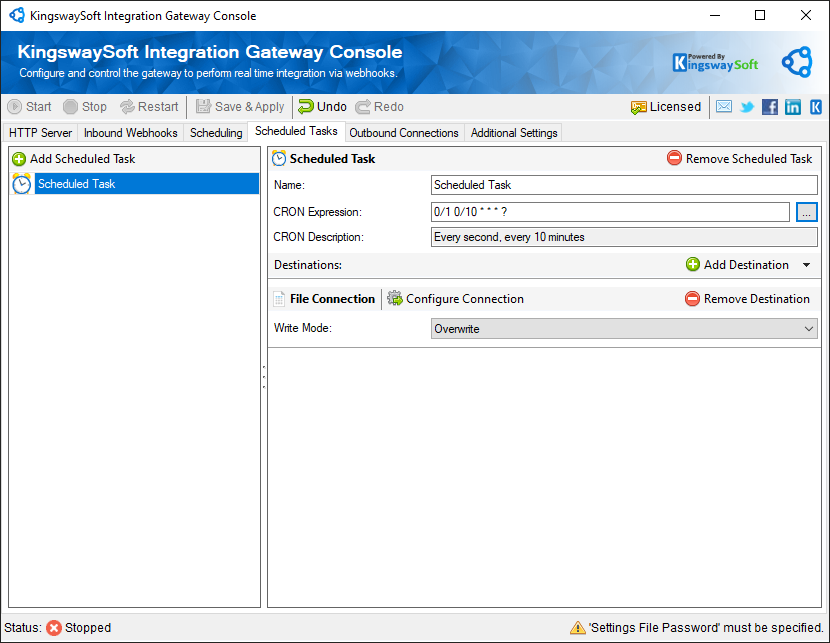
The Scheduled Tasks page allows you to add schedules in the Integration Gateway by using CRON scheduler.
- Add Scheduled Task
-
This button allows you to add a task schedule and name it, which is going to be configured.
- Remove Scheduled Task
-
This button will delete the selected Webhook from the added Webhooks list.
- Name
-
The name of the newly added Scheduled Task.
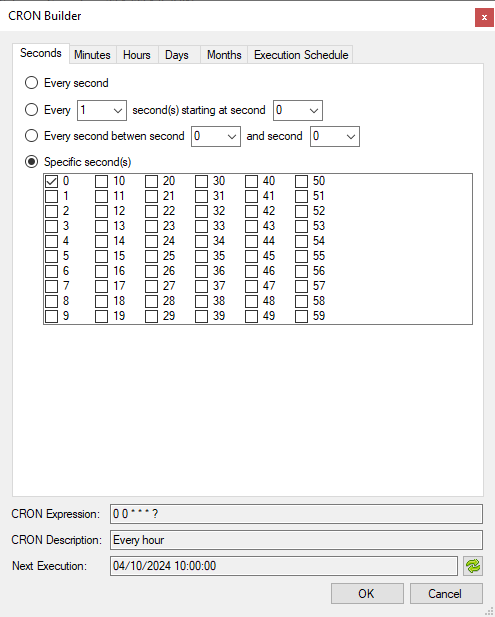
- CRON Expression
-
Specify the CRON Expression. Click on the ellipsis button to open the CRON Scheduler.
- CRON Description
-
The description for the CRON expression chosen.
- Add Destination
-
This button can be used to select a destination for the new Webhook from the configured Outbound Connections. Available options for each destination are:
-
Amazon SQS Connection
- Queue
- This option allows you to set the target queue of the messages which will be sent to your server.
- Message Label
- This option allows you to specify a string describing the message.
- Queue
-
AMQP Connection
- Queue
- This option allows you to set the target queue of the messages which will be sent to your server.
- Is Durable
- Specify if the Destination is durable to survive when a broker restart.
- Priority
- This option allows you to specify the priority of the message which will be sent to your server.
- Message Label
- This option allows you to specify a string describing the message.
- Queue
-
Azure Service Bus Connection
- Queue
- This option allows you to set the target queue of the messages which will be sent to your server.
- Message Time to Live
- Messages written to Azure Service Bus can have a time to live property set that is a number of seconds after which they will expire and be removed from the queue. Setting this value to 0 will create messages that do not automatically expire.
- Message Label
- This option allows you to specify a string describing the message.
- Queue
-
File Connection
- Write Mode
- Overwrite
- By selecting this option, the received response will overwrite any existing data in the specified file.
- Append
- By selecting this option, the received response will be appended to any existing data in the specified file.
- Auto Increment
- By selecting this option, the received response will be added to any existing data in the specified file while auto-incrementing the message number.
- Overwrite
- Write Mode
-
IBM MQ Connection
- Queue
- This option allows you to set the target queue of the messages which will be sent to your server.
- Message Label
- This option allows you to specify a string describing the message.
- Queue
-
MSMQ Connection
- Connector Type
- A GUID is defined by the application and used in conjunction with connector applications or message encryption. This GUID allows a receiving application to interpret message properties that were set by the sending application but that are usually set by Message Queuing. This property is optional and does not need to be set if you are using default encryption settings.
- Priority
- This option allows you to specify the priority of the message which will be sent to your server. Options to select from are from Lowest to Highest.
- Wrap Messages in XML
- Messages written to MSMQ are often XML messages. If the body of your text message is not in XML format, check this option to allow MSMQ to convert to XML format.
- Message Label
- This option allows you to specify a string describing the message.
- Connector Type
-
RabbitMQ Connection
- Queue
- This option allows you to set the target queue of the messages which will be sent to your server.
- Exchange Name
- The name of the exchange to send messages to.
- Delivery Mode
- Persistent: Messages are stored on disk on the server and will persist after a server restart.
- Non-Persistent: Messages are only stored in memory.
- Priority
- This option allows you to specify the priority of the message which will be sent to your server.
- Publisher Confirms
- Enable this option to make sure published messages have safely reached the broker
- Message Label
- This option allows you to specify a string describing the message.
- Queue
-
Amazon SQS Connection
- Remove Destination:
- This button will delete the selected destination from the added Webhook’s destinations list.