REST (Representational State Transfer) and SOAP (Simple Object Access Protocol) are both web service protocols that are widely-used when building an API.
RESTful web service offers a great deal of flexibility and scalability, it is used frequently by major services such as Amazon, eBay, and even Google. Many businesses need to retrieve and send data to these services to support their business operations, building such a solution can be an incredibly challenging and time consuming process for businesses to develop on their own.
ETL tools such as SSIS can offer a great advantage by offering a flexible and scalable platform for meeting such integration requirements. However, when it comes to consuming a REST API in SSIS, SSIS does not provide native support that is intuitive enough to work with RESTful endpoints.
As an SSIS developer and SSIS solution provider, we understand the challenges involved in working with those endpoints. This is why our team worked to create SSIS add-on components within our SSIS Productivity Pack to help simplify the development process for you.
- SSIS REST API Connection
- SSIS REST Source
- SSIS REST Destination
In this blog, we will walk you through the configuration process of using our JSON components to integrate with a RESTful web service. We will be using Zendesk as the target endpoint in our example. Zendesk is a customer service platform which supports millions of users around the globe; it has a fairly easy to use REST API. We are using this API as we believe it is a good starting point for beginners to get started with the REST components, though virtually any other RESTful endpoint feeding data in JSON format would follow a similar process as below.
Edit 8/17/2018: We now offer dedicated support for Zendesk and many other applications with our REST Components. The below blog can still be used as a guide for working with REST APIs we do not currently support, however if you are looking to integrate data with Zendesk we recommend having a look at our REST components instead.
1. Building a REST Connection in SSIS
1.1. Authentication
When making API calls, your requests must contain authentication information that indicates you are a verified user to work with the target endpoint. In the case of Zendesk, you can authorize against the API using the following approaches:
- Basic authentication with email and password
- Email address and API token
- OAuth access token
The first two can be easily implemented and added via the Custom Headers in the HTTP Connection Manager. In this example, we are going to demo the process of how to get an OAuth Access Token from Zendesk using our OAuth 2 Token Generator.
Before you start, you must register an application in Zendesk to generate OAuth credentials that your application can use to authenticate API calls to Zendesk. Based on the documentation, you have three options to retrieve OAuth Access Token from Zendesk:
- Authorization code grant flow
- Implicit grant flow
- Password grant flow
In this example, we will work with the authorization code grant flow to show how things work. As for other the other two, we will demo them in another blog post.
Steps to work with Authorization code grant flow:
Step 1 – Construct the request to redirect user to Zendesk authorization page
Documentation (Link)
- Endpoint: https://{subdomain}.zendesk.com/oauth/authorizations/new
-
Query Parameters (Required):
- response_type: Zendesk returns an authorization code in the response, so specify code as the response type.
- redirect_uri: The URL that Zendesk should use to send the user’s decision to grant access to your application.
- client_id: The unique identifier you obtained when you registered your application with Zendesk.
- scope: A space-separated list of scopes that control access to the Zendesk resources.
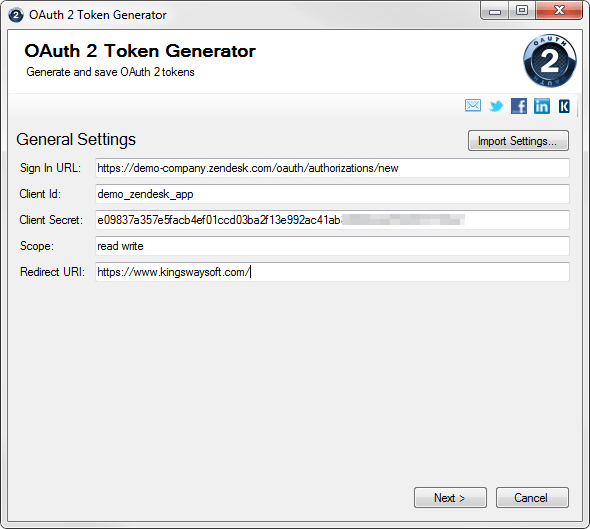
Once you have your application registered in Zendesk, you should be able to get all the required information, you can then put that information into the OAuth2 Token Generator as shown below:
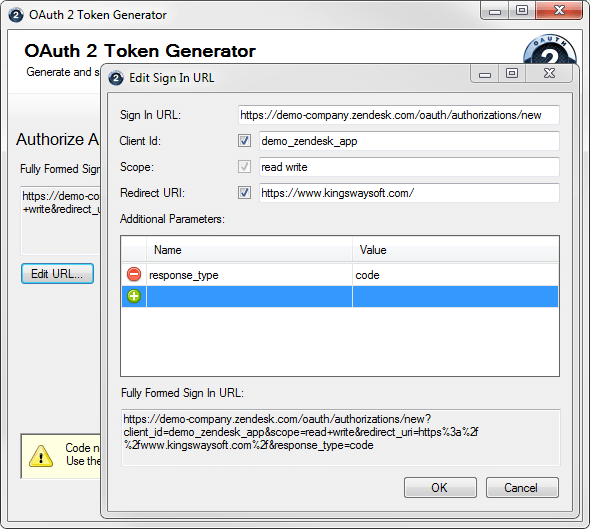
Once the information has been filled in, click Next to go to the next page and click the Edit URL to edit the URL in order to specify the additional parameter response_type which is required by the endpoint.
Once this is done, we can click either Authorize In App… or Authorize In Browser… button to open the Zendesk authorization page:
- Authorize In App…: launches web browser within the generator and will automatically get the code from the redirect URI.
- Authorize In Browser…: launches your default browser and requires you to copy/paste the entire URL to the pop-up dialog in order to get the authorization code.
Chose Authorize In App… to continue the authorization process, the authorization page is shown below:
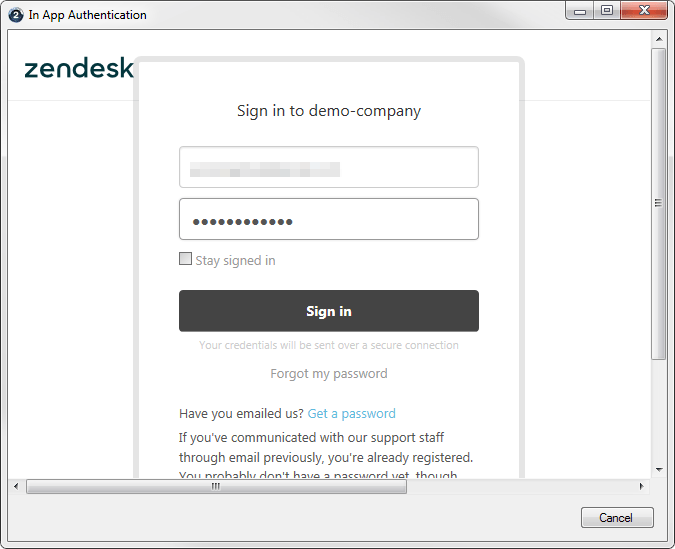
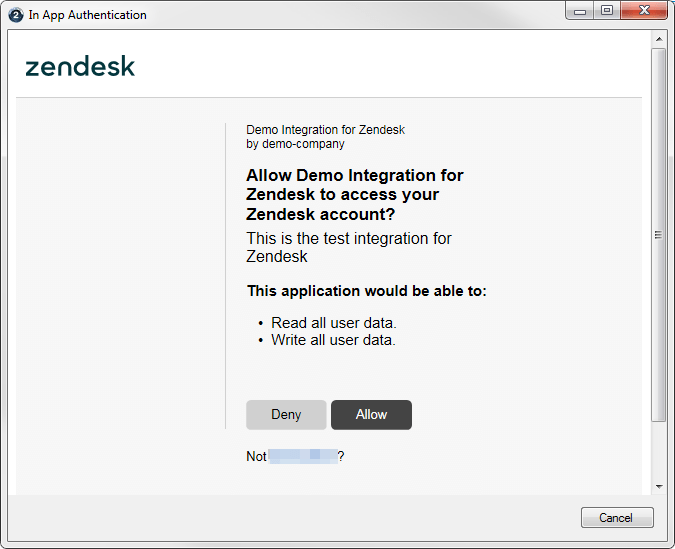
Enter your user name and password to sign in the portal, and click the Allow button to grant permissions to the application. Zendesk will redirect you back to the Redirect URL you’ve specified with an authorization_code of the user’s consent.
Step 2 – Request access token
If you successfully receive the authorization_code from Zendesk, you would need to complete the following configuration to exchange it for an access token.
Documentation (Link):
- Endpoint: https://{subdomain}.zendesk.com/oauth/tokens
-
Query Parameters:
- response_type: specify authorization_code as the value.
- code: use the authorization_code you received from Zendesk after the user granted access.
- client_id: The unique identifier you obtained when you registered your application with Zendesk.
- client_secret: The secret value you received when you registered your application with Zendesk.
- redirect_uri: Save as the last step. This is for ID purposes only.
- scope: specify read as the value.
Based on the documentation, we configure the OAuth2 Token Generator as follows:
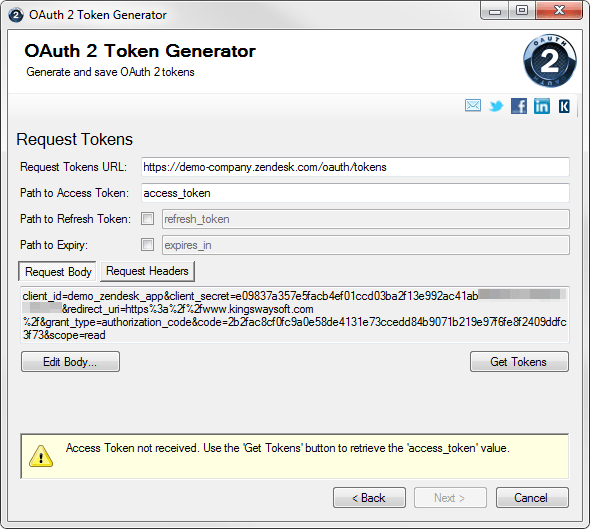
Quick Tip
Some endpoints may require you to include credentials in the request header, e.g. eBay. In this case, you can click the Request Headers tab and edit the headers from there.
In some cases, the access token may expire. In this case, when you issue the access token exchanging request the target endpoint may return a JSON object containing some other properties – refresh_token and expires_in. You can specify the JPath of each property here, and our component will automatically get the new access token once it expires.
- Path to Refresh Token
- Path to Expiry
Step 3 – Get access token
Click the Get Tokens button to get access_token from the endpoint. The generator will help you get the access token and other properties from the endpoint if there are any.
Step 4 – Save access token
The last step is to save the token file to a location so it can be used in the HTTP Connection Manager correctly. This step requires you to enter a password to secure the token file, we specify the Token File Password and click Save Tokens….
Note that you can also export the settings of token generating process, this way you don’t need to provide the configuration details the next time you generate a token. Clicking Export Settings… will generate a JSON file that contains all the settings.
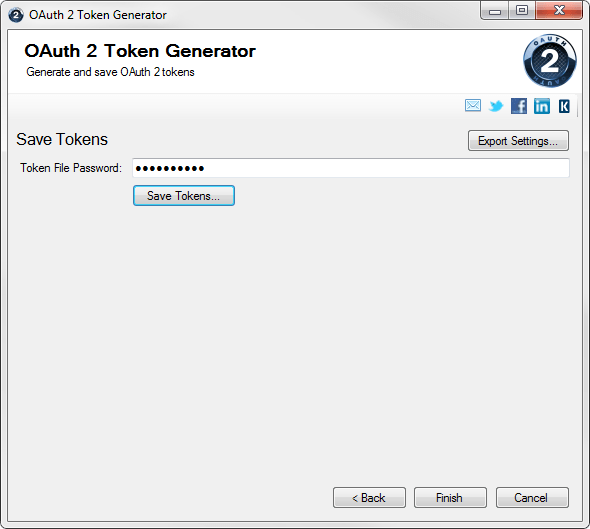
We have now finished the token generating process, let’s move to the next section to see how to use the access token in the HTTP Connection Manager.
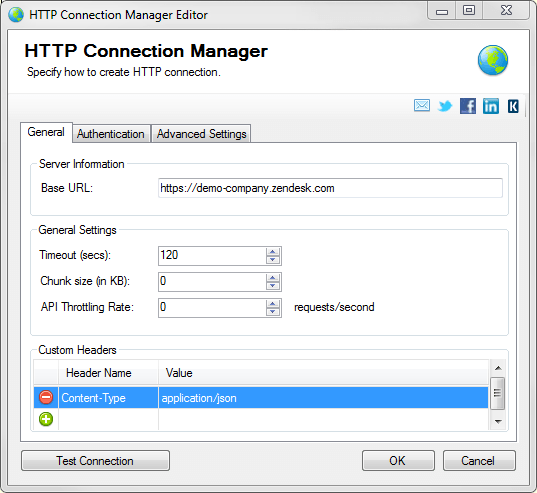
1.2. HTTP Connection Manager
In order to work with the JSON Source and JSON Destination component, an HTTP Connection Manager is required to build the connection with the target endpoint. We will take the “List Tickets” endpoint as an example. To start, we will put the base URL https://{subdomain}.zendesk.com in the Base URL field.
Documentation (Link):
- Name: List Tickets
- Endpoint: GET /api/v2/tickets.json
Since the communication is in JSON format, we add a new custom headers “Content-Type” in the HTTP Connection Manager with the value of “application/json” to indicates the MIME types.
The Authentication tab is the place where we set up the login credentials, it supports several Authentication Mode:
- Credentials
- Basic
- OAuth 2
Since we are using OAuth 2 we can select the OAuth 2 option and provide the Token details.
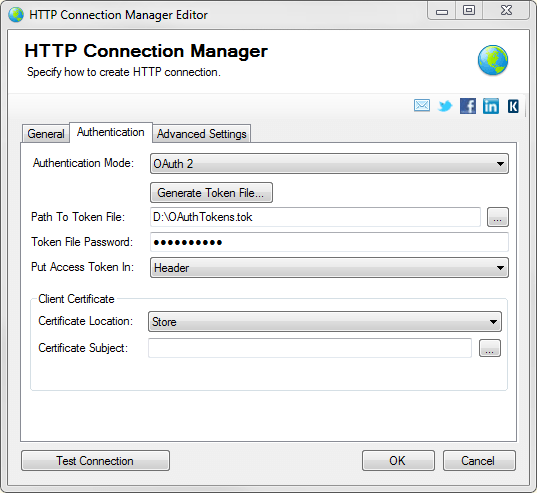
Depending on the endpoint you are working with, you can put the access token in the header of the request or in the query string. In our case, Zendesk requires the access token to be included in the HTTP Authorization header.
Therefore, we select the Header here as the Put Access Token In option.
Please don’t forget to enter the Token File Password in order to get the access token correctly when making API calls.
2. Retrieving JSON Data in SSIS
The JSON Source component is the place where we construct our JSON request, it will send API requests, retrieve JSON responses, break up the structure of the JSON documents and output column data which can be consumed by downstream SSIS pipeline components.
In this section, we will walk you through a simple scenario to retrieve ticket records using the JSON Source component.
2.1 Data Source Configuration
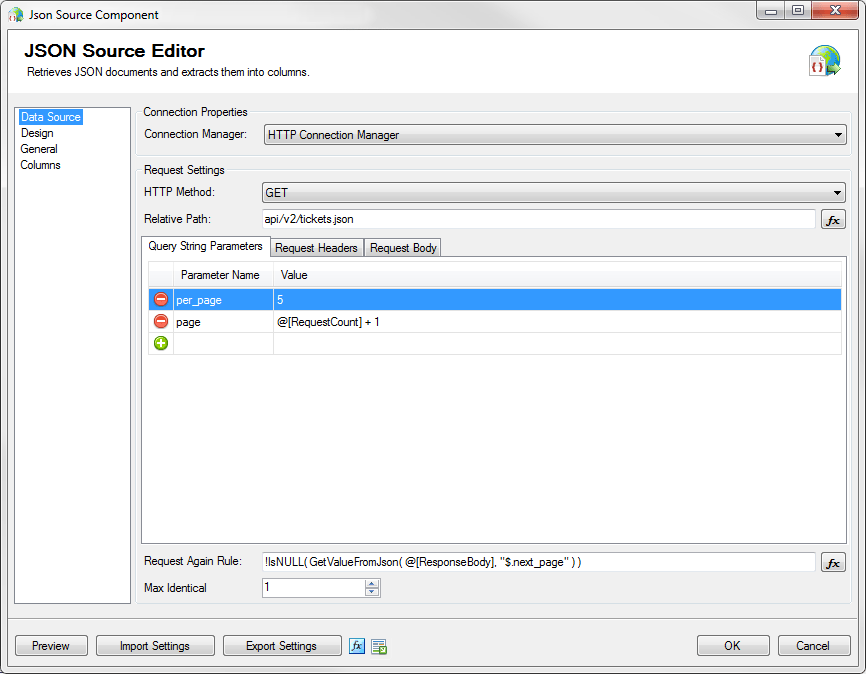
Based on the Zendesk API, the Relative Path to get a list of tickets is “api/v2/tickets.json”, and HTTP Method is GET. Below is a screenshots of the Configuration of the Data Source page:
The JSON Source component also has the capability to deal with pagination. The Request Again Rule option allows paged data to be retrieved. After each request, the request again rule will be evaluated and if it is True, another request will be sent.
Documentation (Link):
- Pagination Example: List results include next_page and previous_page URLs in the response body. When the next_page attribute is null, you have reached the last page.
-
Sample Response:
- {
- "users": [ ... ],
- "count": 1234,
- "next_page": "https://account.zendesk.com/api/v2/users.json?page=2",
- "previous_page": null
- }
The questions is how to get the value from the JSON response so that we can trigger the Request Again Rule, the JSON Source component provides a function called GetValueFromJson which can be used to extract the next_page value from the response body so we can determine whether we should send another request.
-
GetValueFromJson( «json», «jpath» )
- <<json>>: The source JSON document. In this example, the @[ResponseBody] is the body of the preceding request’s response, which can be find in the Preceding Request category when you build your expressions.
- <<jpath>>: The location of the value to extract. $ indicates the root of the JSON document, or you can leave it blank. E.g. .next_page.
Quick Tip
Depending on the endpoints, sometimes the next_page value may not be in the JSON response body, it may exist in the header. If that is the case, you can imply the same logic with the following functions under Preceding Request category:
- GetValueFromPreviousResponseHeaders( «header_name» )
- ValueExistsFromPreviousResponseHeaders( «header_name» )
When we try to send request to get the next page data, a page query parameter is required to paginate through the records, so we use the @[RequestCount] to dynamically change the value of page query parameter.
- @[RequestCount]: returns the counter for the current request number.
Note that it is also possible to parse and extract the next page number from the next_page value.
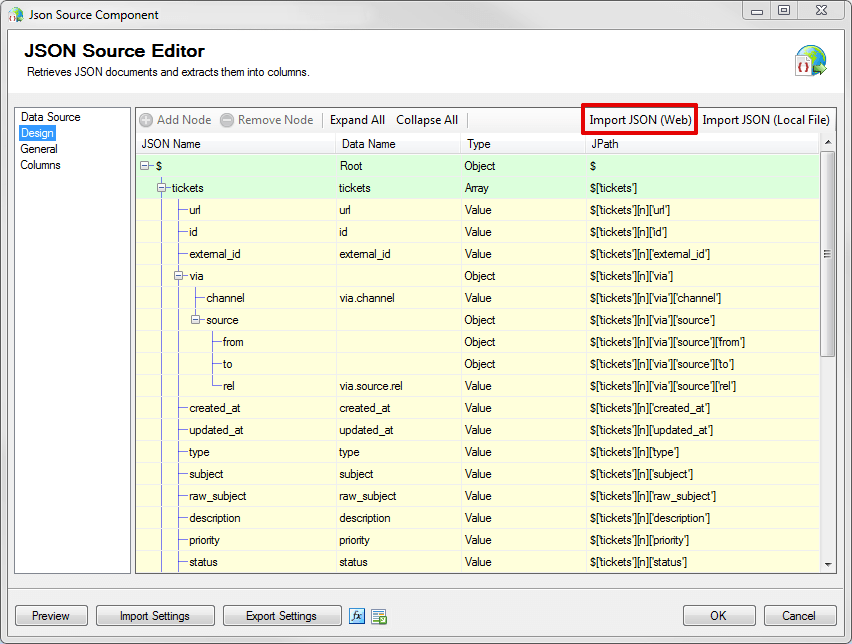
2.2 JSON Design Configuration
The Design Page is the place to build the expected hierarchy of incoming JSON documents so the component can extract the data and output it as columns.
We can simply click the Import JSON (Web) button to import the JSON document from the actual response, the component will construct the JSON hierarchy for you. Once you have the structure, you are able to refine it based on your needs.
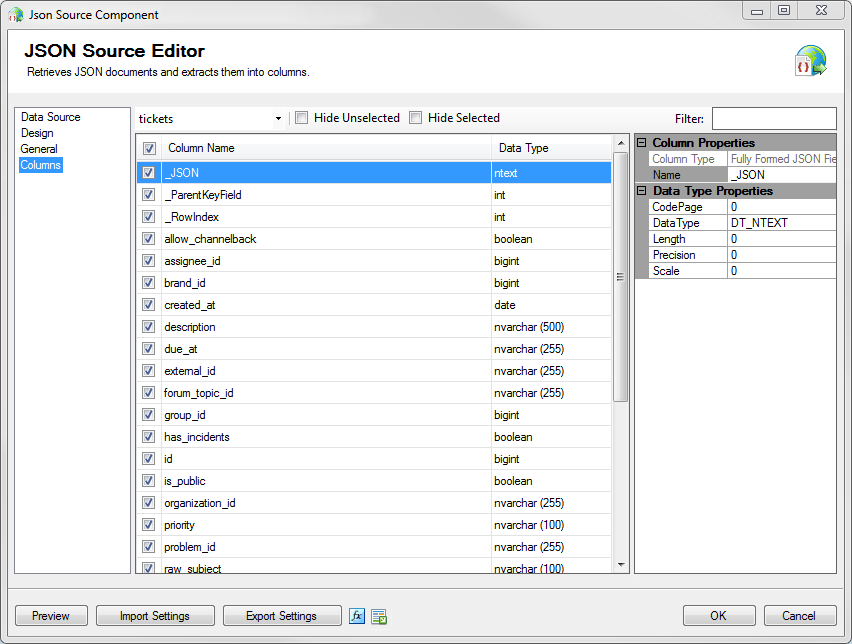
The General and Columns page allows you to configure the output and columns settings for each output.
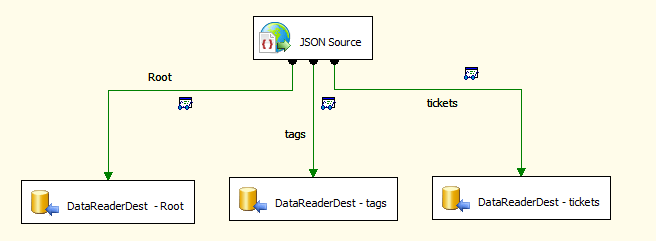
In the sample package, I dragged three Data Reader Destination component and enabled Data Viewer on each output in order to demonstrate the flow of data. In your example you can direct the output to any SSIS destination pipeline component depending on your integration needs. The data flow looks like the following:
3. Sending JSON Data to a REST API using SSIS
The JSON Destination component is used to merge column data into a JSON document and write it to a local file or send it to a HTTP URL to perform a RESTful service call.
In this section, we will walk you through a simple scenario to create a ticket record in ZenDesk using the JSON Destination component.
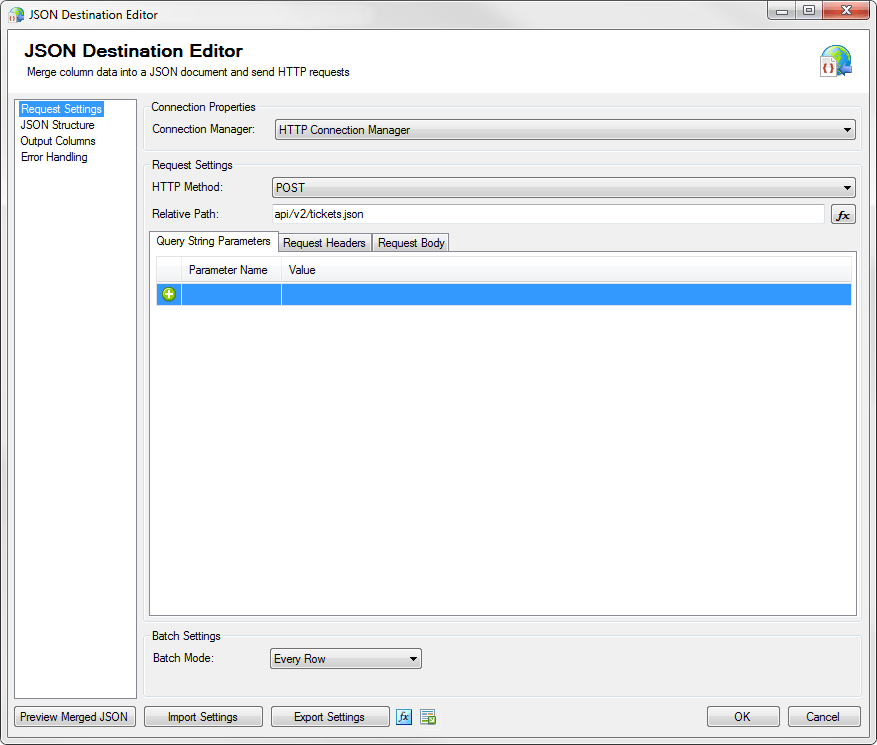
3.1 Request Setting Configuration
Based on the Zendesk API, the Relative Path to get a list of tickets is “api/v2/tickets.json”, and HTTP Method is POST. Below is a screenshots of the Configuration of the Request Settings page:
3.2 JSON Structure Configuration
To create a ticket record in Zendesk, we need to work with the “Create Ticket” endpoint. Let’s take a look at the API documentation first.
Documentation (Link):
- Name: Create Ticket
- Endpoint: POST /api/v2/tickets.json
-
Sample Request:
- {
- "ticket": {
- "subject": "My printer is on fire!",
- "comment": { "body": "The smoke is very colorful." },
- "priority": "urgent"
- }
- }
As you can see, comment is an object within the ticket object, so we need to have a way to specify the relationship between these two when constructing our JSON request body. Fortunately, this is fully supported by the JSON Destination.
In this example, we used two Data Spawner components to generate dummy data to demonstrate the strategy of how to handle this situation properly. We generated two special columns – LinkId and Parent.LinkedId, which can be used to represent the parent-child relationship between object and its nested object.
The whole data flow looks like the following:

In the JSON Destination component’s JSON Structure page, we linked the Parent.LinkId (Data Spawner - comment) to the LinkId (Data Spawner - ticket):
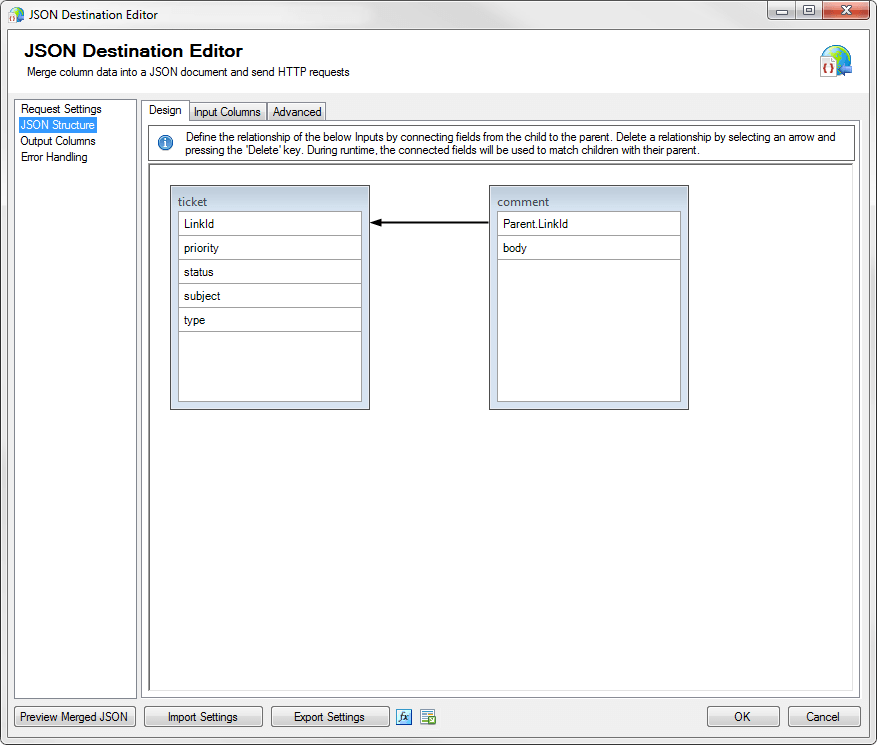
After that, the comment object will become the nested object of the ticket object.
Quick Tip
- You can always click the Preview Merged JSON button to view the JSON document based on the configuration you have specified on the JSON Structure page.
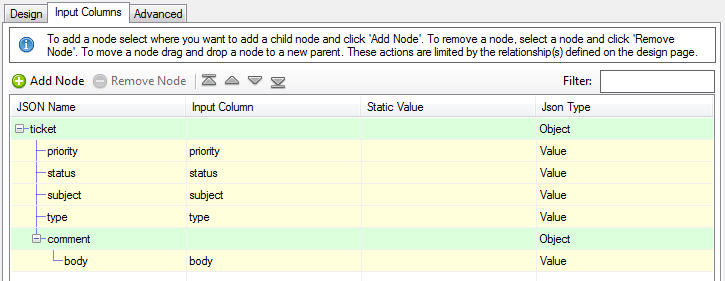
- The nodes in the Input Columns page supports drag and drop, for more details, please visit our Help Manual.
Once we’ve got the JSON structure defined, the last thing is to drag the @[MergedJson] variable to the Request Body area to complete the request body.
3.3 Output Columns Configuration
In some cases, you may want to get the response back when sending a request to the target endpoint, or you may want to implement some kind of logging strategies in your data flow to get more details about the package execution. The Output Columns are typically used to get success or Id information about items created/updated/deleted on the server.
Several additional column are available for you to enabled or disabled in the Default Output:
- HttpBody
- HttpResponseCode
- HttpResponseCodeName
Additionally, you can create new output columns in the Output Columns grid and specify the full JPath. In this situation the JSON Destination component will extract the value based on the JPath and output it to the Default Output.
Documentation (Link):
- Name: Create Ticket
- Endpoint: POST /api/v2/tickets.json
-
Sample Response:
- Status: 201 Created
- Location: https://{subdomain}.zendesk.com/api/v2/tickets/{id}.json
- {
- "ticket": {
- "id": 35436,
- "subject": "My printer is on fire!",
- "url": "https://demo-company.zendesk.com/api/v2/tickets/11.json",
- ...
- }
- }
If we want to get values of those returned properties, we can add several output columns and configure the component like below:
- Output_id: $.ticket.id
- Output_subject: $.ticket.subject
- Output_url: $.ticket.url
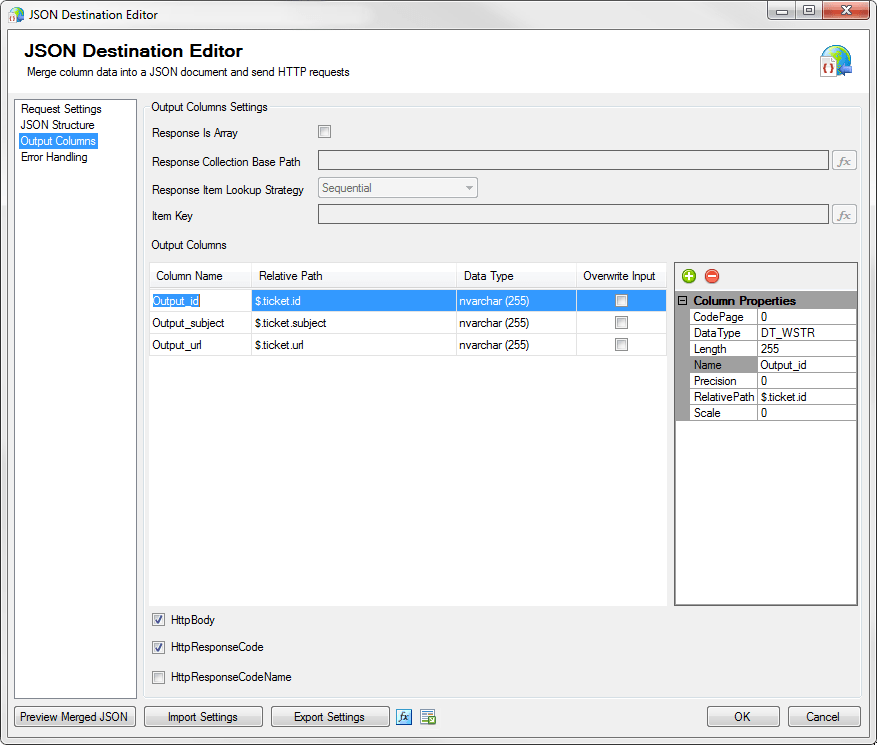
With that being done, the component will extract the data from the response and output them in the Default Output.
4. Sample Package
A sample SSIS package is available for download here. The sample package was prepared in a SQL Server 2008 R2 format, and it should automatically upgrade if you are using any newer version of SSIS.
We hope this post will give you a great sense on how to consume a REST API within SSIS and retrieve and send data to the API using JSON.