Using the HubSpot Destination Component
The HubSpot Destination Component is an SSIS data flow pipeline component that can be used to write data to HubSpot. You can Create, Update, Upsert, or Delete objects that allow a particular action with this component. There are three pages for configuration:
- General
- Columns
- Error Handling
General Page
The General page allows you to specify general settings for the HubSpot Destination Component.
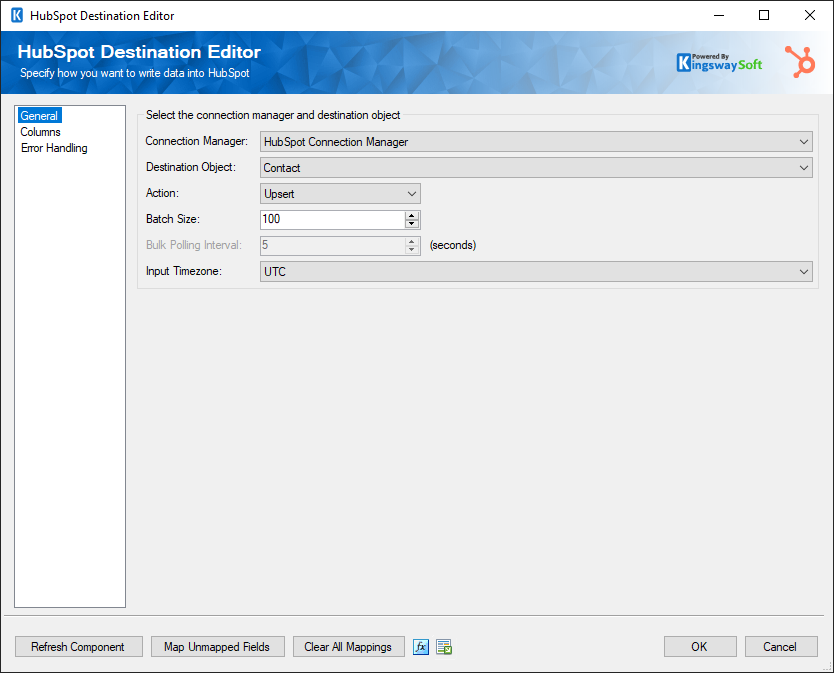
- HubSpot Connection Manager
-
The HubSpot Destination Component requires a HubSpot connection. The HubSpot Connection Manager option will show all HubSpot connection managers that have been created in the current SSIS package or project.
- Destination Object
-
The Destination Object option allows you to specify which object to write data to. A drop-down with the available objects is listed here.
- Action
-
The Action option allows you to specify how data should be written to HubSpot. There are currently four (4) supported action types available but not every object supports every action. Available actions include:
- Create: Create new record(s).
- Update: Update existing record(s). The primary field is required.
-
Upsert: Update an existing record if it exists, otherwise it creates a new one (Contact object only)
- Upsert functionality only works if an email is supplied. If the vid is supplied it will function like a regular Update as you cannot create a new Contact from a vid.
- Delete: Deletes record(s). The primary field is required.
- Batch Size
-
The Batch Size option allows you to specify how many records to send in a request. Only a few objects with a particular action support batch, otherwise the field will be disabled and set to 1.
Note: When the Batch Size option is disabled and set to 1, it means that for the particular Destination Object and Action combination you have selected, batching is not supported.
- Bulk Polling Interval (since v21.2)
-
The Bulk Polling Interval determines the frequency rate to poll the status of the job to determine if it has been completed.
This option will only be available to File and Folder objects.
- Input Timezone
-
The Input Timezone option specifies the timezone of all incoming datetime fields. This will indicate whether the datetime fields should be converted from the Local Time or kept in UTC format when writing to the HubSpot server. There is no performance difference between the two options it just makes integration easier.
- Refresh Component Button
-
Clicking the Refresh Component button causes the component to retrieve the latest metadata and update each attribute to its most recent metadata.
- Map Unmapped Fields Button
-
By clicking this button, the component will try to map any unmapped HubSpot attributes by matching their names with the input columns from upstream components. This is useful when your source component has recently added more columns, in which case you can use this button to automatically establish the association between input columns and unmapped destination attributes.
- Clear All Mappings Button
-
By clicking this button, the component will reset all your mappings in the destination component.
- Expression fx Icon
-
Click the blue fx icon to launch SSIS Expression Editor to enable dynamic updates of the property at run time.
- Generate Documentation Icon
-
Click the Generate Documentation icon to generate a Word document that describes the component's metadata including relevant mapping, and so on.
Columns Page
The Columns page of the HubSpot Destination Component allows you to map the columns from upstream components to HubSpot fields in the destination object.
On the Columns page is a grid that contains four columns as shown below.
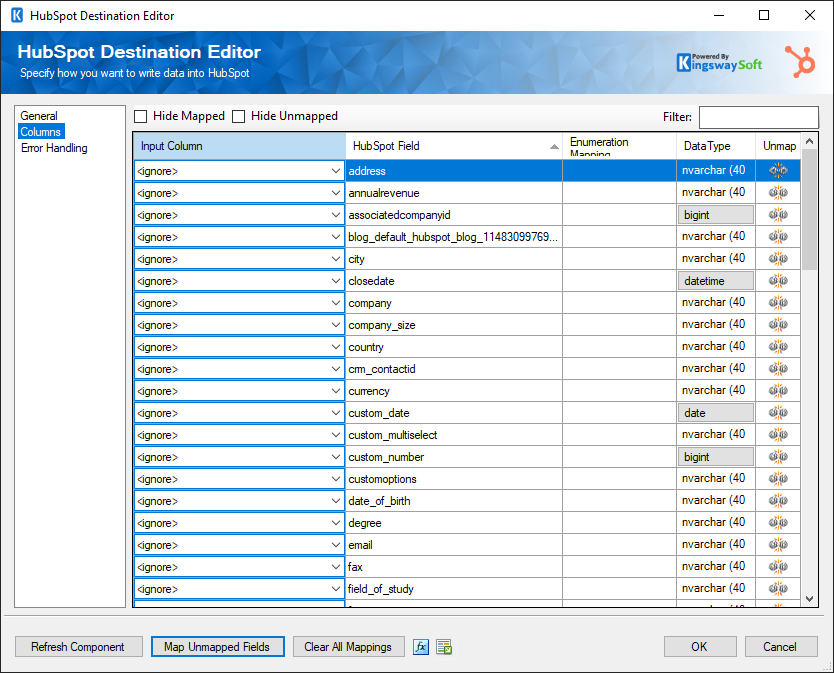
- Input Column: You can select an input column from an upstream component here.
- HubSpot Field: The HubSpot field where you are writing data.
- Enumeration Mapping: The mapping for Option set fields can be done by enabling this option. Please note that this feature is supported only for specific objects (further discussed in detail in the section below).
- Data Type: This column indicates the type of value for the current field.
- Unmap: This column can be used to unmap the field from the upstream input column, or otherwise it can be used to map the field to an upstream input column by matching its name if the field is not currently mapped.
Working with the Enumeration Mapping Feature
You can specify how you map input values to the Enumeration Option values in your HubSpot instance. The following objects support enumeration mapping in the HubSpot Destination component.
- Contact
- Company
- Deal
- Ticket
- Product
- Line_Item
Once an enumeration option field is mapped, you would find an ellipsis (…) button to open the below window.
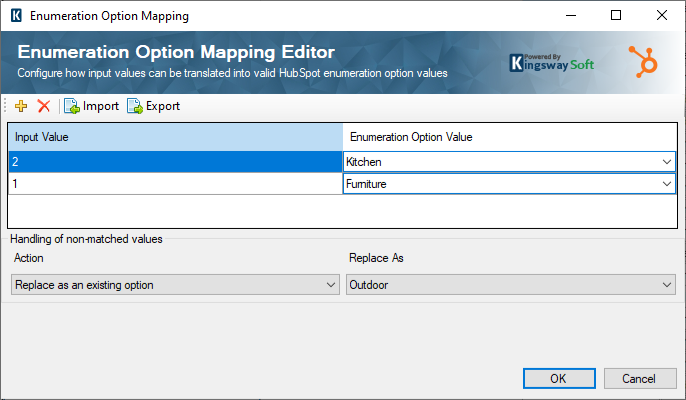
The top part of this window contains a grid that can be used to enter mapping values through four toolbar buttons. The first two buttons allow you to add or delete a mapping entry. The Import button allows you to import from a mapping that you previously saved or exported. The Export button allows you to export all mapping values in the grid to a .xml file so that edits can be made using a different tool that you feel more comfortable working with.
- Input Value
-
You can specify the value that an input needs to be translated.
- Enumeration Option Value
-
The option values available in the Enumeration field that can be chosen.
- Handling of non-matched values
-
The second part of the window is where you specify how to handle non-matched values. There are four options available:
- Create option
-
When no match is found for a particular input value, this option allows you to create a new option using the input value for the specified HubSpot enumeration option field. You could choose an Input column for the label from the drop-down while Create option is chosen.
- Replace as an existing option
-
When no match is found, an existing option value available in the HubSpot instance can be used as the default replacement value.
- Set an empty (NULL)
-
When no match is found, it would be set as empty (NULL).
- Raise an error
-
This option allows you to throw an exception that fails the component entirely when no match is found for a particular input value.
Error Handling Page
The Error Handling page allows you to specify how errors should be handled when they occur.
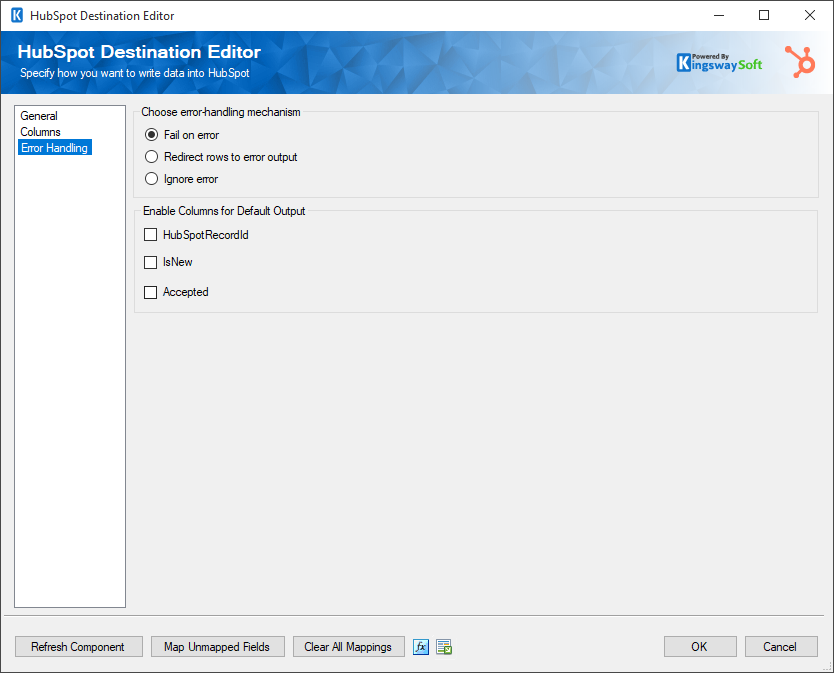
There are three options available:
- Fail on error
- Redirect rows to error output
- Ignore error
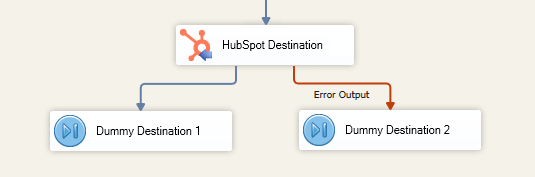
When the Redirect rows to error output option is selected, rows that failed to write to HubSpot will be redirected to the 'Error Output' output of the Destination Component. As indicated in the screenshot below, the green output connection represents rows that were successfully written, and the red 'Error Output' connection represents erroneous rows. The 'ErrorMessage' output column found in the 'Error Output' may contain the error message that was reported by HubSpot or the component itself.
Note: Use extra caution when selecting Ignore error option, since the component will remain silent for any errors that have occurred.
Enable Columns for Default Output. Some objects and actions do not use the default output columns provided, these columns will still be created but will contain no values. Both columns are unchecked by default to prevent unused columns in SSIS.
- HubSpotRecordId - Contains the newly created HubSpot record's ID, which you can use to write to log or further process using additional data flow components
- Accepted - Contains a true/false value that reflects whether or not the particular record succeeded in writing to HubSpot. (Contact List Member only)
Using the HubSpot Token Manager
Note: This section only applies to v7.0 or prior versions.
The HubSpot Token Manager is a utility external to SSIS that allows you to add, remove, import, and export your HubSpot Tokens from machine to machine.
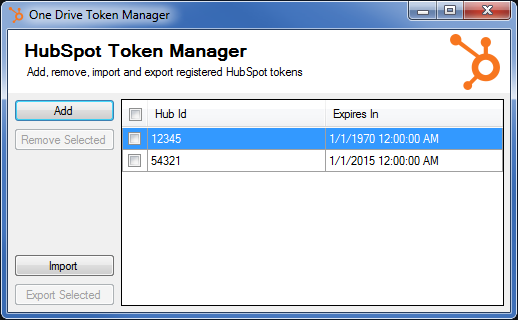
Once you have developed your integration package, and you are getting ready to deploy, this utility will assist you in getting your Hubspot tokens from your development environment to your integration server:
- Open the HubSpot Token Manager on your development machine
- Select the tokens you wish to export
- Click the 'Export' button
- Save the 'tokens.json' file
- Move the file manually to your integration server
- Open the HubSpot Token Manager on your integration server
- Click the 'Import' button
- Select the 'tokens.json' file
This is the simplest way to get your tokens from your development environment to your integration server but in some cases, you may need to add tokens manually, in which case simply click the 'Add' button. Adding tokens in the HubSpot Token Manager is exactly like adding tokens in the HubSpot Connection Manager.
You may also need to remove tokens from your machine. Simply select the tokens you wish to remove and click the 'Remove' button.
Since v7.1, users can only delete existing registry tokens using the Token Manager which was created with an older release of our toolkit, as we have updated our Connection Manager to rely on a token file instead in order to save the access tokens information.