There are a couple methods available to export data from SQL Server to Excel. For infrequent uses if you have access to the SQL Server Management Studio and Excel on the same machine you can simply copy and paste the data from SSMS into Excel. Or if you do not have Excel on the machine you can use the SQL Server Import and Export Wizard.
Both of these options are best for one-off situations. For repeating tasks, SQL Server Integration Services will offer greater productivity and flexibility. By using SSIS we can develop the package once and schedule the export to run automatically as often as needed.
In this blog post we will demonstrate how to export data from SQL Server to Excel using SSIS.

While SSIS does come included with Excel components, these components do not support 64-bit runtimes. Because of this, we will be using SSIS Productivity Pack which includes dozens of premium SSIS add-on components including Premium Excel components which support both 32-bit and 64-bit runtimes. There are also a few other additional features and functionality available within these components which we will take advantage of in this blog post.
Prerequisites
To follow this blog post you will need to be sure to have SSDT installed on your system followed by SSIS Productivity Pack. Please see our Installation Guide if you require assistance with this set-up.
Export data from SQL Server to Excel using SSIS
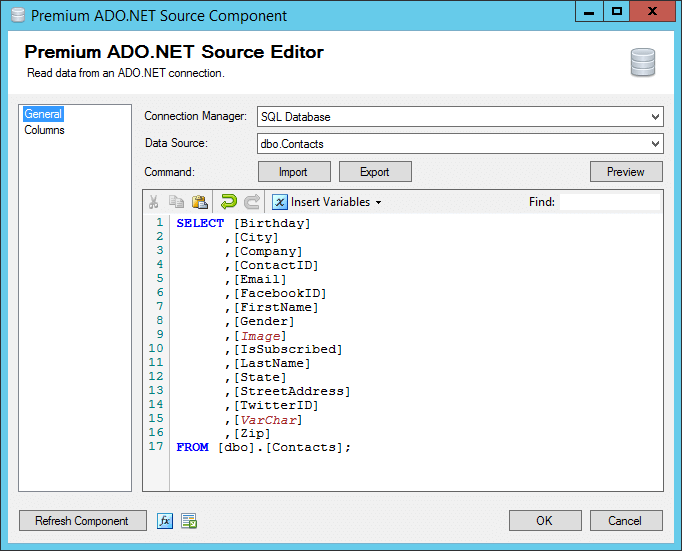
To begin, we will create our SSIS project, drag out a Data Flow Task and enter in. For this blog post we will be using Premium ADO.NET Source to retrieve data from our SQL database. This component is included within SSIS Productivity Pack and will offer greater metadata handling and flexibility if we choose to modify this package later on. However, you may use any other source component of your choosing to replicate this process to export data to Excel.
Export data from SQL Server
To configure our source we will create a new connection manager to the SQL database and then select the appropriate table and fields we would like to export into Excel.
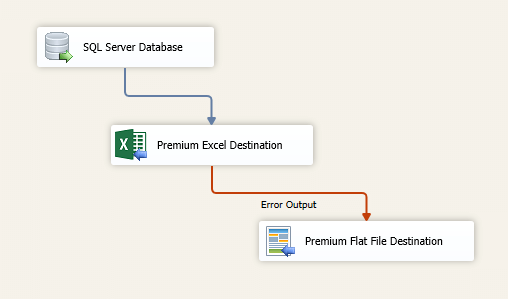
Once our source is configured we can connect it to our Premium Excel Destination.
Write SQL Server data to Excel
Connecting to Excel
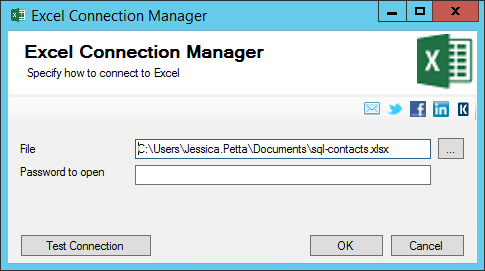
Launching the Premium Excel Destination editor we first have the option to browse for a local file or to create an Excel Connection Manager. One great advantage of the Premium Excel components is the ability to select additional connection managers to work with Excel files stored in the cloud. Currently the following cloud connection managers are also supported:
- Dropbox Connection Manager (included with SSIS Productivity Pack)
- OneDrive Connection Manager (included with SSIS Productivity Pack)
- Azure Blob Storage Connection Manager (included with SSIS Productivity Pack)
- Amazon S3 Connection Manager (included with SSIS Productivity Pack)
- SFTP Connection Manager (included with SSIS Productivity Pack)
- FTPS Connection Manager (included with SSIS Productivity Pack)
- SharePoint Connection Manager (requires SSIS Integration Toolkit for Microsoft SharePoint)
For this post we will use the Excel Connection Manager to connect to a locally stored file.
Excel Write Methods
With our connection established we can now select the worksheet we want to write to and select whether or not the first row will include column names. In our case we are working with a blank file without any column names so we will select this option, we will use this component to populate the column names for us which we will explain shortly.
Next we have our writing settings. First we have the option to protect the file from being modified once it is opened. We are leaving this blank for this post, but this would be useful for cases when you want users to read the file but ensure they cannot modify the file.
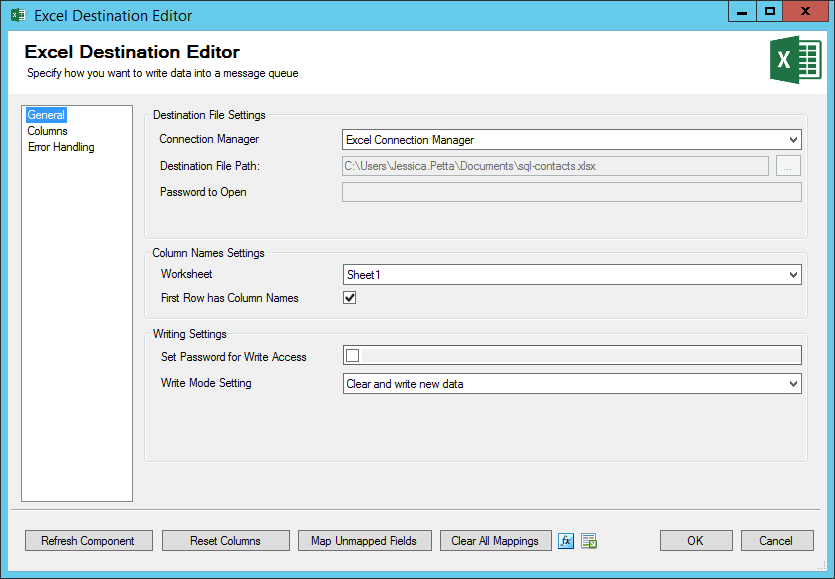
Now we can select how data will be written to the Excel file, there are four options available.
- Clear and write new data: choose this option to clear the whole sheet and write rows.
- Append at end: choose this option to append new rows at the end of existing rows.
-
Overwrite existing cells: choose this option to overwrite the existing rows.
- Note for this option if there are less rows or columns in the new data, rows from the old data will remain. For example, if the file currently has 100 rows of data and we write 90 rows to this file. The first 90 rows will be overwritten with new data while rows 91-100 will remain as they were with the old data remaining.
-
Write to specified rows: choose this option to specify the rows to write.
- Start from row: enter the row number of start row
- End at row: check this option to specify the end row number
For this blog post we will select Clear and Write New Data as we want to be sure all the old data is removed from the file each time the package runs. This is another advantage of using Premium Excel Destination, as we can run the package as many times as we want and not have to worry about duplicating data in our Excel file.
As mentioned earlier, we will be using the component to write the column names for us. This behaviour is available when "First Row has Column Names" is checked and when "Clear and write new data" or "Overwriting existing cells" are used as the write action. If the "Append at end" or "Write to specified rows" options are used, the component will not write the column names as the column names should already be included within your Excel sheet in those cases. If "First Row has Column Names" is unchecked, the column names will never be written to the file.
Mapping SQL Server fields to Excel
We can now move to the columns page. If you selected "First Row has Column Names" you will see these populated here and you can map your input columns to their corresponding column in your Excel file. If you left "First Row has Column Names" unchecked, the component will detect non-empty values in the first row of the file and use incremental columns (Column1, Column2, etc) to represent the columns. In our case, our file does not have any data so we see a blank grid.
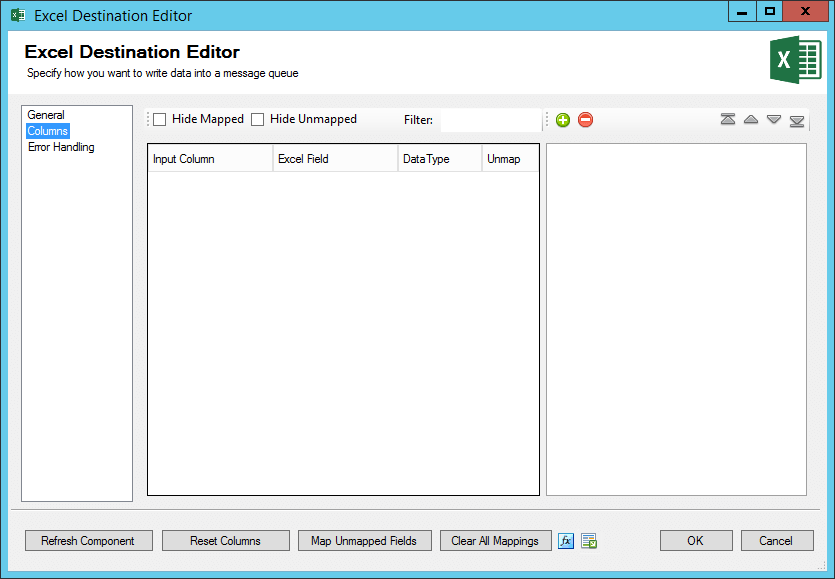
We can manually add in our column names using the green + icon, or we can simply select ‘Reset Columns’ this will use the data from our input to generate the column names and DataTypes in our Excel spreadsheet.
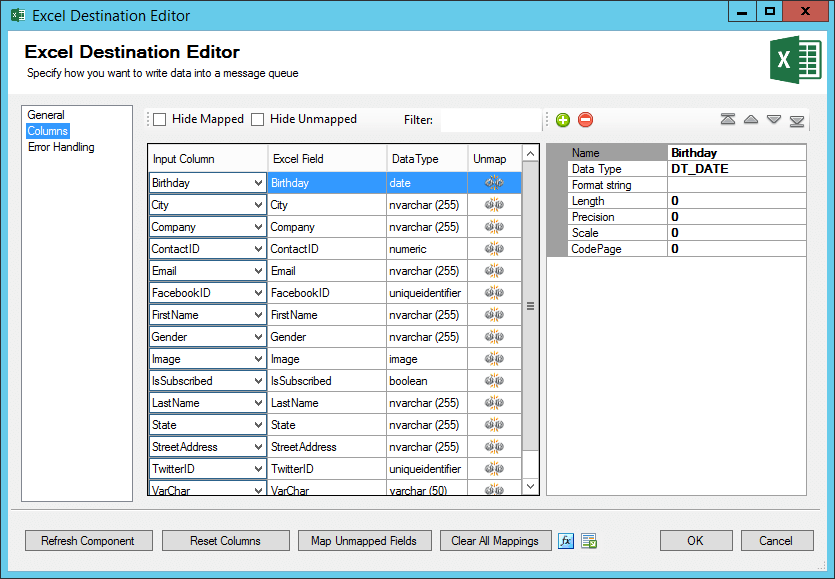
Look at that! All our columns are now generated and properly mapped with just one click.
Should you need to, such as cases when you added a field manually, you have the option to refine any of the columns further on the far right such as renaming the column name, or defining the cell formatting and length.
Note this ‘Reset Columns’ method is best used when there are not column names already defined in the spreadsheet. If column names are already defined in the Excel file and will not be overwritten, data from the input should be mapped to these fields. This is to ensure data is always written to Excel in the correct position. You can select ‘Refresh Component’ to retrieve the columns from the Excel file at any time.
Error Handling
Now we can configure our error handling. For best practices we always recommend selecting Redirect rows to error output. This will provide us with 3 additional columns (ErrorCode, ErrorColumn, ErrorMessage) to help with troubleshooting any errors that may occur. From here we can configure our Error Output using our preferred method. We have chosen a flat file for this case.
We are now ready to run this package.
Further Configurations
The advantage of using SSIS to export data from SQL Server to Excel is the flexibility to configure your package to further automate the process. For instance, as we briefly mentioned, our Premium Excel components support cloud connection managers. By using a cloud connection manager files do not need to first be downloaded and stored locally and then moved to the appropriate cloud location through some other trigger or manual input. Using SSIS Productivity Pack you can update the Excel file right from its location whether on an FTP server or in a cloud storage application.
Another option may be if we want to email this file after it has been updated. To do so we can go to our Control Flow and configure an SMTP Task to send the file as an attachment to our recipients.
SSIS also offers great capabilities for data manipulation should you need to transform your SQL Server data in any way prior to writing to Excel.
Utilizing SSIS to export SQL Server data to Excel means greater flexibility from the extracting of the data to the handling of the newly updated Excel file.
Reversing the Process – Import Excel data into SQL Server Using SSIS
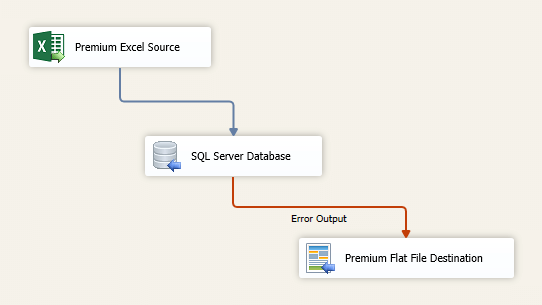
To import Excel data into SQL Server using SSIS we can reverse the above process by using Excel Source Component and Premium ADO.NET Destination. Some of the benefits of this process include those addressed above as well as:
- Retrieving data directly from Excel files stored in the cloud.
- Retrieve data from the Excel worksheet, named range, and/or specific rows.
- Options for how data should be output from an Excel field – calculated without format, calculated with format, or ability to output the formula.
- Premium ADO.NET Destination supports Create, Update, Upsert, & Delete actions which can be incredibly useful for maintaining data quality.
By utilizing SSIS and SSIS Productivity Pack for data transfers between SQL Server and Excel, developers have greater potential and control throughout the entire development and execution process.
See SSIS Productivity Pack for more information on the collection and to get started with exporting data from SQL Server to Excel using SSIS.