Using the AX Destination Component
The AX Destination Component is an SSIS destination component that can be used to write data to the Microsoft Dynamics AX server or Microsoft Dynamics 365 Finance & Operations. You may create, update, upsert, and delete AX records using the AX Destination Component.
AX Destination Component includes the following three pages to configure how you want to write data to the Microsoft Dynamics AX server:
- General
- Columns
- Error Handling
General Page
The General page of the AX Destination Component allows you to specify the general settings of the AX Destination Component.
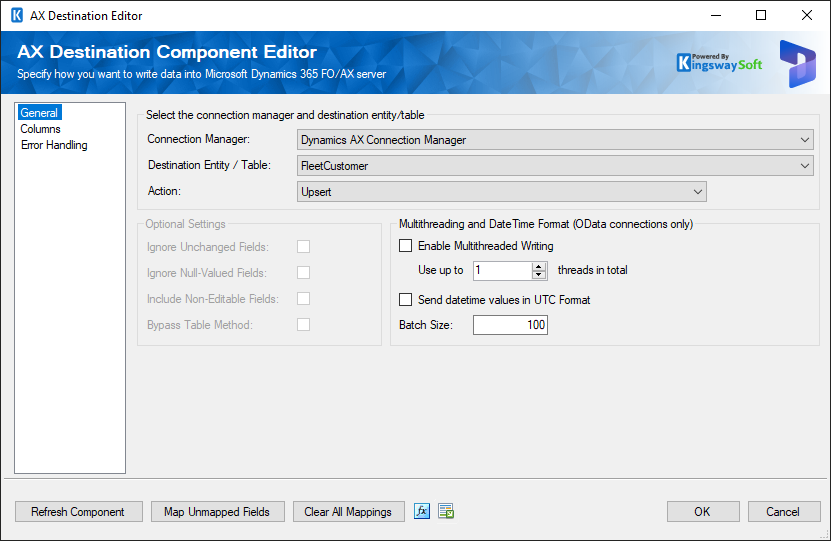
- Select the connection manager and destination entity/table
-
- Connection Manager
-
The AX destination component requires an AX connection in order to connect with Microsoft Dynamics 365 FO/AX server. The AX Connection Manager option will show all DynamicsAX connection managers that have been created in the current SSIS package.
- Destination Entity / Table
-
The Destination Table option allows you to specify which AX table to write the data. When the option is clicked, SSIS Integration Toolkit will retrieve a list of all available AX tables for the selected AX connection.
- Action
-
The Action option allows you to specify how the data should be written to the Microsoft Dynamics AX server. There are four (4) action types available.
- Create: Create new record(s) in AX
- Update: Update existing record(s) in AX
- Upsert: Update any existing record(s) in AX if matching can be found, otherwise create a new record with the information from the upstream pipeline components
- Delete: Delete record(s) from AX
- Custom Action (since v9.2): invokes custom actions defined on top of the target entity, custom actions may take certain inputs and return the execution result in the CustomActionExecutionResult column in the Default Output. Custom actions only apply to OData endpoints, and are automatically discovered by our software.
- Optional Settings
-
- Ignore Unchanged Fields
-
The Ignore Unchanged Fields option allows you to ignore any fields that have not been changed in the target AX system. With this option selected, the AX destination component will check the target AX system and compare each field to see if there are any changes for them. The component will only post the fields that have actual changes. All unchanged fields will be skipped and therefore, not posted to AX.
Note: This option is only available for connections that use Business Connector.
- Ignore Null-Valued Fields (since v2.4)
-
The Ignore Null-Valued Fields option allows you to ignore any fields that have a null value. By ignoring a field, the null value will not be posted to the target AX system. This can help avoid the situation that you overwrite non-empty values with an empty value, if your requirement dictates so.
Note: This option is only available for connections that use Business Connector.
- Include Non-Editable Fields (since v8.0)
-
The Include Non-Editable Fields option allows you to view all fields in the specified AX table.
Note: This option is only available for connections that use Business Connector.
- Bypass Table Method (since v8.0)
-
The Bypass Table Method option allows you to import data into the target AX system without firing/triggering any table method which essentially skips all server-side business logic and data validations.
Note: This option is only available for connections that use Business Connector.
- Multithreading and Date Time Format (OData connections only)
-
- Enable Multithreaded Writing (since v9.0)
-
Since the v9.0 release, we added support for the Multi-threading feature, which allows you to perform multi-threading when writing data to Dynamics 365 for Operations. To configure the Multi-threading feature, you can check the Enable Multithreaded Writing option in the AX Destination component. The default number is 16.
Note: This option supports a maximum number of 100 threads when writing to Dynamics 365 for Operations. We generally recommend 20 or lower to avoid potential server errors. However, you can adjust these settings based on your environment in order to get the best performance.
Note: When this option is enabled, the record order may not be maintained from the upstream pipeline component.
- Send datetime values in UTC Format
-
The Send datetime values in UTC Format option allows you to send DateTime values in UTC format.
- Batch Size (since v21.1)
-
The Batch Size option allows you to specify how many records you want to submit to the D365 F&O server at a time (each service call).
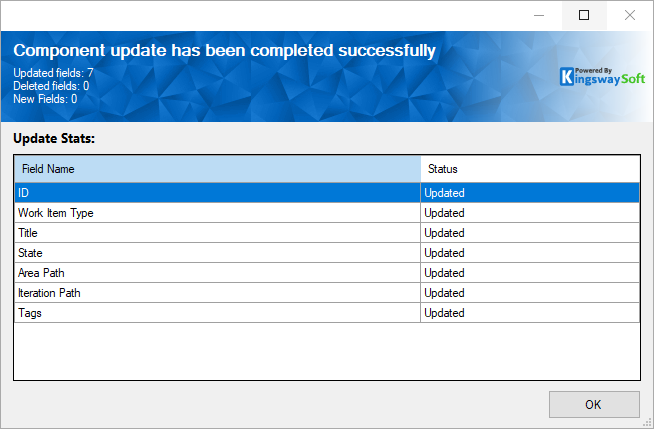
- Refresh Component button
-
By clicking this button, the component will retrieve the latest metadata from the AX server and update each field. After clicking this button, you will receive the following screen once the refresh is done.
- Map Unmapped Fields button
-
By clicking this button, the component will map any unmapped AX fields by matching their names with the input columns from upstream components. This is useful when your source component has recently added more columns, in which case you can use this button to automatically establish the association between input columns and unmapped AX fields.
After clicking this button, you will receive the following message.
- Clear All Mappings button
-
By clicking this button, the component will remove all field mappings. You can use this button to reset your mappings.
Columns Page
The Columns page of the AX Destination Component allows you to map the columns from upstream components to AX fields for the destination entity.
On the Columns page, you would see a grid that contains four columns as below.
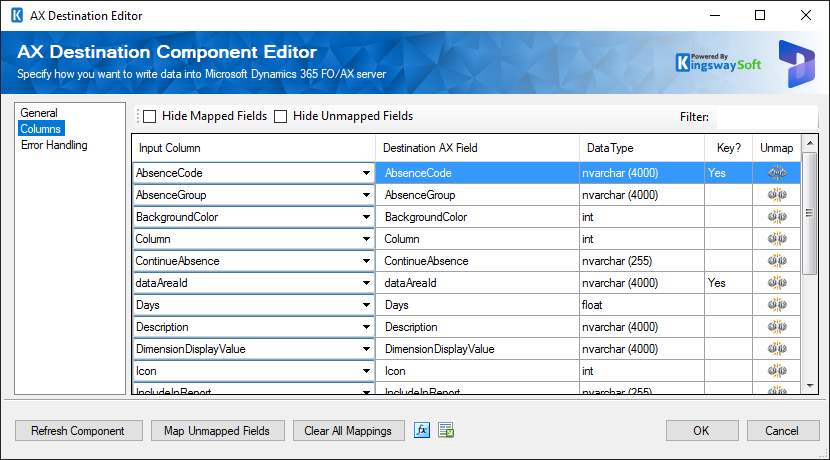
- Input Column: You can select a column from the upstream component to be used as the input of the corresponding AX field.
- Destination AX Field: The AX field where you are writing data.
- Data Type: This column indicates the type of value for the current AX field in the AX system. Typically you would need to pass in the value using the format indicated in the Data Type column.
- Key?: This column indicates whether this field is a key field.
- Unmap: This column can be used to unmap the field from the upstream input column, or otherwise it can be used to map the field to an upstream input column by matching its name if the field is not currently mapped.
Error Handling Page
The Error Handling page allows you to specify how errors should be handled when they occur.
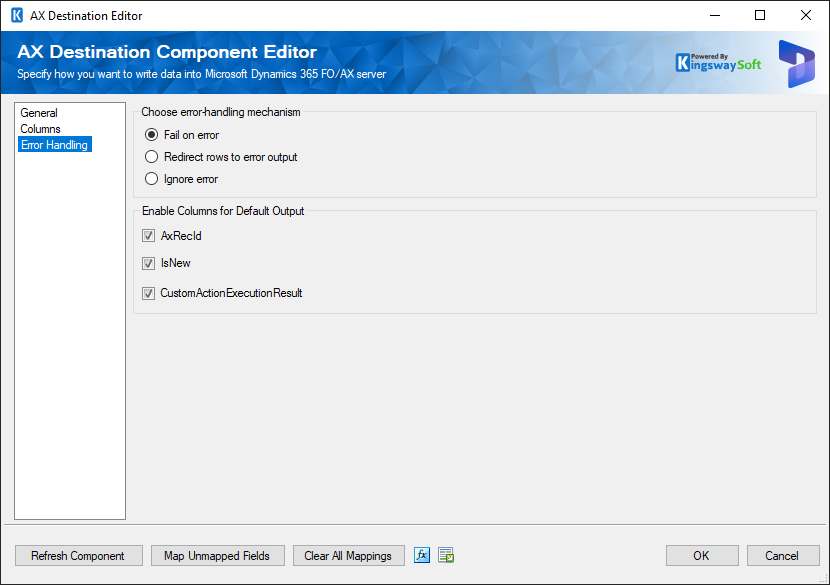
There are three options available.
- Fail on error
- Redirect rows to error output
- Ignore error
When the Redirect rows to error output option is selected, the error handling behavior might be different depending on the version of our software you are using.
- If you are using v2.0 or a later version, it will only redirect the rows that have failed to the error output (the successful ones will be directed to the Default Output of the destination component which is a new output in v2.0).
- If you are using v1.0, it will redirect all rows to the error output including those that have succeeded and those that have failed. In case you need to further process AX records after the destination component (such as logging AX records to a different system, or writing to a different AX table using a subset of available fields) when using v1.0, you must choose the "Redirect rows to error output" as the Error Handling option. Then attach a Conditional Split component to the AX destination component. In the Conditional Split component, evaluate the ErrorCode column (an output field added by the AX destination component) and check to see whether it has actually errored out. The Conditional Split should typically have two output branches, one is ErrorCode == -1, which is the success path, and the other one is ErrorCode != -1, which is the failure path indicating that an error has occurred when writing to the CRM.
In the error output, you can see the following columns:
- ID: Contains the newly created AX record's ID, which you can use to write to log or further process using additional data flow components. Note that this column has been moved to the Default Output of the destination component in v2.0 which has a new name called AxRecId.
- AxErrorMessage: Contains the error message that is reported by Dynamics AX or the component itself
Note: Use extra caution when selecting the Ignore error option, since the component will remain silent for any errors that have occurred.
In the Error Handling page, there is also an option(since v2.1) that can be used to enable or disable the following output fields for the destination component.
- AxRecId: Contains the newly created AX record's ID, which you can use to write to log or further process using additional data flow components.
- IsNew: Contains value to indicate whether it is a newly created AX record, or an existing one. This is useful when you use the Upsert action.
- CustomActionExecutionResult: Contains the execution result of the corresponding custom action, which you can use in further processes using additional data flow components.
Note: If you don't plan to use any of those fields for any further processing, it is generally recommended to turn them off, so you don't get any warning from SSIS by complaining that those fields are never used, and it should also provide slightly better performance by doing so. Note again this feature is only available since v2.1.