Using the Amazon SQS Destination Component
The Amazon SQS Destination component is an SSIS data flow pipeline component that can be used to send messages to an Amazon SQS. There are three pages of configuration:
- General
- Columns
- Error Handling
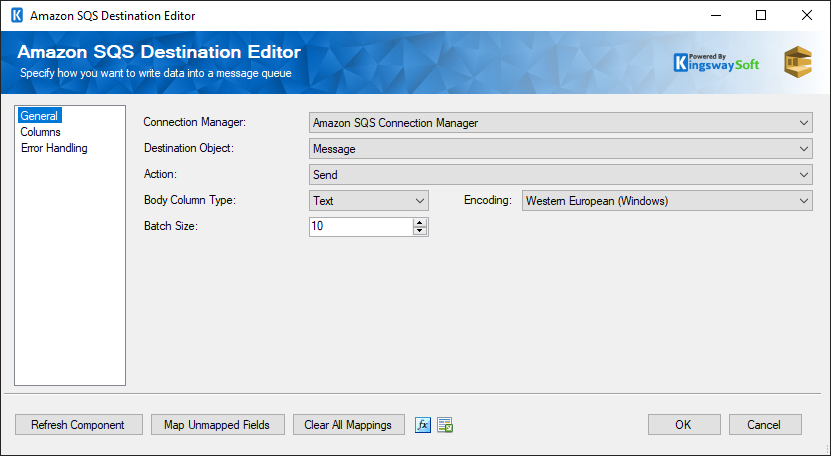
General Page
- Connection Manager
-
The destination component requires an Amazon SQS connection manager. The Connection Manager drop-down will show a list of all the Amazon SQS connection managers that have been created in the current SSIS package.
- Destination Object
-
The Destination Object option allows you to specify what Amazon SQS object you would like to work with. Available options include:
- Queue
- Permission
- Message
- Action
-
The Action option allows you to specify how the data should be pushed into Amazon SQS, there are different actions types available depending on what Destination Object you are working with:
-
Queue
- Create: creates a new queue in Amazon SQS.
- Purge: delete the messages in a queue.
- Set Attributes: sets the value of one or more queue attributes.
- Tag: add cost allocation tags to the specified queue.
- Untag: remove cost allocation tags from the specified queue.
-
Permission
- Add: adds permission to a queue for a specific principal.
- Remove: revokes any permissions in the queue policy that matches the specified Label field.
-
Message
- Send: sends a message to the specified queue.
- Delete: deletes the specified message(s) from the specified queue.
- Change Message Visibility(since v10.0): changes the visibility timeout of messages.
-
Queue
- Body Column Type
-
The Body Column Type allows you to specify whether you want to write the binary content of the message or the text content of the message to Amazon SQS. There are two different modes available for Body column types: Binary and Text. The default setting is Text.
Note: This option is only available to the Message object.
- Encoding
-
The Encoding that will be used to convert the message body to a byte array when sending the text message. This option is only available when the Body Column Type is Text.
Note: This option is only available to the Message object.
- Batch Size
-
The Batch Size to use when sending or deleting messages.
Note: This option is only available to the Message object.
- Refresh Component Button
-
Clicking the Refresh Component button causes the component to retrieve the latest metadata and update each field to its most recent metadata. It will remove any custom fields that have been added to the columns page.
- Map Unmapped Fields Button
-
By clicking this button, the component will try to map any unmapped attributes by matching their names with the input columns from upstream components. This is useful when your source component has recently added more columns, in which case you can use this button to automatically establish the association between input columns and unmapped destination attributes.
- Clear All Mappings Button
-
By clicking this button, the component will reset all your mappings in the destination component.
- Expression fx Icon
-
Click the blue fx icon to launch SSIS Expression Editor to enable dynamic updates of the property at run time.
- Generate Documentation Icon
-
Click the Generate Documentation icon to generate a Word document that describes the component's metadata including relevant mapping, and so on.
Columns Page
The Columns page allows you to map the columns from upstream components to destination attributes.
On the Columns page, you will see a grid as shown below.
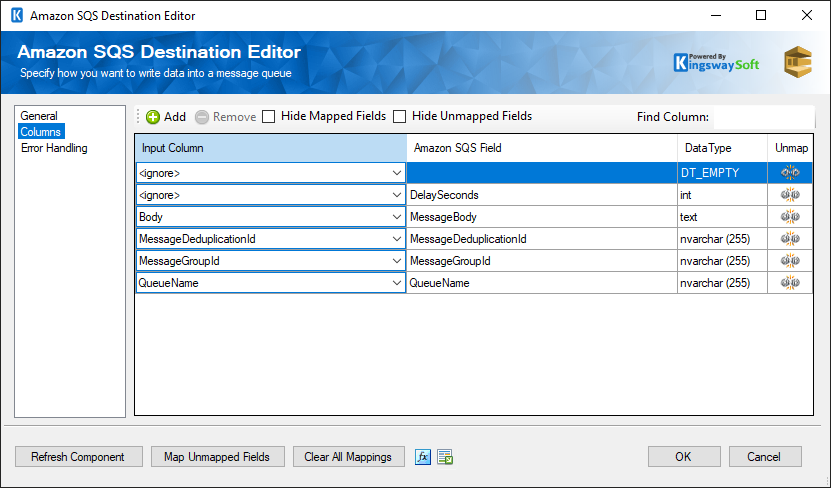
- Input Column: You can select an input column from an upstream component here.
- Amazon SQS Field: The attribute/field that you want to write data to.
- Data Type: This column indicates the type of value for the current attribute.
- Unmap: This button provides a convenient way to unset the mapping for the selected attribute/field.
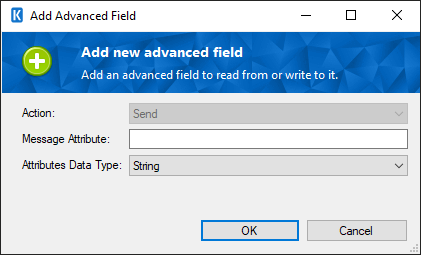
- Add Button
-
Clicking the Add button will bring up a dialog that will allow columns to be added that correspond to custom headers on outgoing messages.
Error Handling Page
The Error Handling page allows you to specify how errors should be handled when they happen.
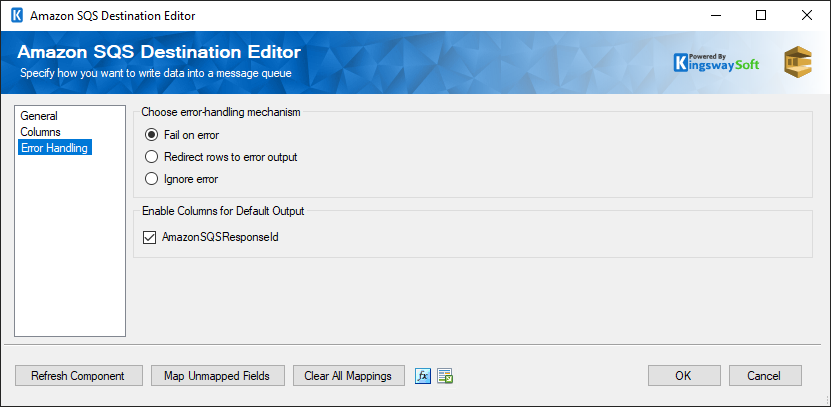
There are three options available:
- Fail on error
- Redirect rows to error output
- Ignore error
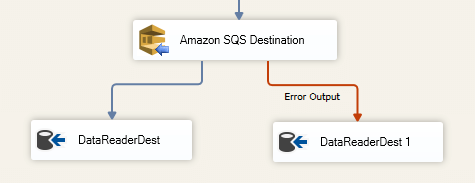
When the Redirect rows to error output option is selected, rows that failed to write to Amazon SQS will be redirected to the 'Error Output' of the Destination Component. As indicated in the screenshot below, the green output connection represents rows that were successfully written, and the red 'Error Output' connection represents erroneous rows. The 'AmazonSQSErrorMessage' output column found in the 'Error Output' may contain the error message that was reported by Amazon SQS or the component itself.
Note: Use extra caution when selecting Ignore error option, since the component will remain silent for any errors that have occurred.